Remove the engine cover. (Refer to Engine and Transaxle - "Engine Cover")
Remove the engine undercover. (Refer to Engine and Transaxle Assembly - "Engine Undercover")
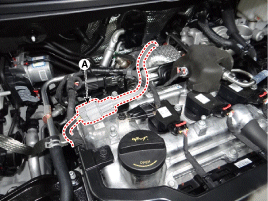
Disconnect (A) from the rear oxygen sensor.
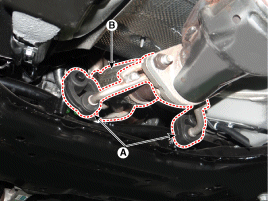
Remove the hanger (A).
Remove the front muffler (B).
Tightening torque: 39.2 ~ 59 N·m
To install, perform the removal procedure in reverse order.
Catalytic Converter Replacement Procedures Using Clamps
Make sure the main muffler clamps are not damaged or deformed.
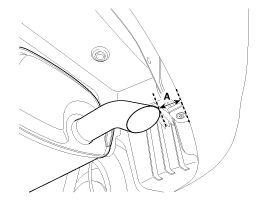
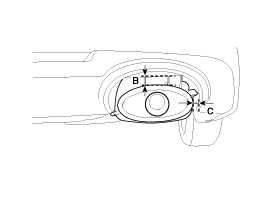
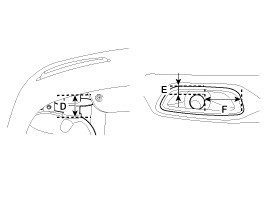
Measure the clearance (A, B, C, D, E, F) between the exhaust pipe (or rear door trim) and the rear bumper. [Pipe Type][Trim Type][Bumper Integrated Trim Type]
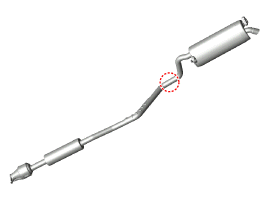
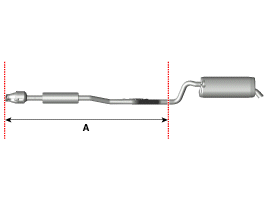
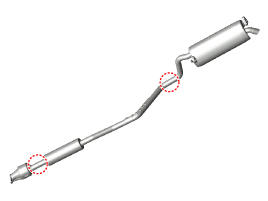
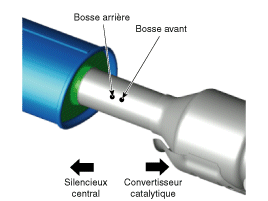
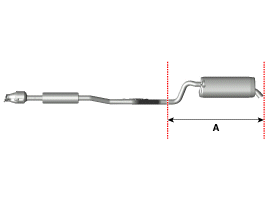
Cut the main muffler as shown below.
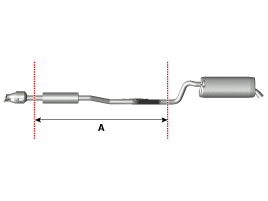
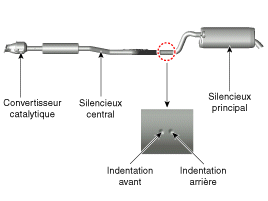
Replace the catalytic converter and center muffler (A) as shown in the illustration below (refer to the clamp installation procedures).
Center Muffler Including Catalytic Converter Replacement Procedures Using Pliers
Make sure the main muffler clamps are not damaged or deformed.
Measure the clearance (A, B, C, D, E, F) between the exhaust pipe (or rear door trim) and the rear bumper. [Pipe Type][Trim Type][Bumper Integrated Trim Type]
Cut the main muffler as shown below.
Replace the catalytic converter and center muffler (A) as shown in the illustration below (refer to the clamp installation procedures).
Center Muffler Without Catalytic Converter Replacement Procedures Using Pliers
Make sure the main muffler clamps are not damaged or deformed.
Measure the clearance (A, B, C, D, E, F) between the exhaust pipe (or rear door trim) and the rear bumper. [Pipe Type][Trim Type][Bumper Integrated Trim Type]
Cut the main muffler as shown below.
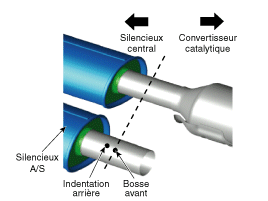
Cut the center muffler as shown below.[With Impact]
Cut the muffler pipe at the marked front stopper.
[Non-Impact]
Cut the A/S muffler at the front stopper as shown in the illustration below.
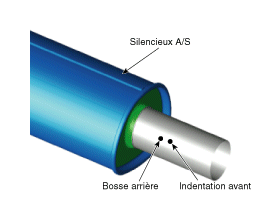
[A/S Muffler]
Cut the marked A/S muffler at the rear stopper.
Replace the center muffler (A) as shown in the illustration below (refer to the clamp installation procedures).
Main Muffler Replacement Procedures with Clamp
Make sure the main muffler clamps are not damaged or deformed.
Measure the clearance (A, B, C, D, E, F) between the exhaust pipe (or rear door trim) and the rear bumper. [Pipe Type][Trim Type][Bumper Integrated Trim Type]
Cut the main muffler as shown below.
Replace the main muffler (A) as shown in the illustration below (refer to the clamp installation procedures).
Clamp Installation Procedures for Catalytic Converter and Center Muffler Replacement
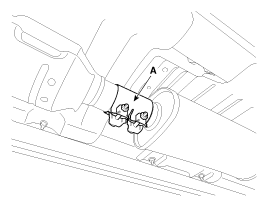
Place the clamp (A) between the cut sections of the pipe and tighten the clamp slightly, but not fully.
Tighten the catalytic converter and center muffler to the specified torque.
Tightening Torque: 40.0 ~ 60 N·m
Compare the clearance between the exhaust pipe (or rear door trim) and the rear bumper with the measurement taken before removing the center muffler assembly.
Do not tighten the clamp by turning it only once. Tighten the clamp nuts to the specified torque, alternating turns a specified number of times.
Tightening Torque: 18.0 ~ 24 N·m
Clamp Installation Procedures for Main Muffler and Center Muffler Replacement
Tighten the main muffler and center muffler to the specified torque.
Tightening Torque: 40.0 ~ 60 N·m
Do not tighten the clamp by turning it only once. Tighten the clamp nuts to the specified torque, alternating turns a specified number of times.
Tightening Torque: 18.0 ~ 24 N·m
?
Test yourself
A quick Hyundai i20 quiz: every answer comes with an explanation and a link to the manual page.