Engine Mechanical System
Intercooler Repair Procedures
In this manual: Engine Mechanical System
13steps
~78min
3/5difficulty
Done 0 of 13
DEPOSIT
- Disconnect the negative battery cable.
- Remove the air duct and air cleaner assembly. (Refer to Intake and Exhaust System - "Air Cleaner")
- Remove the engine undercover. (Refer to Engine and Transaxle Assembly - "Engine Undercover")
- Remove the front bumper. (Refer to Body - "Front Bumper Cover")
- Disconnect the boost pressure sensor (BPS) connector (A).
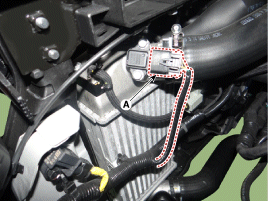
- Remove the intercooler inlet hose (A). Tightening torque: Hose clamp bolt: 4.9~6.9 N·m (If equipped with a cap, tighten until the cap is removed.)
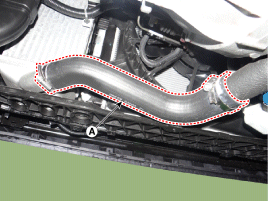
- Disconnect the intercooler outlet hose (A) and the RCV solenoid valve (B). Tightening torque: 4.9~6.9 N·m (If equipped with a cap, tighten until the cap is removed.)
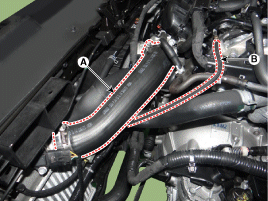
- Disconnect the solenoid valve connector (A), then disconnect the wiring (B) from the intercooler.
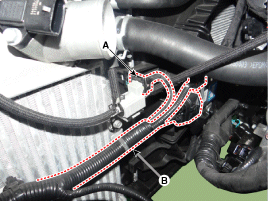
- Remove the air intake cover. (Refer to Intake and Exhaust System - Air Cleaner)
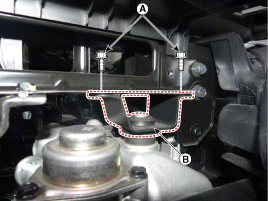
- Loosen the upper intercooler mounting bracket bolt (A) and remove the mounting bracket (B).
Tightening torque: 9.8–11.8 N·m
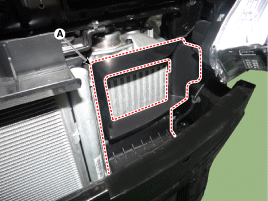
- Remove the intercooler air guide (A).
Tightening torque: 6.9 ~ 10.8 N·m
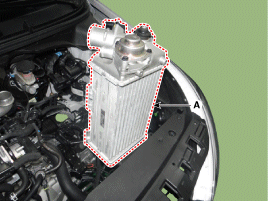
- Remove the intercooler (A).
- To install, perform the removal procedure in reverse order.
Test yourself
A quick Hyundai i20 quiz: every answer comes with an explanation and a link to the manual page.
Was this page helpful?