Body Electrical System
AVN Head Unit
In this manual: Body Electrical System
10steps
~60min
3/5difficulty
Done 0 of 10
Components and Component Location
Components
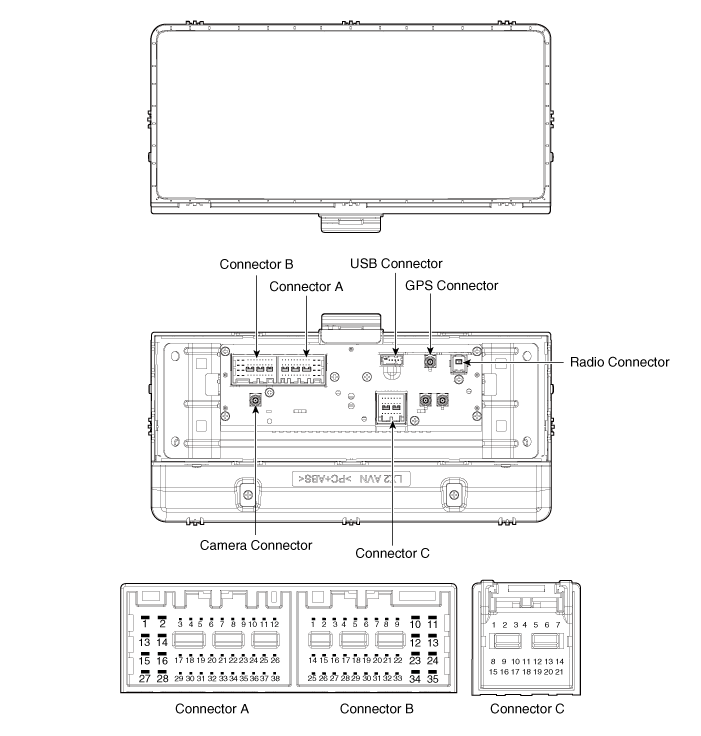
| No | Connector A (External Amplifier) |
Connector A (Internal Amplifier) |
Connector B | Connector C |
| 1 | - | Rear Left Door Speaker (+) | - | - |
| 2 | - | Rear Left Door Speaker (-) | Microphone (+) | I_CAN (High) |
| 3 | Navigation Voice (+) | - | - | - |
| 4 | External Amplifier SPDIF (+) | - | - | - |
| 5 | Reset | Reset | Dummy Antenna Power | - |
| 6 | RVM: Camera Power, SVM: - | RVM: Camera Power, SVM: - | Illumination (+) | - |
| 7 | RVM: Camera Video, SVM: - | RVM: Camera Video, SVM: - | M-CAN (High) | - |
| 8 | - | - | - | - |
| 9 | - | - | - | - |
| 10 | - | - | Battery (+) | - |
| 11 | AUXILIARY DETECTION | AUXILIARY DETECTION | Battery (+) | - |
| 12 | Steering Wheel Remote Control | Steering Wheel Remote Control | Ground | - |
| 13 | - | Front Left Door Speaker (+) | Ground | - |
| 14 | - | Front Left Door Speaker (-) | - | - |
| 15 | - | Front Right Door Speaker (-) | Microphone (-) | - |
| 16 | - | Front Right Door Speaker (+) | - (SVM Type: SVM Detect2) | MTS Key |
| 17 | Navigation Voice (-) | - | - | - |
| 18 | External Amplifier SPDIF (-) | - | - | - |
| 19 | External Amplifier SPDIF (Ground) | - | Illumination (-) | - |
| 20 | RVM: Camera Power GND, SVM: - | RVM: Camera Power GND, SVM: - | M-CAN (Low) | - |
| 21 | RVM: Camera Video Ground, SVM: - | RVM: Camera Video Ground, SVM: - | - | - |
| 22 | - | - | ACC | |
| 23 | - | - | Keyboard Power | |
| 24 | - | - | - | |
| 25 | - | - | - | |
| 26 | Steering wheel ground | Steering wheel ground | - | |
| 27 | - | Rear Right Door Speaker (-) | - | |
| 28 | - | Rear Right Door Speaker (+) | - | |
| 29 | - | - | - | |
| 30 | - | - | - | |
| 31 | - | - | - | |
| 32 | SVM DETECT 1 | SVM DETECT 1 | - | |
| 33 | RVM: Camera Screen Ground, SVM: - | RVM: Camera Screen Ground, SVM: - | IGN 1 | |
| 34 | - | - | Keyboard Ground | |
| 35 | - | - | - | |
| 36 | - | - | ||
| 37 | - | - | ||
| 38 | Vehicle Speed | Vehicle Speed |
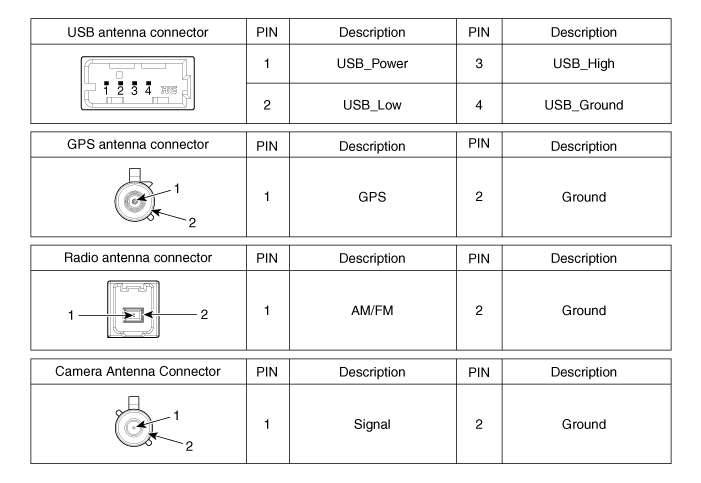
Repair Procedures
Removal
- Disconnect the negative (-) battery terminal.
- Remove the center panel. (Refer to Body - "Center Panel")
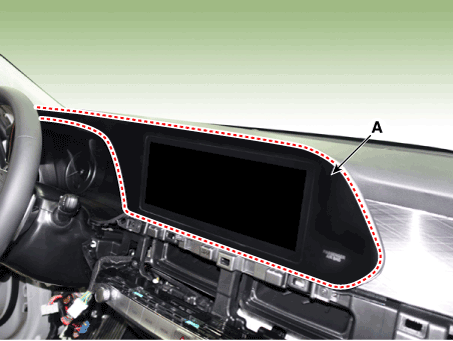
- Using a flat-blade screwdriver, remove the monitor cover (A).
- Remove the AVN head unit (A) after loosening the mounting screws.
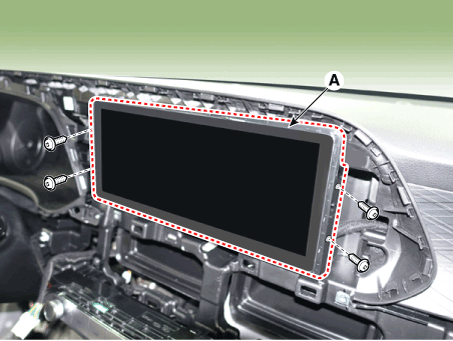
- Remove the AVN head unit (A) after disconnecting the connectors and cable.
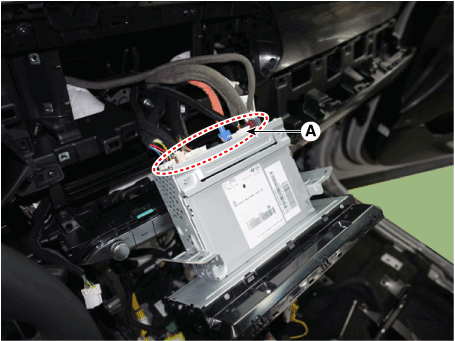
Installation
- Connect the audio unit connectors.
- Install the AVN head unit.
- Install the monitor cover.
- Install the center fascia panel.
- Connect the negative (-) battery terminal.

- Make sure the connector is properly connected.
- Inspect the AVN system.
Test yourself
A quick Hyundai Palisade quiz: every answer comes with an explanation and a link to the manual page.
Was this page helpful?