Body Electrical System
Speakers
In this manual: Body Electrical System
30steps
~180min
4/5difficulty
Done 0 of 30
Repair Procedures
Inspection
- Speaker Troubleshooting
- Basic Speaker Inspection: Check the sound from the speaker with the speaker mounting screws removed and the wiring connector connected to eliminate possible vibrations transmitted from the body trim and surrounding parts.
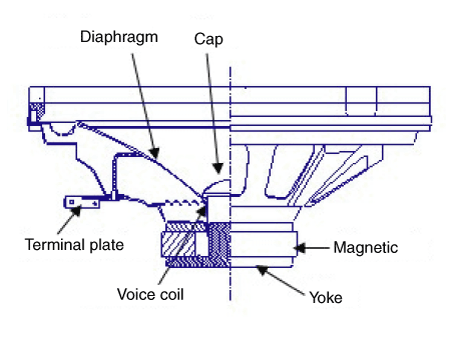
- Troubleshooting
No Symptom Inspection/Remedy 1 Rattling Noise - Before replacing the speaker, make sure the mounting screw is installed properly.
- After reinstalling the speaker, make sure that no rattling sound is heard.
- If the rattling sound is heard again, replace the speaker with a new one.
2 Noise - Check whether the wiring connector is connected properly. If not, connect the wiring connector.
- In case of radio static discharge, check for noise from the CD.
- If noise is heard when the radio and CD are turned on, replace the speaker with a new one.

- If there is only static, it is caused by poor radio reception. Therefore, the speaker does not need repair or replacement.
3 Poor Performance Check the wiring connection between the battery and speaker - Before replacing a speaker, inspect the wiring connection between the battery and the speaker for normal condition.
- Check the speaker power supply and resistance, then check the sound quality. ■ Specified resistance: 2–4 Ω
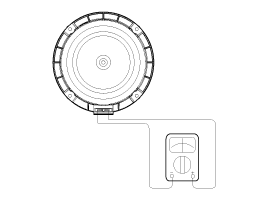
- If the speaker performs poorly, replace it with a new one.
When handling speakers:
- Do not damage the speaker by impact, such as dropping or throwing it.
- Be careful not to spill water or oil on the speakers.
- Be careful when handling the speaker, as the diaphragm material is paper, which tears easily from impact or external force.
- Modification of the audio system may damage the speakers. If this occurs, the speakers are not covered by the manufacturer's warranty.
- Basic Speaker Inspection: Check the sound from the speaker with the speaker mounting screws removed and the wiring connector connected to eliminate possible vibrations transmitted from the body trim and surrounding parts.
Removal
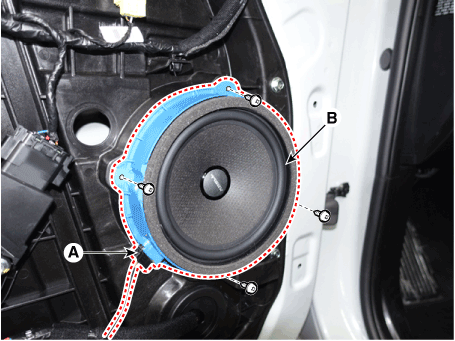
Front Door Speaker- Remove the front door trim panel. (Refer to Body - "Front Door Trim")
- Disconnect the speaker connector (A) and remove the front door speaker (B) after loosening the mounting screws.
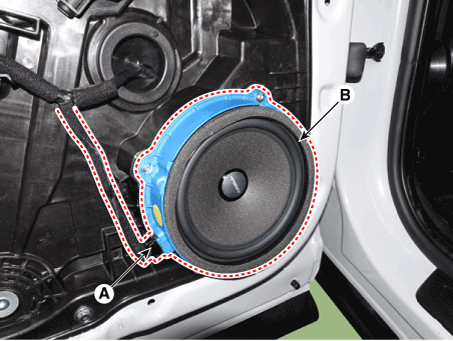
- Remove the rear door trim panel. (Refer to Body - "Rear Door Trim")
- Disconnect the speaker connector (A) and remove the front door speaker (B) after loosening the mounting screws.
- Remove the center speaker grille (A), then disconnect the speaker connector (B).
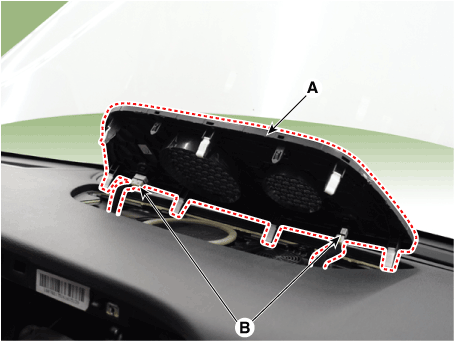
- Remove the center speaker (A) after loosening the mounting screws.
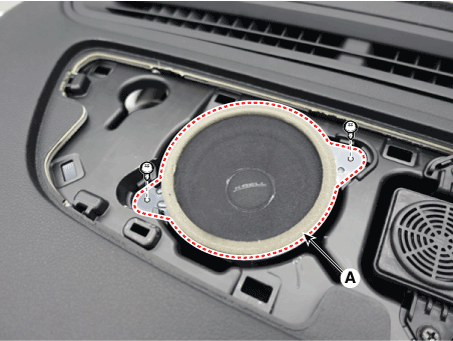
- Disconnect the speaker connector (A), then remove the center speaker (B).
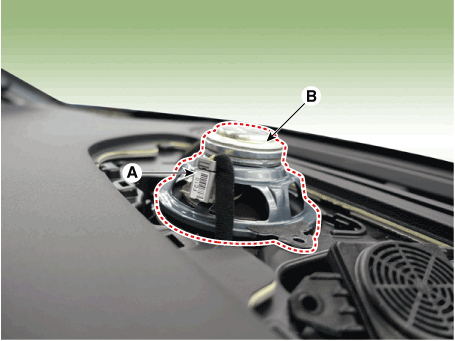
- Remove the front quarter cover (A).
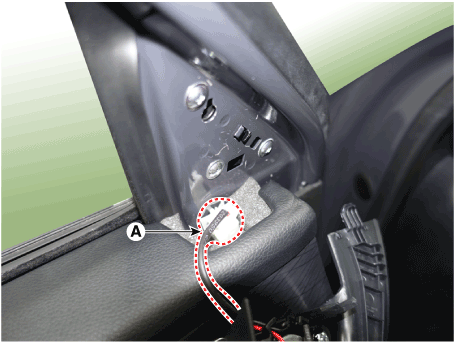
- Remove the speaker (A) after loosening the mounting screws.
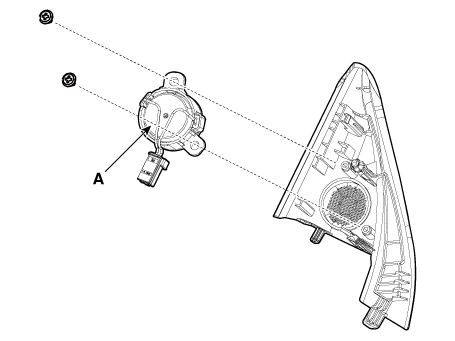
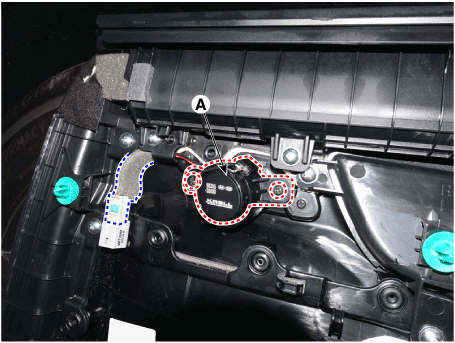
- Remove the rear door trim panel. (Refer to Body - "Rear Door Trim")
- Disconnect the speaker connector, then remove the center speaker (A).
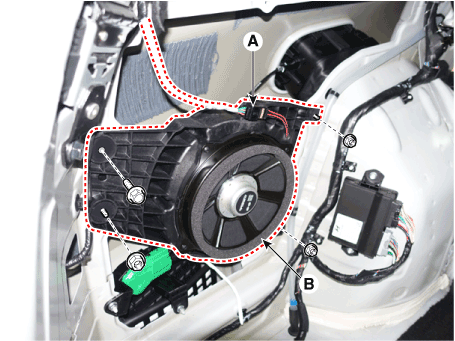
- Remove the left rear side trim panel of the luggage compartment. (Refer to Body – Luggage Compartment Side Trim)
- Disconnect the subwoofer speaker connector (A).
- Remove the subwoofer speaker (B) after loosening the mounting screws.
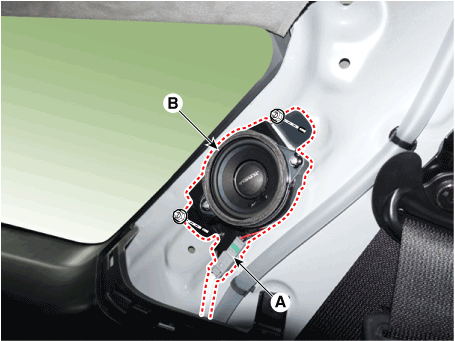
- Remove the rear pillar trim. (Refer to Body - "Rear Pillar Trim")
- Disconnect the speaker connector (A), then remove the surround speaker (B).
Installation
Front Door Speaker- Install the front speaker.
- Install the front door trim panel.
- Install the rear speaker.
- Install the rear door trim panel.
- Install the front center speaker.
- Install the front center speaker grille.
- Connect the connector.
- Install the tweeter and the front door quarter cover.
- Connect the connector.
- Install the tweeter and the rear door quarter cover.
- Install the subwoofer speaker.
- Install the left luggage compartment side trim.
- Install the surround speaker.
- Install the rear pillar garnish.
Test yourself
A quick Hyundai Palisade quiz: every answer comes with an explanation and a link to the manual page.
Was this page helpful?