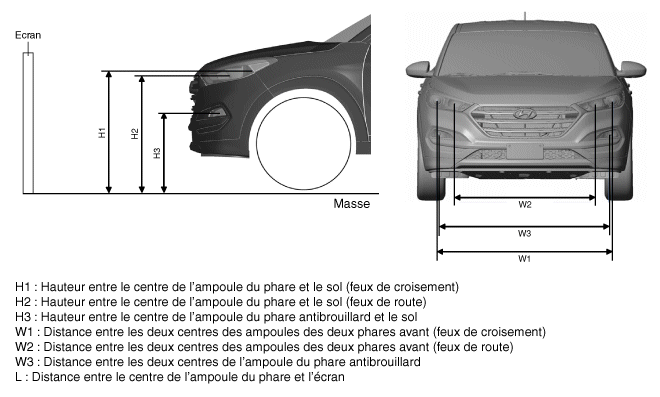
Headlamps must be adjusted using appropriate aiming equipment, in accordance with the equipment manufacturer's instructions.Turn the adjusting wheel alternately to adjust the light direction forward. If adjusting equipment is not available, perform the following procedure:
Inflate the tires to the specified pressure and remove any load from the vehicle except the driver, spare tire, tools, coolant and fuel.
The vehicle must be on a level surface.
Draw a vertical line (vertical line passing through the center of each headlamp) and a horizontal line (line passing through the center of the headlamp) on the screen.
With the headlamps and battery in good condition, adjust the headlamps so that the brightest part is on the horizontal and vertical lines. A: Horizontal (high/low beam) B: Vertical (high/low beam)FRONT FOG LAMP AIMING. Front fog lamp aiming must be performed in the same way as the headlamps. With the fog lamps and battery in normal condition, adjust the fog lamps by turning the adjusting screw (A) with a screwdriver.
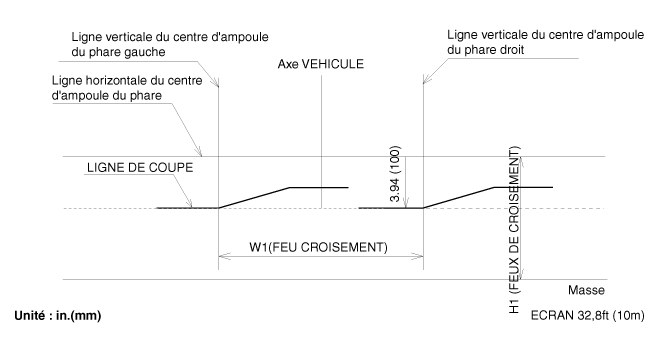
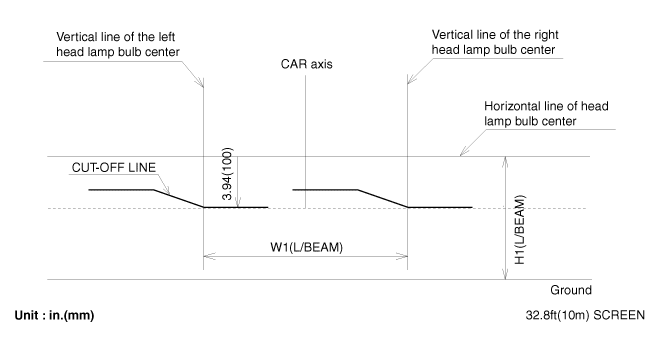
Headlamp (low beam)
With the low beam on, adjust the cut-off line to be positioned as shown in the illustration below.
If there is a headlamp leveling switch, set it to the 0 position.
(LHD)(DIRECT DRIVE)
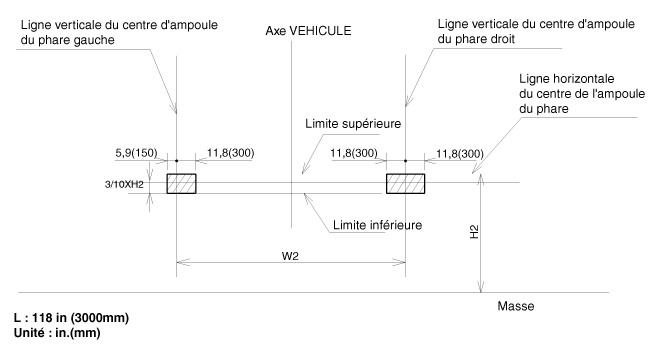
Headlamp (High Beam)
Turn on the high beam headlamps with no driver in the vehicle.
The cutoff line must be within the line indicated in the illustration.
When adjusting the low beam, adjust the vertical aim after adjusting the horizontal aim.
If there is a headlamp leveling switch, set it to the 0 position.
With the front fog lamps on, adjust the cut-off line to be positioned as shown in the illustration below.
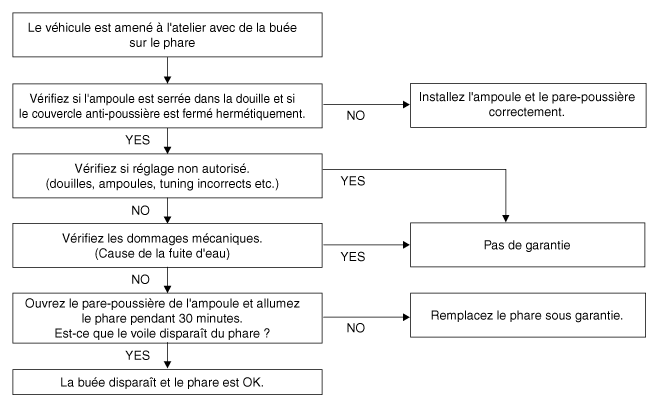
HEADLAMP AND FOG LAMP AIMING POINT. Headlamp fogging: Check the procedure below when a headlamp is fogged.
DEPOSIT
Headlamp
Disconnect the negative (-) battery terminal.
Remove the front bumper cover. (Refer to Body - "Front Bumper Cover")
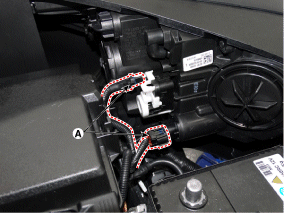
Disconnect the headlamp connector (A).
Remove the headlamp assembly (A) after loosening the mounting bolts.
REPLACEMENT
TURN SIGNAL
Turn off the headlamp power.
Remove the bulb socket (B) and turn the bulb (A) counterclockwise to remove the lamp assembly.
Installation is the reverse of removal.
Turn off the headlamp power.
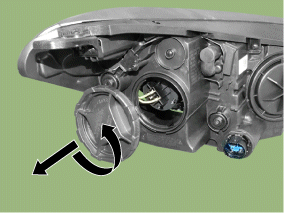
Remove the lamp caps from the headlamp assembly by turning them counterclockwise.
Remove the low beam bulb (B) after removing the socket (A).
Installation is the reverse of removal.
Turn off the headlamp power.
Remove the lamp caps from the headlamp assembly by turning them counterclockwise.
Remove the high beam bulb (A) after releasing the retainer (B) and disconnect the bulb connector.
Installation is the reverse of removal.
Lamp (low beam) Lamp (high beam)
REMEDY
Install the headlamp assembly after connecting the connector.
Install the front bumper cover.
Connect the negative (-) battery terminal.
?
Test yourself
A quick Hyundai Tucson quiz: every answer comes with an explanation and a link to the manual page.