Body Electrical System
Automatic Headlight Aim Control
In this manual: Body Electrical System
28steps
~168min
4/5difficulty
Done 0 of 28
Circuit Diagrams
Wiring Diagram
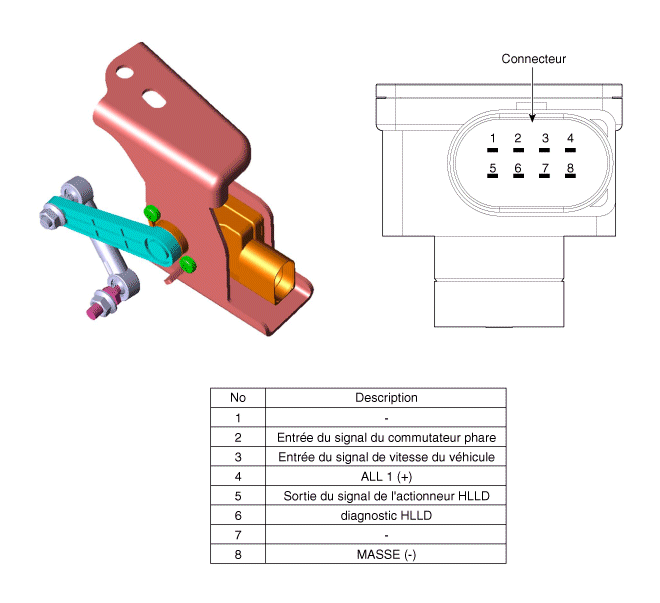
Description and Operation
Description
The headlight beam direction changes according to driving conditions and vehicle load level to maintain driver visibility and protect the driver's eyes from glare, for safe driving. The ECU, installed on the rear center arm, with built-in sensor and actuators, mounted on the headlight, receives the input signal after static changes of the vehicle. The headlight beam is adjusted automatically when its frame tilts.Operation
OPERATION- Changes the suspension angle due to changes in vehicle load.
- Change in sensor angle.
- The microprocessor calculates the required change in headlamp aiming angle.
- Sends the correct signal to the headlamp leveling corrector and to the actuator trigger.
- Ignition ON
- Position Codes
- Stationary: if the level sensor change is 0.3° or more, the headlamp operates within 1.5 s maximum.
- While driving: if the vehicle speed exceeds 4 km/h (2.5 mph), the speed change is no more than 0.8–1.6 km/h per second, and the load condition changes, the headlamp is activated.
- Automatic Headlamp Leveling 1. Sensor and leveling unit 2. Sensor mounting bracket 3. Sensor connector group
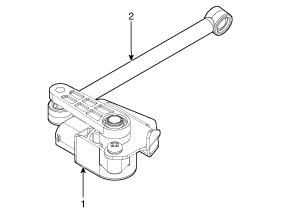
- Using the microprocessor, detects the change in angle of the linkage mechanism or the speed signal.
- Control program controller, rear center arm.
Repair Procedures
Inspection
- Turn the ignition "ON".
- Turn off the headlight switch.
- Make sure the headlamp settings change regularly when the headlamp leveling switch is activated.
- If the system malfunctions, check the connector and terminals to make sure they are connected correctly. If terminals are bent, loose, or corroded, repair as necessary, then recheck the system. If the terminal is in good condition, go to Step 5.
- Replace the headlamp and make sure it operates correctly.
DEPOSIT
- Disconnect the negative (-) battery terminal.
- Disconnect the headlamp leveling corrector connector (A).
- Remove the rear headlamp leveling corrector unit (B) by loosening the mounting bolts and nut.
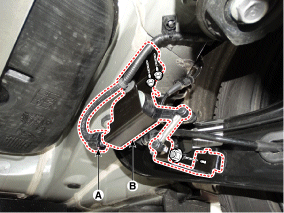
REMEDY
- Install the headlamp leveling device.
- Connect the headlamp leveling device connector.
Troubleshooting
Check with GDS
Initialization and diagnosis using GDS equipment. A brief description of the A/S procedure is provided below.| No. | Procedure |
| 1 | Park the vehicle on a level surface. |
| 2 | Check tires. |
| 3 | IGN1 ON. |
| 4 | Low Beam On |
| 5 | Communication with Diagnostic Tool |
| 6 | Initial Instructions for Using the Diagnostic Tool |
| 7 | Erase the DTC. |
| 8 | IGN1 OFF → ON |
| 9 | Reconnect to diagnostic tool |
| 10 | Check the HLLD 15% output value and the DTC. |
| 11 | Activate the ECU using the diagnostic tool instructions. |
| 12 | Mechanical Initial Headlamp Adjustment |
- Select the vehicle model and "Front Headlamp Aiming System (AHLS)".
- Check the sensor output value and the data of each item on the system information screen.
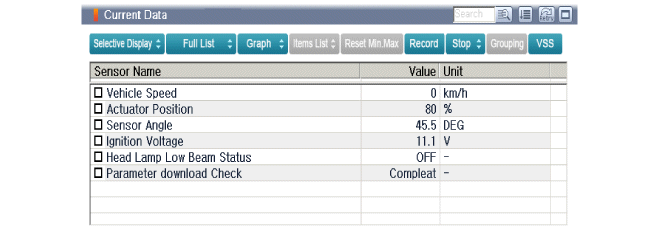
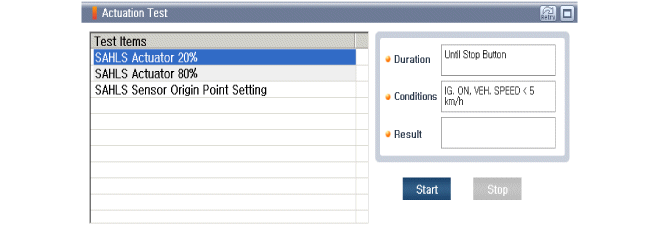
- To perform the AHLS function check, select "Actuation Test".
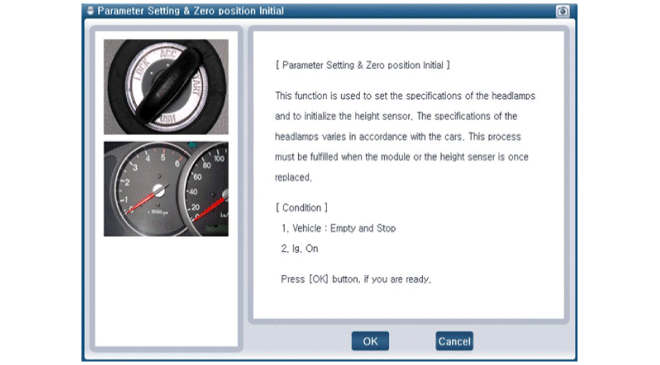
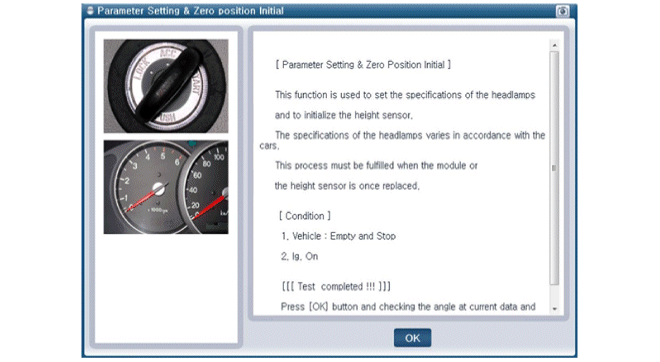
- Select "Parameter Setting and Initial Zero Position".
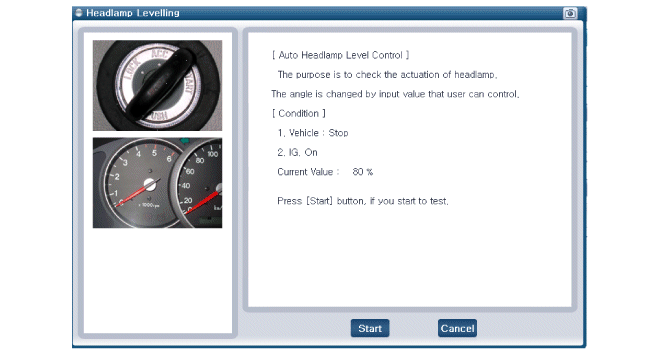
- Make sure the AHLS operates in the "Headlamp Range Correction" menu.
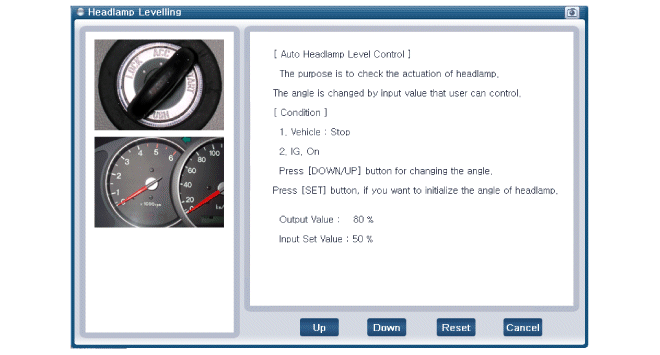
- To check the headlamp range correction system for fault codes, select "Diagnostic Trouble Codes".
Test yourself
A quick Hyundai Tucson quiz: every answer comes with an explanation and a link to the manual page.
Was this page helpful?