Steering
Steering Column and Shaft Repair Procedures
In this manual: Steering
22steps
~132min
4/5difficulty
Done 0 of 22
Replacement
- Disconnect the negative battery cable from the battery and wait at least 30 seconds.
- Turn the steering wheel so that the front wheels point straight ahead.
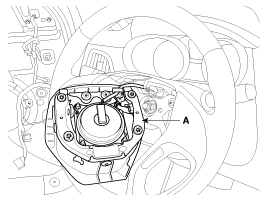
- Remove the airbag module (A). (Refer to Restraints - "Airbag Module")
- Disconnect the connector (B) and the lock nut (A), then remove the steering wheel from the steering column shaft.
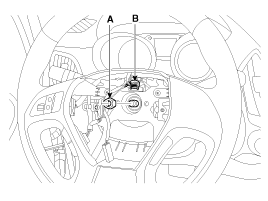
Do not strike the steering wheel to remove it; this may damage the steering column.
- Remove the upper (A) and lower (B) steering column covers.
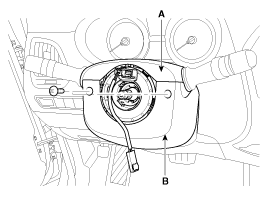
- Remove the clock spring (A).
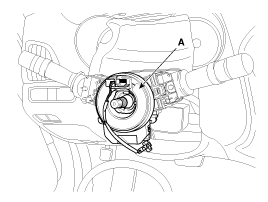
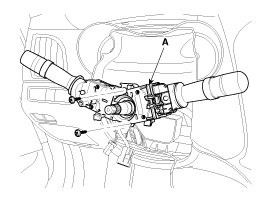
- Remove the multifunction switches (A).
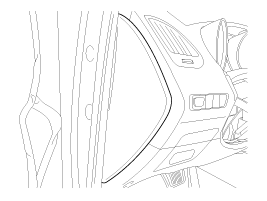
- Remove the lower cover.
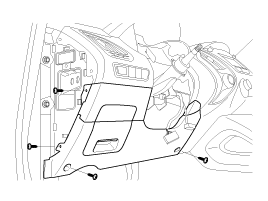
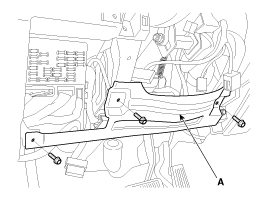
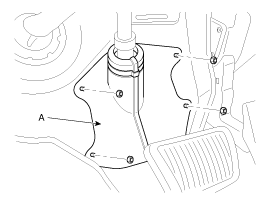
- Loosen the bolt and nut, then remove the panel (A).
- Loosen the nut, then remove the dust cover (A).
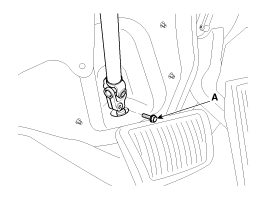
- Loosen the bolt (A) and disconnect the universal joint assembly from the steering gear.
Tightening torque: 32.4 ~ 37 N·m
Hold the steering wheel in the neutral position to prevent damage to the inner cable of the clock spring while handling the steering wheel. - Disconnect all connectors connected to the steering column.
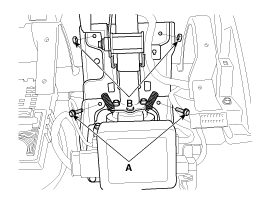
- Remove the steering column by loosening the mounting bolts (A) and nuts (B).
Tightening torque: 12.7 - 17.7 N·m
- Installation is the reverse of removal.
- Perform "ASP Calibration" and "EPS Type Recognition" using GDS. (Refer to Electric Power Steering - "ASP Calibration or EPS Type Recognition")
- Perform "MDPS TEST (Motor Driven Power Steering)" using GDS. (Refer to Electric Power Steering - "MDPS Performance Check")
Disassembly
Universal Joint Assembly
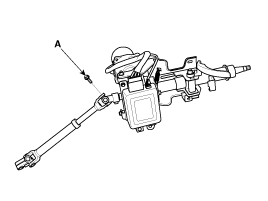
- Loosen the bolt (A) and then disconnect the universal joint assembly from the steering column assembly.
Tightening torque: 28.0 ~ 32 N·m
- Assembly is the reverse of disassembly.
Inspection
- Inspect the steering column for damage and deformation.
- Inspect the joint bearing for damage and wear.
- Inspect the tilt bracket for damage and cracks.
- Check the key lock operation and replace it if necessary.
Test yourself
A quick Hyundai Tucson LM quiz: every answer comes with an explanation and a link to the manual page.
Was this page helpful?