Steering
Steering Gear Repair Procedures
In this manual: Steering
42steps
~252min
4/5difficulty
Done 0 of 42
Replacement
- Remove the front wheel and tire.
Tightening torque: 88.3 ~ 108 N·m
Be careful not to damage the hub bolts when removing the front wheel and tire.
- After loosening the nut, disconnect the stabilizer link (B) from the front strut assembly (A).
Tightening torque: 98.1 ~ 118 N·m
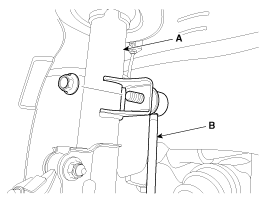
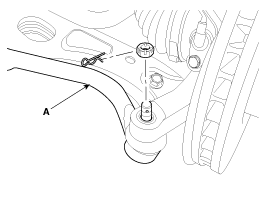
- Remove the cotter pin and castle nut, then disconnect the tie rod end (A) from the front steering knuckle.
Tightening Torque: 23.5 ~ 33 N·m
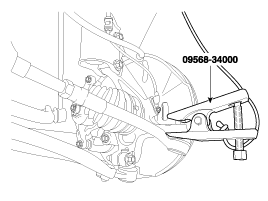
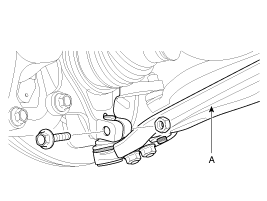
- Loosen the bolt and nut, then remove the lower arm (A).
Tightening torque: 98.1 ~ 118 N·m
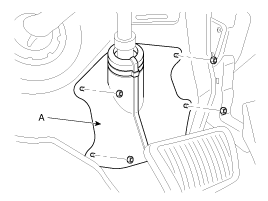
- Loosen the nut and remove the dust cover (A).
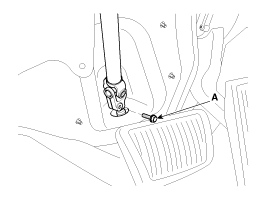
- Loosen the bolt (A) and disconnect the universal joint assembly from the steering gear.
Tightening torque: 32.4 ~ 37 N·m
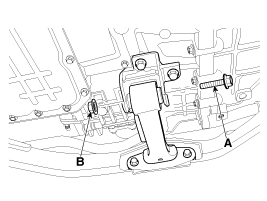
Lock the steering wheel in the straight-ahead position to prevent damage to the inner cable of the clock spring when handling the steering wheel. - Loosen the bolt (A) and nut (B), then remove the roller link stopper.
Tightening Torque: 107.9 ~ 128 N·m
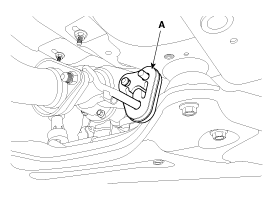
- Disconnect the muffler rubber mount (A).
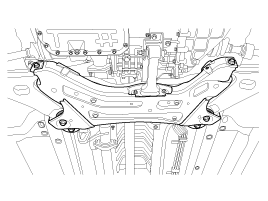
- Loosen the bolts and nuts, then remove the subframe.
Tightening torque: 176.5 ~ 196 N·m (18.0 ~ 20.0 kgf·m, 130.2 ~ 144.7 lbf·ft)
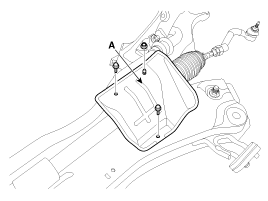
- Loosen the bolt and nut, then remove the protector (A).
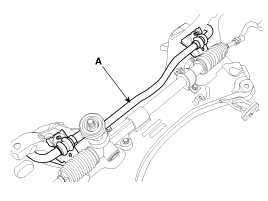
- Loosen the bolt and remove the stabilizer bar (A) from the subframe.
Tightening torque: 44.1 ~ 54 N·m
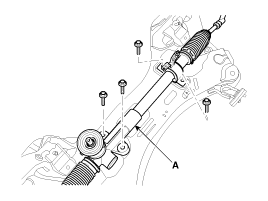
- Loosen the bolt and remove the steering gear (A).
Tightening Torque: 58.8 ~ 78 N·m
- Installation is the reverse of removal.
Disassembly
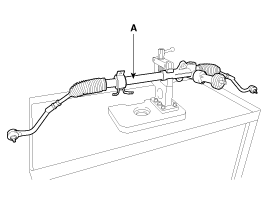
- Secure the steering gear (A) in a vise.
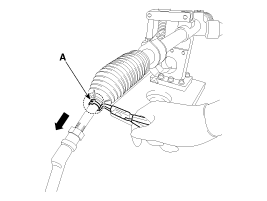
- Remove the boot clamp (A) in the direction indicated by the arrow. (The left and right sides are the same.)
- Create space to bend the boot (B) using long-nose pliers (A). (The left and right sides are the same.)
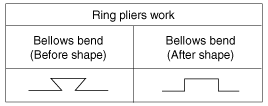
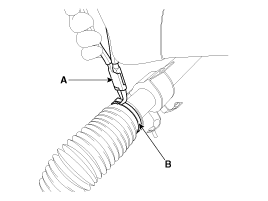
- After creating space between the boot and the tie rod end parts using a flat-tip screwdriver (-), remove the boot (A) in the direction of the arrow. (The left and right sides are the same.)
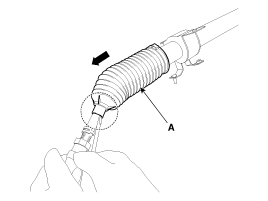
- Remove the tie rod and tie rod end assembly (A). (The left and right sides are the same.)
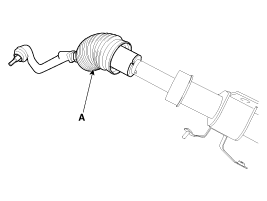
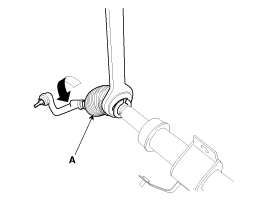
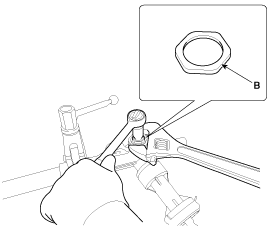
- Hold the rack bush stopper (A) in place, then remove the lock nut (B).
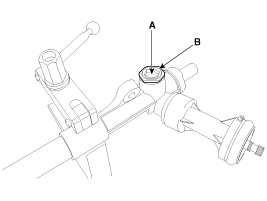
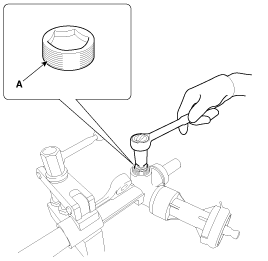
- Remove the rack bush stopper (A).
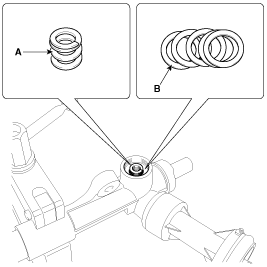
- Remove the rack bush spring (A) and the leaf spring (B).
- Note that urethane shims or the back side of the O-ring may be used instead of the leaf spring.
- The number of leaf springs may differ depending on the vehicle.
- Remove the rack support yoke assembly (A) from the inner tube.
For the rack support yoke assembly (A), the number and availability of O-rings may differ depending on the vehicle.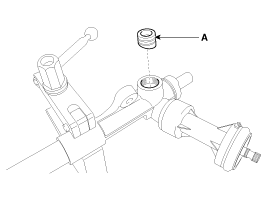
- Remove the dust seal and cover (A).
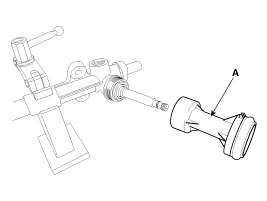
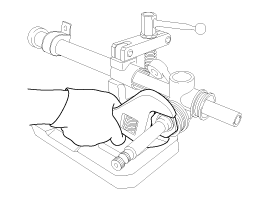
- Remove the upper plug (A) using a wrench.
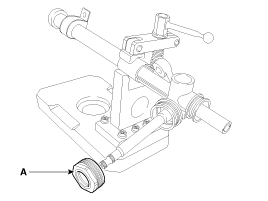
- Remove the pinion assembly (A).
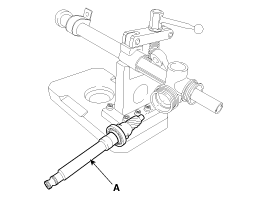
- Remove the rack (A) in the direction indicated by the arrow.
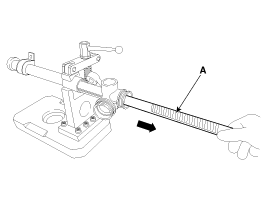
Installation
- Apply grease to the rack teeth (A), then install the rack (B) in the direction indicated by the arrow.
When inserting the rack, be careful not to damage the inside of the gear housing.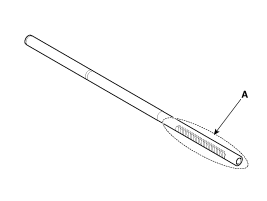
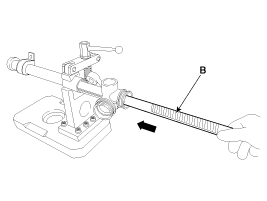
- Apply grease to the pinion, then install the pinion assembly (A).
- After applying three bonds of Loctite to the thread of the upper plug (A), install the upper plug using a wrench.
When installing the upper plug, the upper plug is made of aluminum, so be careful not to cross-thread it. - Install the dust seal and cover (A).
- Install the support bracket (A).
Before installing the support clamp assembly, make sure the O-ring is not damaged. - Install the strut bar plug (A) and the leaf spring (B).
- The number of leaf springs may differ depending on the vehicle. Pay attention to the direction.
- Leaf spring direction
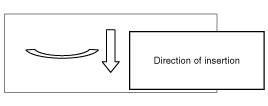
- After applying three bonds of Loctite to the thread of the strut bar plug (A), install the strut bar plug.
- Adjust the clamp in accordance with "How to Adjust the Clamp". (Refer to Power Steering System - Steering Gear Box)
- After tightening the strut bar plug, install the anchor nut (A).
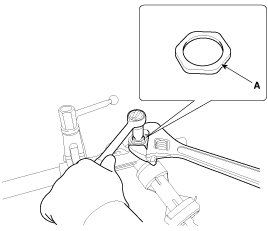
- Install the tie rod and tie rod end assembly (A). (The left and right sides are the same)
- Seal (A) the strut and connecting rod connections. (The left and right sides are the same)
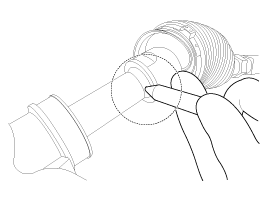
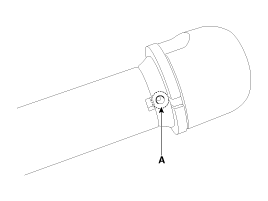
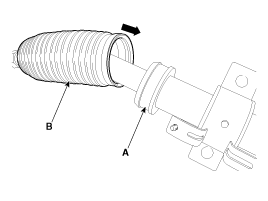
- After applying sealant to the strut hoses and bellows connections (A), install the bellows (B) in the direction indicated by the arrow.
Inspection
- Strut bar
A. Inspect the rack for damage. B. Inspect the strut bar for bending and deformation. 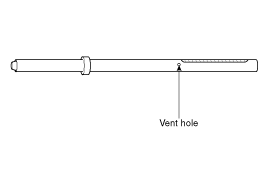
- Gear Assembly
A. Inspect the gear for damage. B. Inspect the oil seal for damage. - Inspect the inside of the strut housing for damage.
- Inspect the bellows for tears.
Test yourself
A quick Hyundai Tucson LM quiz: every answer comes with an explanation and a link to the manual page.
Was this page helpful?