Alternator Rotor Installation
- Using a cleaning fluid, clean off any oil or dirt on the following portions and dry them with a clean cloth.
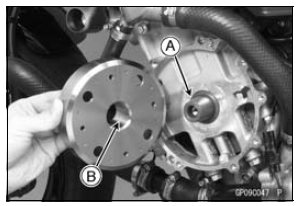
- Using a cleaning fluid, clean off any oil or dirt on the washer [A] and dry it with a clean cloth.
- Install the washer.
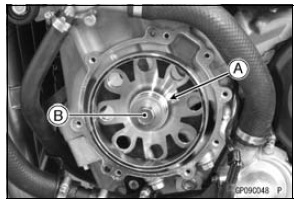
NOTE
Confirm the alternator rotor fit or not to the crankshaft before tightening it with specified torque.
- Install the rotor bolt [B] and tighten it with 70 NВ·m (7.0 kgfВ·m, 52 ftВ·lb) of torque.
- Remove the rotor bolt and washer.
- Check the tightening torque with flywheel puller [A].
Special Tool - Flywheel Puller Assembly, M38 × 1.5/M35 × 1.5: 57001-1405

If the rotor is not pulled out with 20 NВ·m (2.0 kgfВ·m, 15 ftВ·lb) of drawing torque, it is installed correctly.
If the rotor is pulled out with under 20 NВ·m (2.0 kgfВ·m, 15 ftВ·lb) of drawing torque, clean off any oil dirt or flaw of the crankshaft and rotor tapered portion, and dry them with a clean cloth. Then, confirm that it is not pulled out with above torque.
- Install the washer and rotor bolt.
- Tighten the alternator rotor bolt while holding the alternator rotor steadily with the holder [A] and suitable washer [B] or plate.
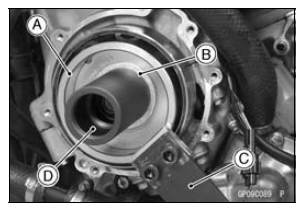
Special Tools - Grip [C]: 57001-1591 Rotor Holder: 57001-1666 Flywheel Puller Assembly, M38 × 1.5/M35 × 1.5 [D]: 57001-1405 Rotor Holder Attachment: 57001-1689 Torque - Alternator Rotor Bolt: 155 NВ·m (15.8 kgfВ·m, 114 ftВ·lb)
- Install the alternator cover (see Alternator Cover Installation).
Test yourself
A quick Kawasaki Ninja ZX-10R quiz: every answer comes with an explanation and a link to the manual page.