Clutch
Clutch Installation
In this manual: Clutch
~2min read
- Apply engine oil to the needle bearing [A] and the sleeve [B].
- Install: Needle Bearing Sleeve
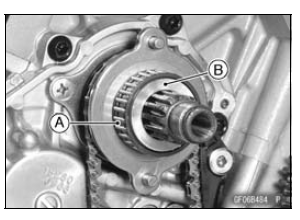
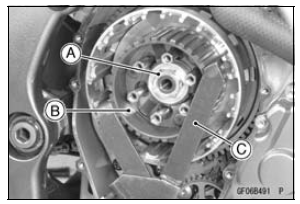
- Install the clutch housing [A].
Fit the holes [B] and projections [C].
Engage the clutch housing gear and the crankshaft primary gear.
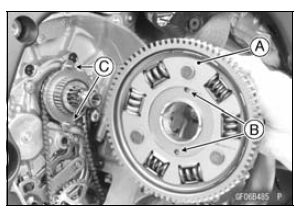
- Install the spacer [A] and the clutch hub [B].
Turn the stepped side [C] of the spacer to outside.
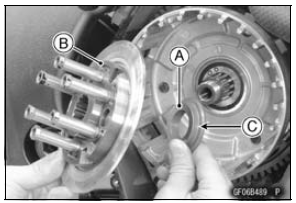
If the sub clutch hub bolts were removed, install them as follows.
Apply a non-permanent locking agent to the threads of the sub clutch hub bolts, and tighten them.
Torque - Sub Clutch Hub Bolts: 25 NВ·m (2.5 kgfВ·m, 18 ftВ·lb)
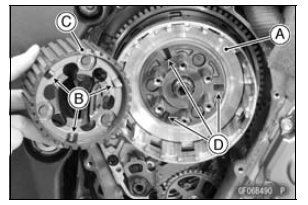
- Install the clutch hub [A] on the drive shaft.
- Align the damper cams [B] of the sub clutch hub [C] to the cam followers [D] of the clutch hub.
- Install the four torque limiter springs as shown in the figure.
First Torque Limiter Spring [A] Tang [B]
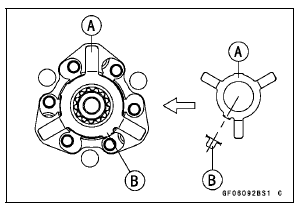
Second Torque Limiter Spring [A] Tang [B]
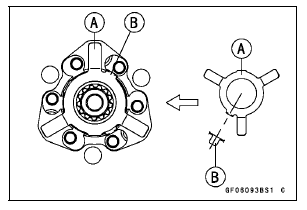
Third Torque Limiter Spring [A] Tang [B]
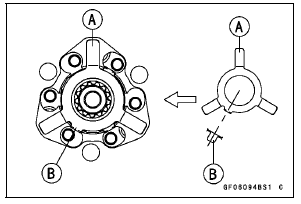
Fourth Torque Limiter Spring [A] Tang [B]
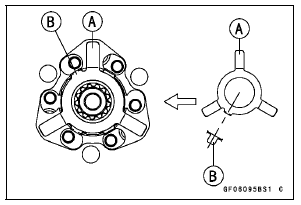
- Replace the clutch hub nut [A] with a new one.
- Hold the sub clutch hub [B] steady with the clutch holder [C], and tighten the clutch hub nut.
Special Tool - Clutch Holder: 57001-1243
Torque - Clutch Hub Nut: 130 NВ·m (13.3 kgfВ·m, 96 ftВ·lb)
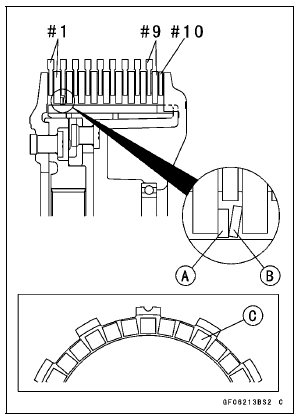
- Install the following as shown in the figure.
 #9]
Steel Plates (T = 2.9) [#1
 #7]
Steel Plates (T = 2.6) [#8, #9] Spring Seat [A] Spring [B]
NOTE
- The lining blocks [C] of the friction plate [#1, #10] are smaller than them of the friction plates [#2
 #9].
- Install the spring seat and spring between first steel plate and second steel plate.
NOTICE
If new dry friction plates and steel plates are installed, apply engine oil to the surfaces of each plate to avoid clutch plate seizure.
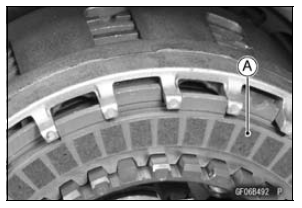
- Install the last friction plate (48 lining blocks) [A] fitting the tangs in the grooves in the housing as shown in the figure.
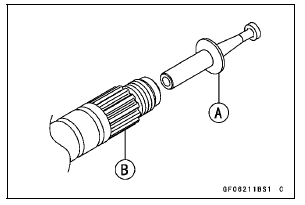
- Apply molybdenum disulfide grease to the pusher [A].
- Install the pusher to the drive shaft [B] direction as shown in the figure.
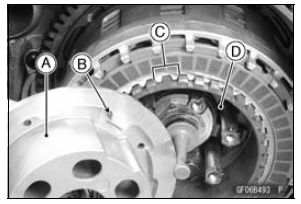
- Apply engine oil to the ball bearing on the spring plate [A].
- Align the projections [B] of the spring plate to the grooves [C] of the sub clutch hub [D] to install the spring plate on the sub clutch hub.
- Install the clutch springs and spring holders, and tighten the clutch spring bolts.
Test yourself
A quick Kawasaki Ninja ZX-10R quiz: every answer comes with an explanation and a link to the manual page.
Was this page helpful?