Engine Vacuum Synchronization Inspection
NOTE
These procedures are explained on the assumption that the intake and exhaust systems of the engine are in good condition.
- Situate the motorcycle so that it is vertical.
- Remove: Fuel Tank (see Fuel Tank Removal in the Fuel System (DFI) chapter) Air Cleaner Housing (see Air Cleaner Housing Removal in the Fuel System (DFI) chapter) Primary Fuel Hose (Disconnect, see Fuel Hose Replacement)
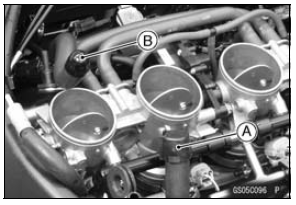
- Plug the breather hose end [A] and the air switching valve hose end [B].
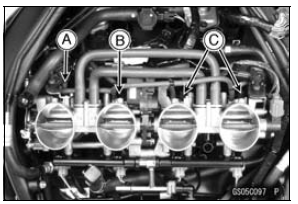
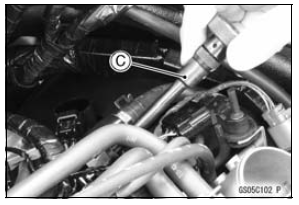
- Remove: Intake Air Pressure Sensor Hose [A] (Disconnect) Air Intake Valve Hose [B] (Disconnect, Other than US, CA and CAL Models) Rubber Caps [C]
- For CAL and SEA-B1 Models, disconnect the vacuum hoses.
NOTE
When the engine is running, the ECU detects the service code 16. But the engine synchronization can be inspected correctly.
- Connect a vacuum gauge and hoses [A] (Special Tool: 57001-1369) to the fittings on the throttle body.
Special Tool - Vacuum Gauge: 57001-1369
- Connect a highly accurate tachometer to one of the stick coil primary leads.

- Connect the following parts temporarily.
Special Tool - Extension Tube: 57001-1578
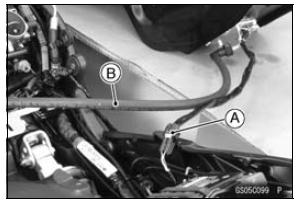
- Connect the following parts temporarily.
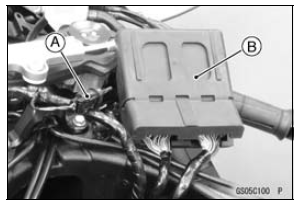
NOTE
- Be sure to connect the intake air temperature sensor.
When the ignition switch is turned ON without the intake air temperature sensor, the ECU detects the service code 13. Then the ECU starts the fail-safe (see Self-diagnosis Outline in the Fuel System (DFI) chapter).
In this case, the engine vacuum synchronization can not be inspected correctly.
The engine vacuum synchronization is inspected with the air cleaner housing removed and the engine started.
The secondary fuel injectors are operating with following conditions.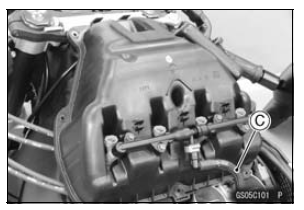
1. The engine speed is more than 6 000 r/min (rpm).
2. The throttle opening is more than 12°.
WARNINGGasoline is extremely flammable and can be explosive under certain conditions, especially when atomized by the fuel injector nozzle. To prevent a fire or explosion, be sure the secondary fuel injector connectors are disconnected before starting the engine so that fuel cannot be sprayed by the injectors.
- Start the engine and warm it up thoroughly.
- Check the idle speed, using a highly accurate tachometer [A].
Idle Speed Standard: 1 100 ±50 r/min (rpm)
If the idle speed is out of the specified range, inspect the idle speed control valve (see Idle Speed Control Valve Inspection in the Self-Diagnosis System chapter).

NOTICE
Do not measure the idle speed by the meter unit.
- While idling the engine, inspect the throttle body vacuum, using the vacuum gauge [B].
Throttle Body Vacuum Standard: 30.7 ±1.33 kPa (230 ±10 mmHg) at idle speed
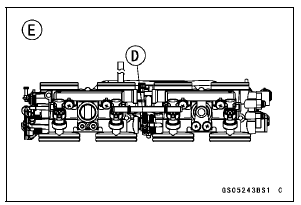
- If any vacuum is not within specifications, adjust the bypass screws [A].
Special Tool - Pilot Screw Adjuster, D [C]: 57001-1588
- Adjust the each vacuum (#1

#4) to the standard value. - Open and close the throttle valves after each measurement, and adjust the idle speed as necessary.

NOTE
- The engine vacuum synchronization is adjusted with the secondary fuel injector connectors disconnected.
View from Rear [E]
- Check the vacuums as before.
If all vacuums are within the specification range, finish the engine vacuum synchronization.
If any vacuum can not be adjusted within the specification, remove the bypass screws #1 ∼ #4 and replace them with new ones.
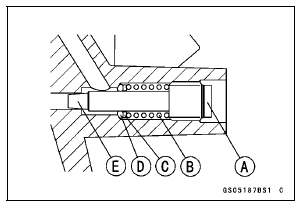
- Turn in the bypass screw [A] with counting the number of turns until it seals fully but not tightly. Record the number of turns.
- Remove:
Bypass Screw
Spring [B]
Washer [C]
O-ring [D]
- Check the bypass screw hole in the throttle body for carbon deposits.
If any carbons accumulate, wipe the carbons off from the hole, using a cotton pad penetrated with a high flash-point solvent.
- Replace the bypass screw, spring, washer and O-ring as a set.
- Turn in the bypass screw until it seats fully but not tightly.
NOTICE
Do not over-tighten the bypass screw. The tapered portion [E] of the bypass screw could be damaged.
- Back out the same number of turns counted when first turned in. This is to set the screw to its original position.
NOTE
A throttle body has different “turns out” of the bypass screw for each individual unit. On setting the bypass screw, use the “turns out” determined during disassembly.
- Repeat the same procedure for other bypass screws.
- Repeat the synchronization.
If the vacuums are correct, check the output voltage of the main throttle sensor (see Main Throttle Sensor Output Voltage Inspection in the Self-Diagnosis System chapter).
Special Tool - Throttle Sensor Setting Adapter: 57001 -1538
Main Throttle Sensor Output Voltage
Connections to Adapter: Degital Meter (+) → R (sensor L) lead
Degital Meter (–) → BK (sensor V/W) lead
Standard: DC 0.64 ∼ 0.68 V at idle throttle opening
If the output voltage is out of the standard, check the input voltage of themain throttle sensor (see Main Throttle Sensor Input Voltage Inspection in the Self-Diagnosis System chapter).
- Remove the vacuum gauge hoses and install the intake air pressure sensor hose, rubber caps and air intake valve hose on the original position.
- For CAL and SEA-B1 Models, install the vacuum hoses.
Run the vacuum hose according to Cable, Wire, and Hose Routing section in the Appendix chapter.
Test yourself
A quick Kawasaki Ninja ZX-10R quiz: every answer comes with an explanation and a link to the manual page.