Brakes
Front Master Cylinder Installation
In this manual: Brakes
~1min read
- Apply silicone grease to the sliding surface of the brake lever pivot bolt.
- Tighten: Torque - Brake Lever Pivot Bolt: 1.2 NВ·m (0.12 kgfВ·m, 11 inВ·lb) Brake Lever Pivot Bolt Nut: 5.9 NВ·m (0.60 kgfВ·m, 52 inВ·lb)
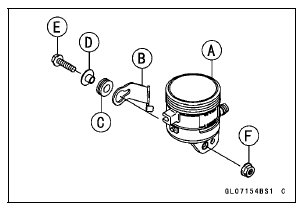
- Assemble the reservoir [A] and the bracket [B] as shown in the figure.
- Install the master cylinder clamp [A] so that the arrow mark [B] faces upward.

- Set the front master cylinder to match its mating surface [A] to the punch mark [B] of the handlebar.
- Tighten the upper clamp bolt first, and then the lower clamp bolt.

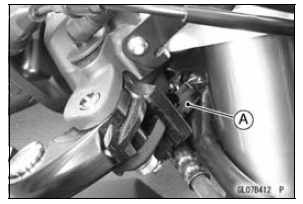
- Connect the front brake light switch connector [A] as shown in the figure.
- Replace the washers that are on each side of the hose fitting with new ones.
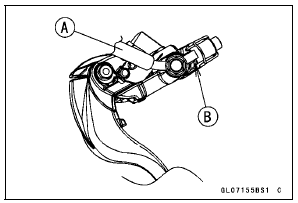
- Install the brake hose [A].
Touch the brake hose to the stopper [B] of the front master cylinder.
- Tighten: Torque - Brake Hose Banjo Bolt: 25 NВ·m (2.5 kgfВ·m, 18 ftВ·lb)
- Bleed the brake line (see Brake Line Bleeding).
- Check the brake for good braking power, no brake drag, and no fluid leakage.
Test yourself
A quick Kawasaki Ninja ZX-10R quiz: every answer comes with an explanation and a link to the manual page.
Was this page helpful?