Fuel Tank Installation
- Note the above WARNING (see Fuel Tank Removal).
- Run the hoses correctly (see Cable, Wire, and Hose Routing section in the Appendix chapter).
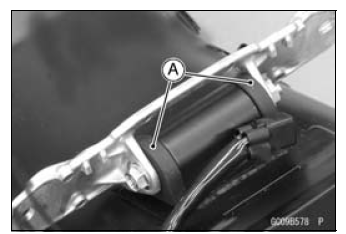
- Check that the dampers [A] are in place on the fuel tank.
If the dampers are damaged or deteriorated, replace them.
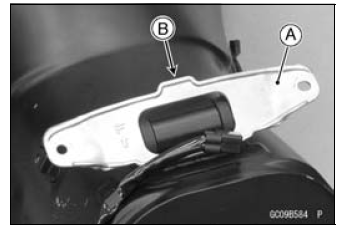
- If the fuel tank bracket is removed, install the bracket [A] so that its projection [B] faces the front.
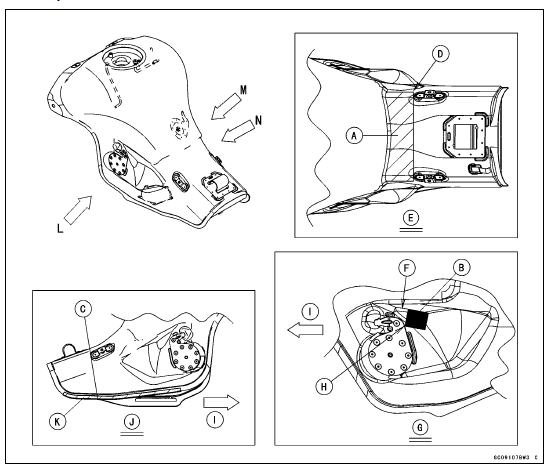
Install the pad [A], hooks [B] and trim [C] on the fuel tank as shown in the figure.
[D] Attach the pad on the fuel tank so that it covers entire round from end to end.
[E] View N [F] Attach the hook parallel to this line.
[G] View L [H] Attach the hook so that the corner of it contacts the bracket.
[I] Front [J] View M [K] After installation, fix the rear end of the trim to the fuel tank by hand.
- For the California and Southeast Asia models, note the following.
To prevent the gasoline from flowing into or out of the canister, hold the separator perpendicular to the ground.
Connect the hoses according to the diagram of the evaporative emission control system. Make sure they do not get pinched or kinked.
Run the hoses with a minimum of bending so that the air or vapor will not be obstructed.
- Remove the vinyl bag on the pipe.
- Check that there are no flaws, burrs, and adhesion of foreign materials on the delivery pipe [A].
- Replace the fuel hose with a new one.
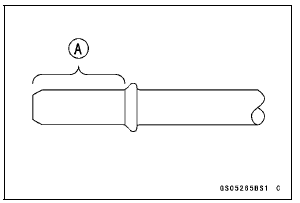
- Apply engine oil to the pipe.
- Insert the fuel hose joint [A] securely onto the pipe [B] and push down the joint lock [C].
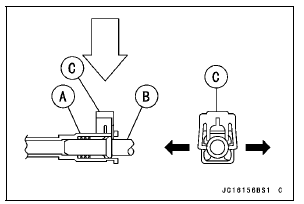
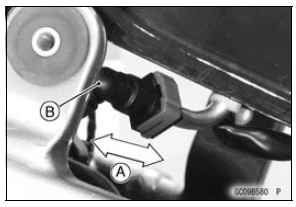
- Push and pull [A] the fuel hose joint [B] back and forth more than two times, and make sure it is locked and does not come off.
Leaking fuel can cause a fire or explosion resulting in serious burns. Make sure the hose joint is installed correctly on the delivery pipe by sliding the joint.
If it comes off, reinstall the hose joint.
- Tighten the left fuel tank bracket bolt first, and then the right fuel tank bracket bolt.
- Connect the fuel pump lead connector and the battery (–) terminal (see Battery Installation in the Electrical System chapter).
- Install the damper [A], hooks [B] and dampers [C] on the fuel tank covers as shown in the figure.
[D] Upper Fuel Tank Cover [E] Left Fuel Tank Cover [F] Right Fuel Tank Cover [G] Attach the damper on the ruled line.
[H] Attach the hook on the ruled line.
[I] View K [J] View L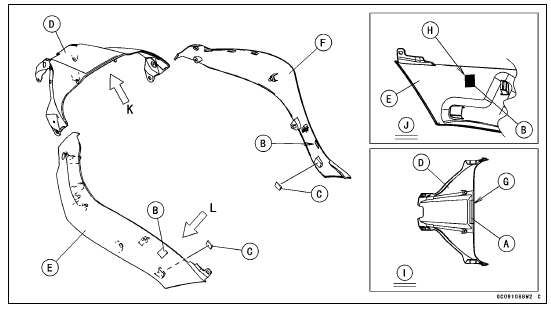
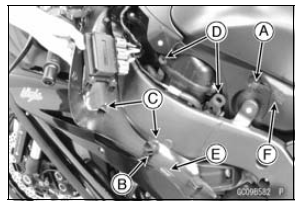
Insert the projections [A] of the upper fuel tank cover [B] into the holes [C] of the fuel tank.

Insert the hook portion [A] of the fuel tank into the slot [B] of the fuel tank cover.
Insert the projections [C] into the holes [D], and then attach the hook fastener [E] to the hook fastener [F] on the fuel tank.
Test yourself
A quick Kawasaki Ninja ZX-10R quiz: every answer comes with an explanation and a link to the manual page.