Body Electrical System
Automatic Headlamp Leveling Unit Repair Procedures
In this manual: Body Electrical System
16steps
~96min
4/5difficulty
Done 0 of 16
Removal
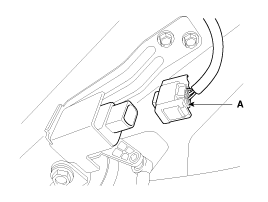
Height sensor- Disconnect the height sensor connector (A).
- Loosen the mounting bolts (body: 2 pcs, chassis: 1 pc) on the height sensor bracket.
Tightening torque: 3 ~ 5 N·m
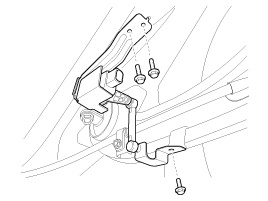
- Remove the height sensor.
- Remove the headlamp assembly.
Installation
Height sensor- Install the height sensor.
- Connect the connector.
- Install the headlamp assembly.
Inspection Using GDS
Initialization and diagnostic procedure using GDS equipment. The following is a summary of the A/S procedure using GDS.| No. | Procedure |
| 1 | Position the vehicle on a level surface. |
| 2 | Check tires. |
| 3 | IGN1 ON. |
| 4 | Low beam headlamps on. |
| 5 | Communication with Diagnostic Tool |
| 6 | Initial command from diagnostic tool |
| 7 | Clear trouble code |
| 8 | IGN1 OFF → ON |
| 9 | Reconnect to diagnostic tool |
| 10 | Check HLLD output value as 15% and DTC |
| 11 | Operate the leveling device by diagnostic tool command |
| 12 | Headlamp Mechanical Initial Aiming |
- Select the vehicle model and "Headlamp Adjustment".

- GDS can forcibly operate actuators, monitor input/output values and perform self-diagnosis.
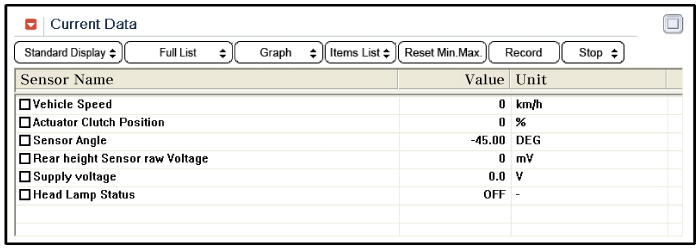
- For the AHLS output function test, select "Actuation Test".

- Select "Parameter Setting and Zero Initial Position".


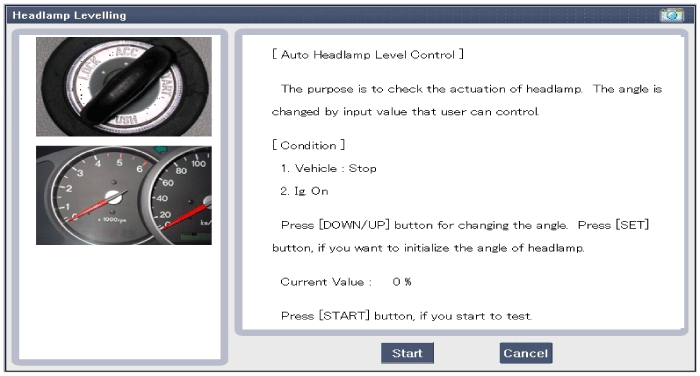
- Make sure the AHLS system is forcibly operated in the "Headlamp Leveling" menu.
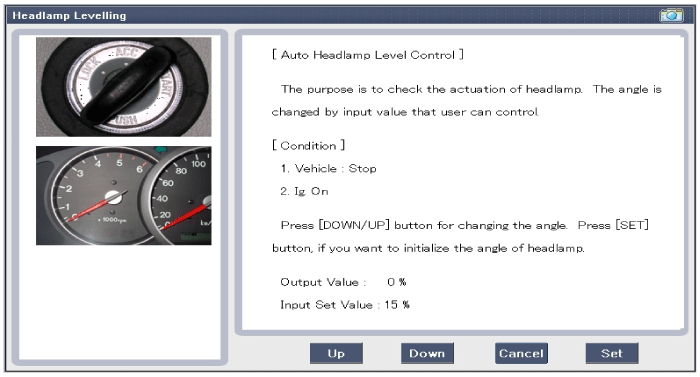

- To check the headlamp leveling system trouble codes, select "Diagnostic Trouble Codes".
Test yourself
A quick Kia Cadenza VG Owner's Manual quiz: every answer comes with an explanation and a link to the manual page.
Was this page helpful?