Kia Sorento XM 2011-2023 Repair Manual
Interior Trim Replacement
In this manual: Kia Sorento XM 2011-2023 Repair Manual
31steps
~186min
4/5difficulty
Done 0 of 31
Door Trim Replacement
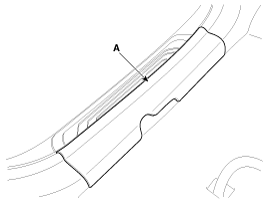
- Using a screwdriver or removal tool, remove the front door scuff plate (A). [Front]
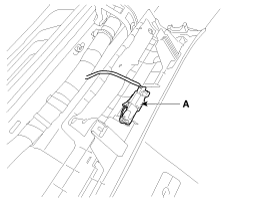
- Disconnect the connector (A).
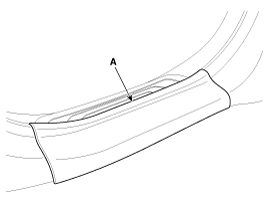
- Using a screwdriver or removal tool, remove the rear door scuff plate (A). [Rear]
- Install in the reverse order of removal.
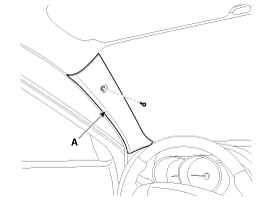
- Loosen the screw, then remove the front pillar garnish (A).
- Install in the reverse order of removal.
- Remove the front door sill trim.
- Remove the hood release handle.
- Using a screwdriver or removal tool, remove the hood side trim (A).
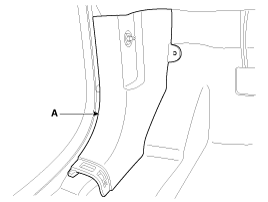
- Install in the reverse order of removal.
- Remove the front door sill trim.
- Remove the rear door sill trim.
- Remove the front seat belt anchor pretensioner cover (A).
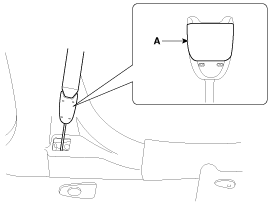
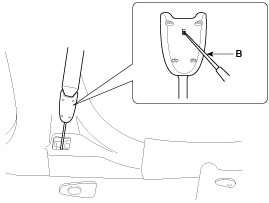
- Remove the front seat belt anchor pretensioner by pressing the stopper pin with a flat-tip screwdriver (B).
- Using a screwdriver or removal tool, remove the center pillar lower garnish (A).

- Loosen the mounting bolt, then remove the center pillar upper garnish (B).
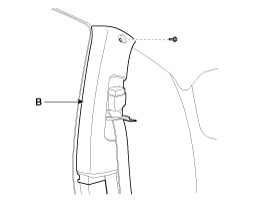
- Install in the reverse order of removal.
- Remove the rear door sill trim.
- Remove the luggage compartment trim (A).
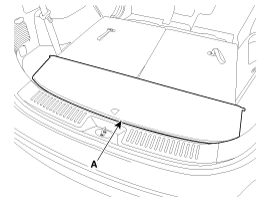
- Remove the luggage compartment partition trim (A).
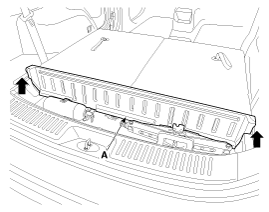
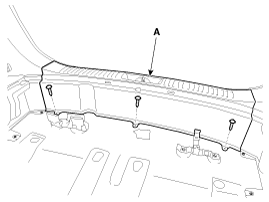
- Loosen the mounting screws, then remove the rear cross trim (A).
- Loosen the mounting bolt, then remove the second row lower seat belt anchor (A).
Tightening torque: 39.2 ~ 54 N·m
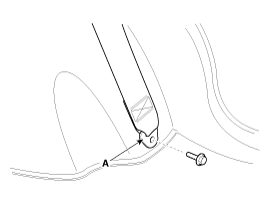
- Loosen the mounting bolt, then remove the third row seat belt lower anchor (A).
Tightening torque: 39.2 ~ 54 N·m
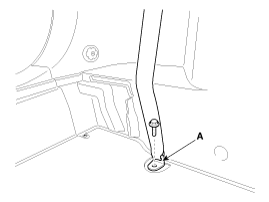
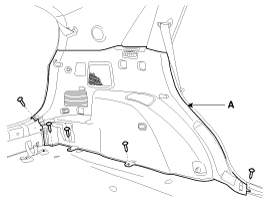
- Loosen the mounting screws, then remove the luggage side trim (A).
- Install in the reverse order of removal.
- Remove the luggage side trim.
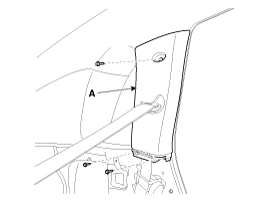
- Loosen the mounting bolt, then remove the rear pillar garnish (A).
- Install in the reverse order of removal.
- Remove the luggage side trim.
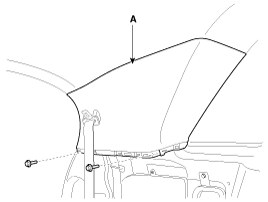
- Loosen the mounting bolt, then remove the rear pillar trim (A).
- Install in the reverse order of removal.
Test yourself
A quick Kia Sorento Owner's Manual quiz: every answer comes with an explanation and a link to the manual page.
Was this page helpful?