Kia Sorento XM 2011-2023 Repair Manual
Emergency Pad Replacement
In this manual: Kia Sorento XM 2011-2023 Repair Manual
62steps
~372min
4/5difficulty
Done 0 of 62
Instrument Cluster Panel Replacement
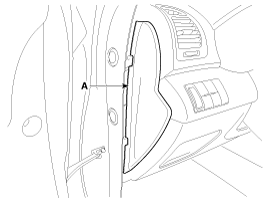
- Using a screwdriver or a removal tool, remove the side cover of the airbag (A).
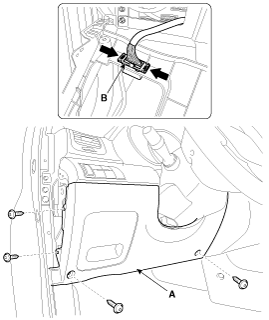
- After loosening the mounting screws, remove the lower protector (A).
- Disconnect the diagnostic connector (B).
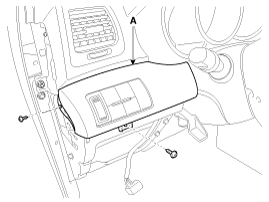
- Loosen the mounting screws, then remove the side trim (A).
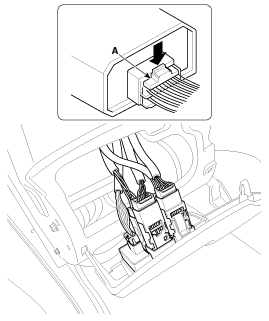
- Press the stopper pin (A), then disconnect the connectors.
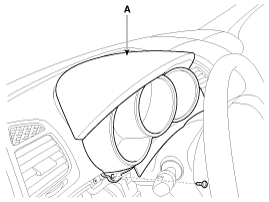
- After loosening the mounting screw, remove the cluster panel (A).
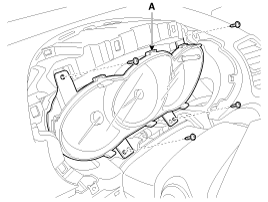
- Loosen the mounting screws, then remove the cluster (A).
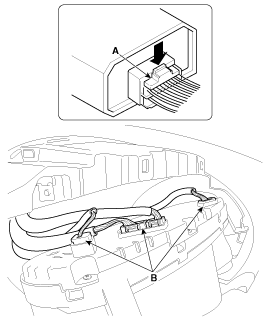
- Press the lock pin (A), then disconnect the connectors (B).
- Install in the reverse order of removal.
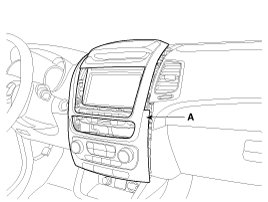
- Using a screwdriver or trim tool, remove the center panel (A).
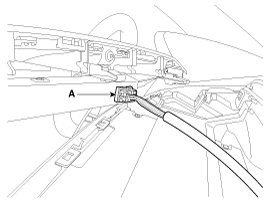
- Disconnect the clock connector (A).
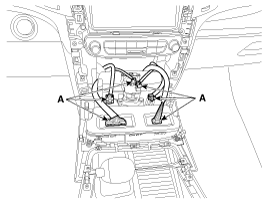
- Disconnect the heater and air conditioning controller connectors (A).
- Install in the reverse order of removal.
- Remove the center panel.
- After loosening the mounting screws, remove the center duct protector (A). [LH]
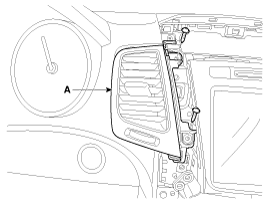
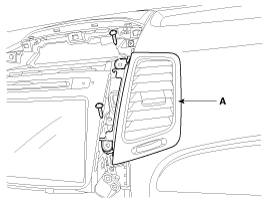
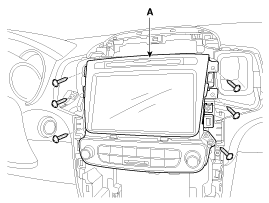
- Loosen the mounting screws, then remove the AVN head unit (A).
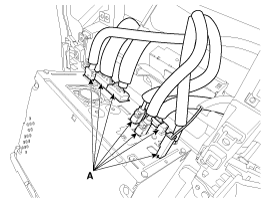
- Disconnect the AVN head unit connectors (A).
- Install in the reverse order of removal.
- Using a screwdriver or a removal tool, remove the side cover of the airbag (A).
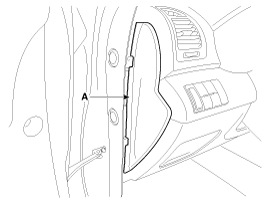
- After loosening the mounting screws, remove the lower protector (A).
- Press the stopper pin (B), then disconnect the diagnostic connector (C).
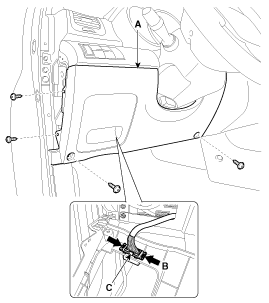
- Loosen the mounting bolts, then remove the reinforcement panel (A).
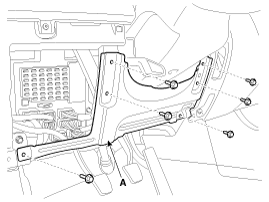
- Install in the reverse order of removal.
- Remove the hood side trim.
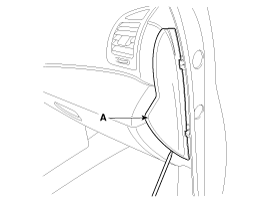
- Using a screwdriver or a removal tool, remove the side cover of the airbag (A).
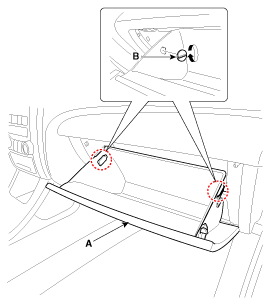
- Disconnect the plug (B) from the glove box (A).
- Disconnect the air duct (A) from the glove box (B).
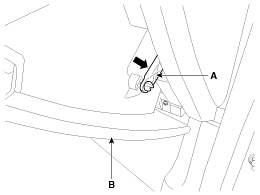
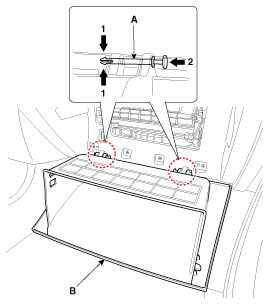
- Disconnect the pins (A) and remove the glove box (B).
- After loosening the mounting screws, remove the side trim protector [RH] (A).
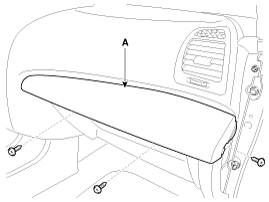
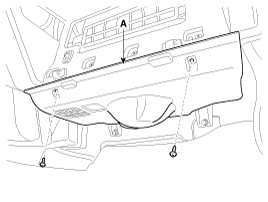
- After loosening the mounting screws, remove the protector under the cover (A).
- Remove the glove box housing (A) after removing the mounting screws.
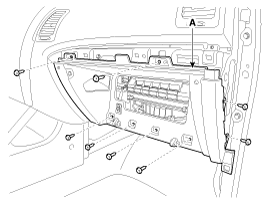
- Disconnect the glove box lamp connector (A).
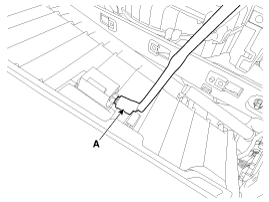
- Install in the reverse order of removal.
- Remove the airbag lower panel.
- Loosen the mounting screws, then remove the steering column lower shroud panel (A).
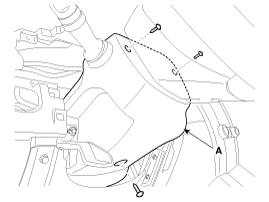
- Install in the reverse order of removal.
- Using a screwdriver or removal tool, remove the side cover of the airbag (A). [LH]
- Install in the reverse order of removal.
- Remove the following parts.
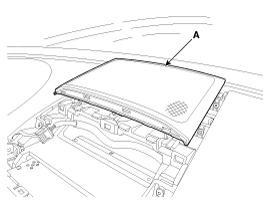
A. Floor Console Assembly B. Front Pillar Trim C. Hood Side Trim D. Instrument cluster (Refer to "Instrument Cluster" in Group BE) E. AVN head unit or audio unit (Refer to "AVN Head Unit" in Group BE) (Refer to "Audio System" in Group BE) F. Glove Box Housing G. Steering Column Cover Panel H. Steering wheel (Refer to "Steering Wheel" in Group ST) I. Multifunction switch assembly (Refer to "Multifunction Switch" in Group BE) - Using a screwdriver or removal tool, remove the center speaker grille (A).
- Loosen the mounting screws and remove the center speaker assembly (A).
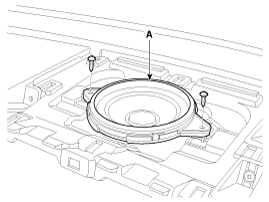
- Disconnect the center speaker connector (A).
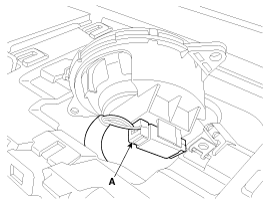
- Using a screwdriver or removal tool, remove the auto light sensor (A).
- Disconnect the auto light sensor connector (B).
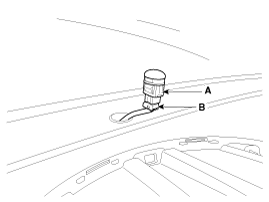
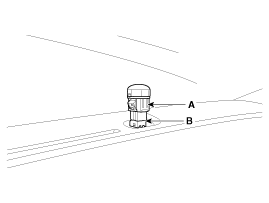
- Using a screwdriver or puller, remove the photo sensor (A).
- Disconnect the photo sensor connector (B).
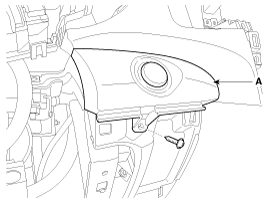
- After loosening the mounting screw, remove the center garnish [LH] (A).
- Disconnect the start/stop button switch connector (A).
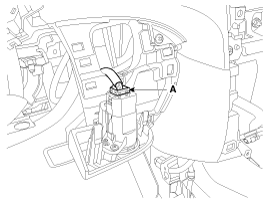
- Loosen the mounting bolts.
- Disconnect the passenger airbag connectors (A).
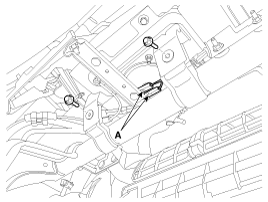
- Loosen the mounting bolts and nuts, then remove the main garnish assembly (A).
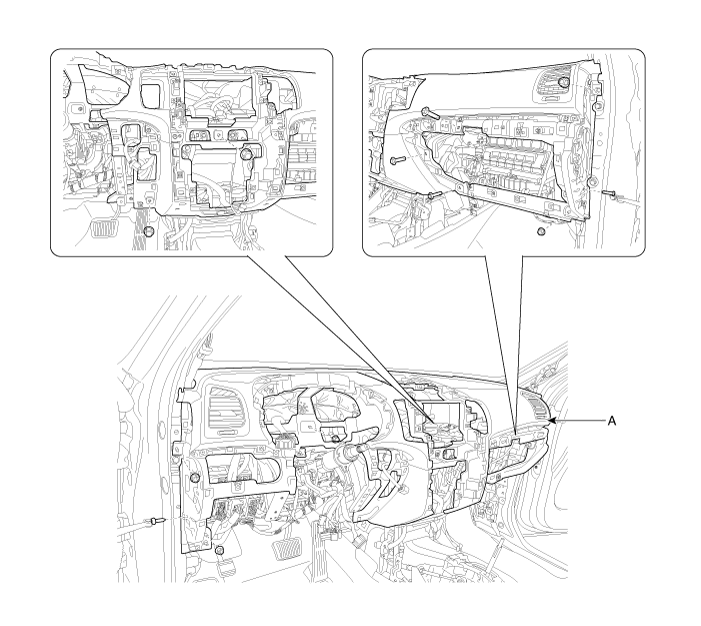
- Install in the reverse order of removal.
- Remove the following parts.
A. Hood Top Cover B. Crash Pad Main Assembly C. Disconnect the steering column connectors (Refer to "Steering Column and Shaft" in Group ST). D. Lower the steering column after loosening the mounting bolts (Refer to "Steering Column and Shaft" in Group ST). - Disconnect the connectors from the fan unit.
- Loosen the mounting bolt, then remove the rear duct (A). [LH]
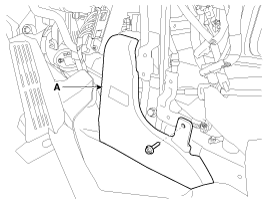
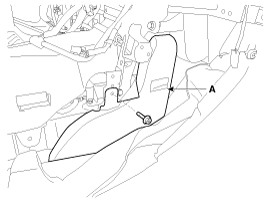
- Remove the mounting screw, then remove the driver side shower duct (A).
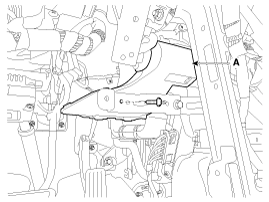
- Disconnect the connector (A) of the SRS control module (SRSCM).
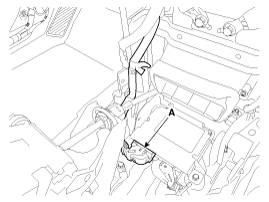
- Disconnect the junction block connectors in the cabin (A).
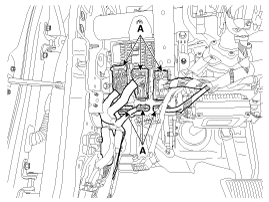
- Disconnect the multi-box connectors (A). [Driver]
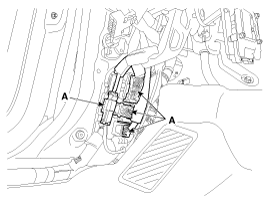
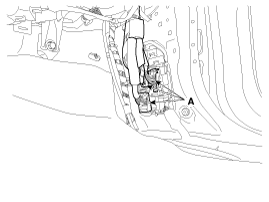
- Disconnect the connector (A) and the mounting clips from the front pillar. [Driver]
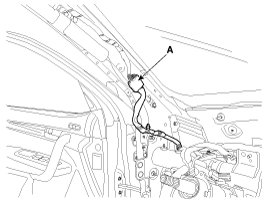
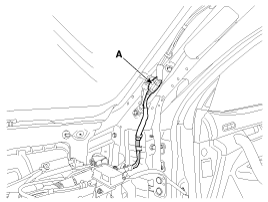
- Loosen the mounting bolts and nuts, then remove the cross member cover assembly (A).
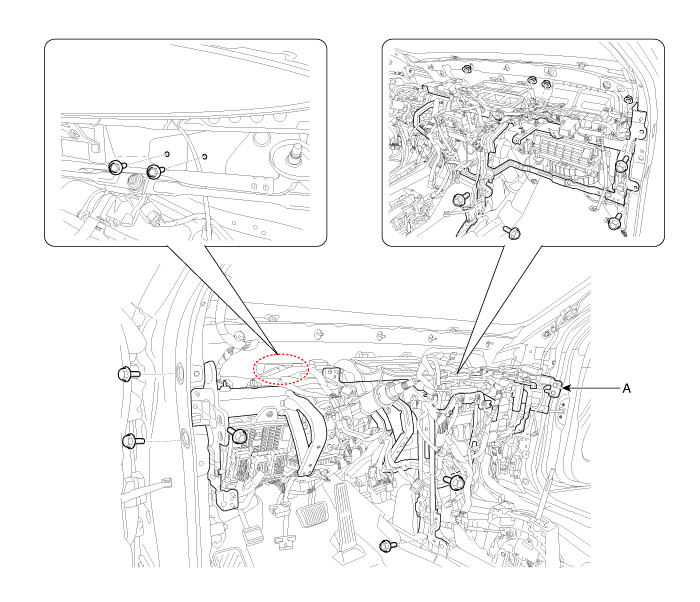
- Install in the reverse order of removal.
Test yourself
A quick Kia Sorento Owner's Manual quiz: every answer comes with an explanation and a link to the manual page.
Was this page helpful?