Kia Sorento XM 2011-2023 Repair Manual
Hood Replacement
In this manual: Kia Sorento XM 2011-2023 Repair Manual
16steps
~96min
5/5difficulty
Done 0 of 16
Hood Assembly Replacement
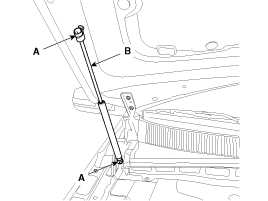
- Using a screwdriver, slightly lift the socket clips (A) on both ends of the hood support (B).
- After loosening the hood hinge mounting bolts (B), remove the hood assembly (A).
Tightening torque: 21.6 ~ 26 N·m
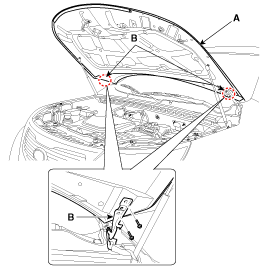
- Install in the reverse order of removal.
- Using a clip remover, disconnect the clips and remove the hood insulator pad (A).
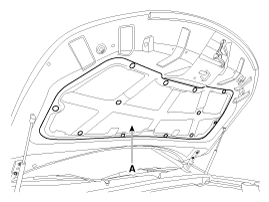
- Install in the reverse order of removal.
- Disconnect the clips, then remove the hood seal (A).
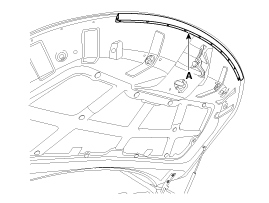
- Install in the reverse order of removal.
- Remove the hood seal (A).
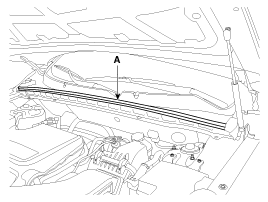
- Install in the reverse order of removal.
- Using a socket (B), remove the hood latch release handle (A).
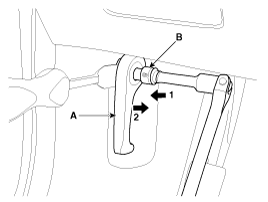
- Install in the reverse order of removal.
- Loosen the hood latch bolts (A).
- Disconnect the hood latch cable (B) and the release cable (C).
Tightening torque: 7.8~11.8 N·m
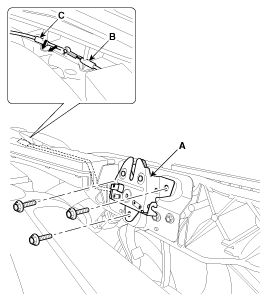
- Install in the reverse order of removal.
- Using a screwdriver (A), gently lift the socket retainer (B) at both ends of the lift support (D), then remove the lift support from the bracket (C).
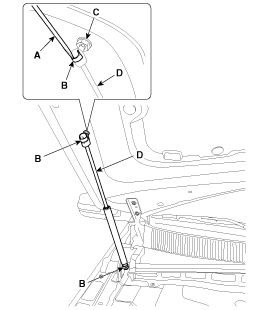
- Insert the lift support socket into the bracket for installation.
Test yourself
A quick Kia Sorento Owner's Manual quiz: every answer comes with an explanation and a link to the manual page.
Was this page helpful?