Drive Shaft and Axle
Front Propeller Shaft Repair Procedures
In this manual: Drive Shaft and Axle
31steps
~201min
5/5difficulty
3special tools
Done 0 of 31
Replacement
- Loosen the wheel nuts slightly. Raise the vehicle and make sure it is securely supported.
- Remove the front wheel and tire (A) from the front hub.
Tightening torque: 88.3 ~ 108 N·m
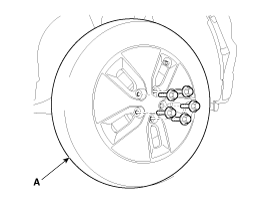
Be careful not to damage the hub bolts when removing the front wheel and tire (A).
- Remove the drive shaft lock nut (A).
Tightening torque: 274.6 ~ 294 N·m N·m (28.0 ~ 30.0 kgf·m, 202.5 ~ 217.0 ft-lbf)
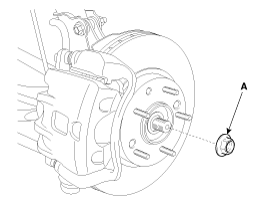
- Replace the drive shaft lock nut with a new one.
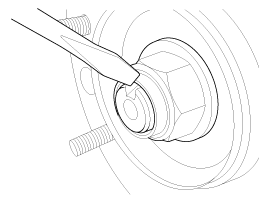
- After installing the drive shaft lock nut, stake the lock nut using a chisel and hammer as shown in the illustration below.
- Remove the tie rod end ball joint (C) from the steering knuckle using SST (09568-34000).
- Remove the cotter pin (A).
- Remove the castellated nut (B).
- Use SST (09568-34000).
Tightening torque: 23.5 ~ 33 N·m
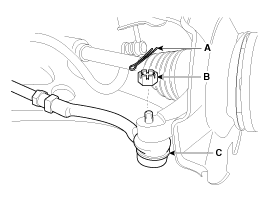

- When using the SST, be careful not to damage the lower arm ball joint dust boot.
- Keep the SST tied to the vehicle, as there is a risk of injury if the SST falls during removal of the lower arm ball joint.
- Peripheral parts may be damaged if the lower arm ball joint is removed with a general tool such as a pry bar, so be sure to use the SST.
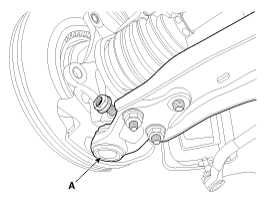
- Remove the lower arm (A) from the steering knuckle.
Tightening torque: 58.8 ~ 71 N·m
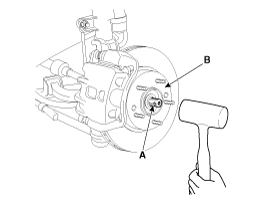
- Using a plastic hammer, disconnect the propeller shaft (A) from the axle hub (B).
- Insert a pry bar (A) between the transaxle case and the joint housing, and separate the drive shaft (B) from the transaxle case.

- Install in the reverse order of removal.
- Check the front alignment. (Refer to Suspension System - "Front Wheel Alignment")
Inspection
- Inspect the drive shaft boots for damage and wear.
- Inspect the ball joint for wear and damage.
- Inspect the splines for wear and damage.
- Inspect the dynamic damper for cracks, wear and position.
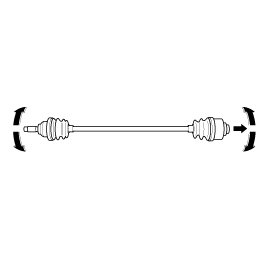
- Inspect the drive shaft for cracks and excessive wear.
Disassembly
|
- Remove the front drive shaft. (Refer to Drive Shaft Assembly - "Front Drive Shaft")
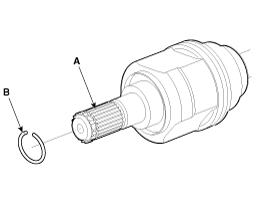
- Remove the BJ snap ring (B) from the TJ housing (A).
- Remove both clamps from the TJ case.
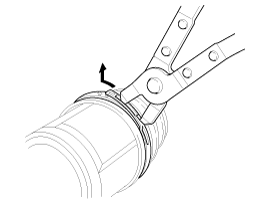
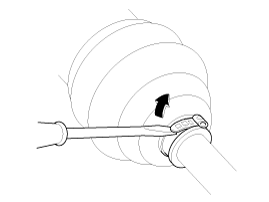
- Remove the boot from the transaxle side joint (TJ).
- When separating the joint boot (A) on the transaxle side, wipe the grease from the VTJ housing (B) and arrange the parts in the correct order.
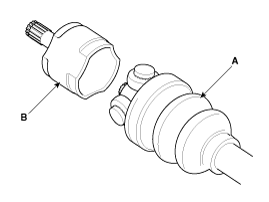
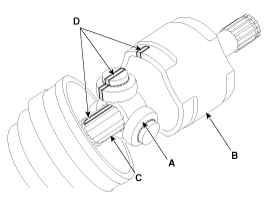
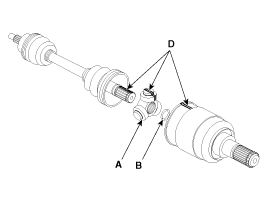
- Make alignment marks (D) on the spider roller assembly (A), TJ housing (B) and shaft spline (C) to facilitate reassembly.
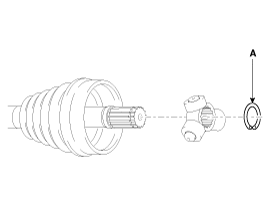
- Remove the snap ring (A) from the shaft.
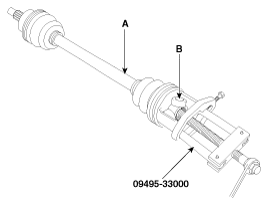
- Remove the spider assembly (B) from the drive shaft (A) using special service tool (09495-33000).
- Clean the spider assembly.
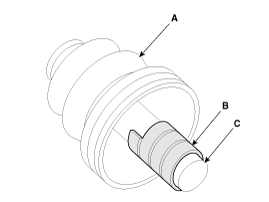
- Remove the TJ boot (A).
- To reuse the boot (A), wrap tape (B) around the drive shaft splines (C) to protect the boot (A).
Installation
- Wrap tape around the drive shaft (TJ) spline to prevent damage to the boot.
- Using the alignment marks (D) made during removal as a guide, install the spider assembly (A) and snap ring (B) onto the drive shaft splines (C).
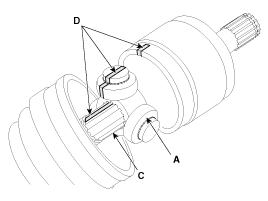
- Add grease to the joint boot.
- Install both boot bands.
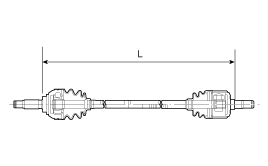
- To control the air in the TJ boots, observe the specified distance between the boot bands when they are tightened.
Motor Distance (L) mm (in.) Left side Right Side 80 kW 546,3 804,7
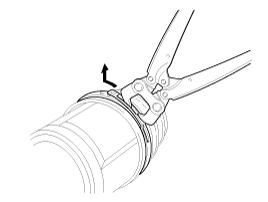
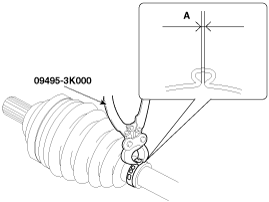
- Using the SST (09495-3K000), secure the TJ boot clamps.
Clearance (A): 2.0 mm (0.0787 in) or less
- Install the front drive shaft. (Refer to Driveshaft Assembly - "Front Drive Shaft")
- Check the front alignment. (Refer to Suspension System - "Front Wheel Alignment")
Test yourself
A quick Kia Soul EV Owner's Manual quiz: every answer comes with an explanation and a link to the manual page.
Was this page helpful?