Suspension System
Troubleshooting
In this manual: Suspension System
23steps
~138min
4/5difficulty
Done 0 of 23
Troubleshooting
Vehicle Inspection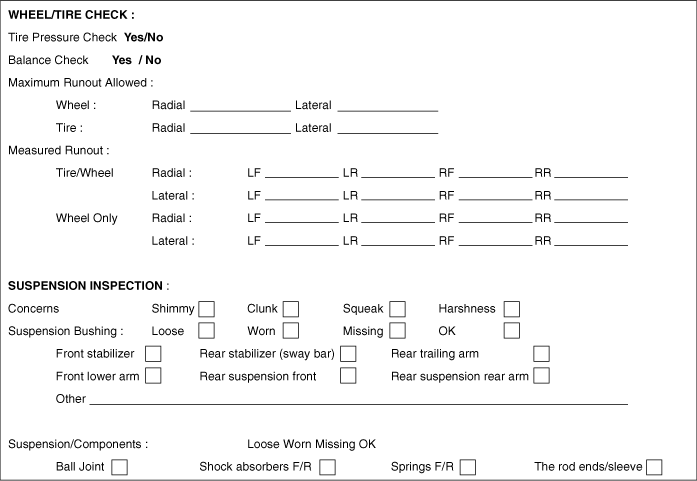
| Symptom | Suspect area | Remedy (Refer to page) |
| Squeak or grunt noise from front suspension, more likely to occur in cold weather or on rough roads or when turning. | Front Stabilizer Bar | Under these conditions, the noise is acceptable. |
| Knock noise from front suspension, occurs when turning and when not turning. | Loose front struts or shock absorbers. | Check for loose nuts or bolts. Tighten to specification. |
| Knock noise from rear suspension, occurs when shifting from reverse to drive. | Loose or Damaged Rear Suspension Components | Inspect rear suspension components for looseness or damage. Repair or install new components as necessary. |
| Click or pop noise from front suspension, more noticeable on rough roads or bumps. | Worn or damaged ball joints. | Install a new lower arm as necessary. |
| Click or pop noise occurs when turning the vehicle. | Worn or damaged ball joints. | Install a new lower arm as necessary. |
| Click or clunk noise occurs when accelerating while turning. | Damaged or worn Birfield joint. | Repair or install a new Birfield joint as necessary. Refer to Group DS - Propeller Shaft. |
| Front suspension noise - squeak, creak or rattle - mainly occurs on bumps or rough roads. | Steering components Loose or bent front struts or shock absorbers Damaged spring or spring seats Worn or damaged arm bushings Worn or damaged stabilizer bar bushings or links |
Go to Diagnostic Procedure A. |
| Squeak or scrape - front strut noise occurring on rough roads or when turning the vehicle. | Uneven seating surface between strut insulator and body panel, burrs around strut insulator bolts and insulator bolt mounting holes | Repair or install new parts as necessary. |
| Rear suspension noise - squeak, creak or rattle - mainly occurs on bumps or rough roads. | Loose or bent rear shock absorbers Damaged spring or spring seats Worn or damaged suspension arm bushings |
Go to Diagnostic Procedure B. |
| Shudder - occurs during acceleration from low speed or when stopping. | Rear axle assembly incorrectly positioned Damaged or worn front suspension components |
Inspect axle mounts and rear suspension for damage or wear. Repair as necessary. Check for loose stabilizer bar, damaged or loose strut/strut bushings, or loose or worn ball joints. Inspect tie rod for wear or damage. Repair or install new components as necessary. |
| Shimmy - most noticeable during coasting/deceleration - also stiff steering. | Excessive Positive Caster | Check wheel alignment angles. Adjust as necessary. |
| Tire noise - hum/moan at constant speed. | Abnormal wear | Rotate the tire and check tire wear. Install a new tire as necessary. Inspect suspension components for damage or wear. Perform wheel alignment. |
| Tire noise - noise tone decreases as vehicle speed decreases. | Unbalanced tire | Balance the tire and road test. Install a new tire as necessary. |
| Tire noise - ticking, changes with speed. | Nail puncture or stone in tire tread | Inspect the tire. Repair or replace as necessary. |
| Wheel and tire - vibration and noise directly related to vehicle speed, independent of acceleration, coasting or deceleration. | Damaged or worn tire | Go to Diagnostic Procedure C. |
| Tire shake or shimmy - occurs at lower speeds. | Damaged wheel bearings | Rotate the wheel and check for abnormal play or roughness in the wheel bearing. If necessary, adjust or install new wheel bearings. Refer to Group DS - Front/Rear Axle. |
| Damaged wheel | Inspect the wheel for damage. If necessary, install a new wheel. | |
| Damaged or worn suspension components | Inspect the suspension components for wear or damage. Repair as necessary. | |
| Loose wheel nuts | Check the wheel nuts. Tighten to specification. |
|
| Damaged or uneven tire wear | Rotate the tire and check for abnormal wear or damage. If necessary, install a new tire. | |
| Tire shimmy or vibration - occurs at low speeds | Wheel/tire out of balance | |
| Uneven tire wear | Check the tires for abnormal wear. If necessary, install a new tire. | |
| Excessive radial runout of wheel or tire | Perform a radial runout test on the wheel and tire. If necessary, install a new tire. |
|
| Worn or damaged wheel studs or elongated stud holes | Inspect the wheel studs and wheels. If necessary, install new components. |
|
| Excessive lateral runout of wheel or tire | Perform a lateral runout test on the wheel and tire. Inspect the wheel, tire and hub. If necessary, repair or install new components. |
|
| Foreign material between brake disc and hub. | Clean the mounting surfaces of the brake disc and hub. Refer to Group DS - Front/Rear Axle. |
|
| Shake or shudder at high speed - occurs at high speeds. | Excessive wheel hub runout Damaged or worn tires Damaged or worn wheel bearings Worn or damaged suspension or steering linkage Brake disc or drum imbalance |
Go to Detailed Test D. |
| Drift left or right | Tires Steering linkage Alignment Base brake system |
Go to Detailed Test E. |
| Steering Wheel | Alignment Steering linkage Front lower arm ball joint |
Go to Detailed Test F. |
| Tracks incorrectly | Rear suspension Caster |
Go to Detailed Test G. |
| Harsh ride | Front strut and spring assembly Rear shock absorber and spring assembly |
Go to Detailed Test H. |
| Excessive Noise | Front or rear stabilizer bar components Springs Suspension components Shock absorbers |
Go to Detailed Test I. |
| Abnormal tire wear | Tire or unbalanced wheels Tire inflation Strut Alignment |
Go to Detailed Test J. |
| Vibration | Wheel/tire Front drive axle shaft(s) Steering system Strut and spring assembly Strut and spring mount Front lower arm ball joint Front lower arm bolt bushing Stabilizer bar bushings Wheel hubs and bearings Rear suspension arms and bushings |
Go to Detailed Test K. |
| Vehicle leans | Tire/wheel Vehicle load Suspension components Incorrect ground clearance |
Inflate tires to specification. Redistribute load as necessary. Visually inspect the suspension system. If necessary, adjust ride height. |
| Poor steering return | High steering knuckle torque Alignment |
Go to Detailed Test E. |
DIAGNOSTIC PROCEDURE A: FRONT SUSPENSION NOISE
| CONDITIONS | DETAILS/RESULTS/ACTIONS |
| A1. VEHICLE ROAD TEST | |
|
|
| A2. CHECK STEERING SYSTEM | |
|
|
| A3. CHECK FRONT SHOCK ABSORBER/STRUT | |
|
|
| A4. CHECK FRONT SPRINGS | |
| Inspect the front coil springs and front spring seats/brackets for wear or damage. Are the front coil springs or spring seats/brackets worn or damaged? > YES Repair or install new components as necessary. Verify normal operation of the system. > NO Go to A5. |
|
| A5. CHECK STABILIZER BAR | |
|
|
DIAGNOSTIC PROCEDURE B: REAR SUSPENSION NOISE
| CONDITIONS | DETAILS/RESULTS/ACTIONS |
| B1. VEHICLE ROAD TEST | |
|
|
| B2. CHECK REAR SHOCK ABSORBER/STRUT | |
|
|
| B3. CHECK REAR COIL SPRINGS | |
| Inspect the rear coil springs and rear spring seats/brackets for wear or damage. Are the rear coil springs or spring seats/brackets worn or damaged? > YES Repair or install new components as necessary. Verify normal operation of the system. > NO Go to B4. |
|
| B4. CHECK TRAILING ARMS | |
|
|
DIAGNOSTIC PROCEDURE C: WHEEL AND TIRE
| CONDITIONS | DETAILS/RESULTS/ACTIONS | ||||
| C1. ROAD TEST VEHICLE | |||||
Is there vibration and noise? > YES Go to C2. > NO The wheel and tire are normal. Diagnose other suspected systems. |
|||||
| C2. CHECK FRONT WHEEL BEARINGS | |||||
| Inspect the front wheel hub bearings. Refer to "Wheel Bearing Inspection" (see group DS - Front Axle). Are the wheel hub bearings normal? > YES Go to C3. > NO Inspect the wheel bearings. Adjust or repair as necessary. Verify normal operation of the system. |
|||||
| C3. CHECK TIRES | |||||
|
|||||
| C4. TIRE ROTATION DIAGNOSIS | |||||
|
|||||
| C5. CHECK TIRE RADIAL RUNOUT | |||||
| Measure the radial runout of the wheel and tire assembly. The typical total radial runout specification is 1.15 mm (0.059 in.). Does the radial runout meet specification? > YES Go to C8. > NO Go to C6. |
|||||
| C6. CHECK WHEEL RADIAL RUNOUT | |||||
| Measure the wheel radial runout. The typical total radial runout specification is 1.14 mm (0.045 inch). ? Does the radial runout meet specification? > YES Install a new tire. Verify system operation. > NO Go to C7. |
|||||
| C7. CHECK HUB/BRAKE DISC OR DRUM RUNOUT OR STUD CIRCLE RUNOUT | |||||
| Measure the pilot or bolt circle runout. Typical runout specifications: ? Pilot runout - less than 0.15 mm (0.006 inch) ? Bolt circle runout - less than 0.38 mm (0.015 inch) ? Does the radial runout meet specification? > YES Install a new wheel. Verify system operation. > NO Repair or install new components as necessary. |
|||||
| C8. CHECK TIRE LATERAL RUNOUT | |||||
| Measure the lateral runout of the wheel and tire assembly. The typical total lateral runout specification is 2.5 mm (0.098 inch). ? Does the lateral runout meet specification? > YES The wheel and tire are good. Diagnose other suspect systems. > NO Go to C9. |
|||||
| C9. CHECK WHEEL LATERAL RUNOUT | |||||
| Measure the lateral runout of the wheel. The typical total lateral runout specification is 1.2 mm (0.047 inch). ? Does the lateral runout meet specification? > YES Install a new tire. Verify system operation. > NO Go to C10. |
|||||
| C10. CHECK FLANGE FACE LATERAL RUNOUT | |||||
| Measure the lateral runout of the flange face. Typical lateral runout specification: ? Hub/brake disc - less than 0.13 mm (0.005 inch) ? Does the lateral runout meet specification? > YES Install a new wheel. Verify system operation. > NO Repair or install new components as necessary. |
|||||

DIAGNOSTIC PROCEDURE D:
| CONDITIONS | DETAILS/RESULTS/ACTIONS |
| D1. CHECK FRONT WHEEL BEARING ROUGHNESS | |
|
|
| D2. CHECK FRONT WHEEL BEARING END PLAY | |
| Check the front wheel bearing end play. ? Is the end play within specification? > YES Go to D3. > NO Adjust or repair as necessary. Verify system operation. |
|
| D3. MEASURE FRONT WHEEL LATERAL AND RADIAL RUNOUT | |
| Measure the lateral runout and radial runout of the vehicle front wheels. Go to detailed test C. ? Do the measurements meet specification? > YES Go to D4. > NO Install new wheels and balance the assembly as necessary. Verify system operation. |
|
| D4. MEASURE FRONT WHEEL LATERAL RUNOUT | |
| Measure the lateral runout of the vehicle front tires. Go to detailed test C. ? Is the runout within specification? > YES Go to D5. > NO Install new tires and balance the assembly as necessary. Verify system operation. |
|
| D5. MEASURE FRONT WHEEL RADIAL RUNOUT | |
| Measure the radial runout of the vehicle front tires. Go to detailed test C. ? Is the runout within specification? > YES Balance the front wheel and tire assembly. If any tire cannot be balanced, install a new tire. Verify system operation. > NO Go to D6. |
|
| D6. MATCH TIRE AND WHEEL ASSEMBLY | |
| Mark the high point of runout on the tire and on the wheel. Lower the assembly and rotate the tire 180 degrees (half turn) on the wheel. Inflate the tire and measure the radial runout. ? Is the runout within specification? > YES Balance the assembly. Verify system operation. > NO If the high point is not within 101.6 mm (4 inches) of the first high point on the tire, go to D7. |
|
| D7. MEASURE WHEEL FLANGE RUNOUT | |
| Remove the tire and mount the wheel on a balancing stand. Measure the runout on both wheel flanges. Go to detailed test C. ? Is the runout within specification? > YES Locate and mark the low point on the wheel. Install the tire with the high point of the tire matched to the low point of the wheel. Balance the assembly. Verify system operation. If the condition persists, go to D8. > NO Install a new wheel. Check the runout on the new wheel. If the new wheel is within limits, locate and mark the low point. Install the tire with the high point of the tire matched to the low point of the wheel. Balance the assembly. Verify system operation. If the condition persists, go to D8. |
|
| D8. CHECK FOR VIBRATION FROM THE FRONT OF THE VEHICLE | |
| Rotate the front wheel and tire assembly on a balancing machine while the vehicle is raised on a lift. Feel for vibration in the front fender or while seated in the vehicle. ? Is vibration present? > YES Replace known good wheel and tire assemblies as necessary. Verify system operation. > NO Check the driveline components. Verify system operation. |
|
DIAGNOSTIC PROCEDURE E: PULL TO LEFT OR RIGHT
| CONDITIONS | DETAILS/RESULTS/ACTIONS |
| E1. CHECK THE TIRES | |
| Inspect the tires for excessive wear or damage. ? Are the tires excessively worn or damaged? > YES Install new tires. > NO Go to E2. |
|
| E2. CHECK THE STEERING LINKAGE | |
|
|
| E3. CHECK VEHICLE ALIGNMENT | |
|
|
| E4. BRAKE DIAGNOSIS | |
| Apply the brakes while driving. ? Does the vehicle pull or grab during braking? > YES Refer to Group BR - Specifications. > NO If the steering wheel is centered, the vehicle is operating correctly. If the steering wheel is off-center, go to detailed test F. |
|
 Special Service Tools
: Tool Name/Number, Illustration, Description. Coil Spring Compressor 09546-26000: Compresses coil spring. Ball Joint Remover 09568-34000: Separates ball joint from front axle...  Front Suspension System
... Additional information:
Kia Soul EV (PS EV) 2015-2020 Service Manual: Cluster Ionizer Repair Procedures
Inspection 1. Press the MODE switch more than 4 times within 2 seconds while pressing the OFF switch. Display / Error description: 00 Normal; 50 Cluster ion generator failure. * For diagnostic procedures, refer to the DTC code. Replacement 1. Disconnect the negative (-) battery terminal. 2. Remove...
Kia Soul EV (PS EV) 2015-2020 Service Manual: Rear Seat Belt Pretensioner Repair Procedures
Replacement • Be careful not to damage the pretensioner when installing the belt. 1. Remove the rear pillar trim. (Refer to Interior Trim - Rear Pillar Trim) 2. Loosen the upper anchor bolt (A) of the rear seat belt. 3. After loosening...
Test yourself
A quick Kia Soul EV Owner's Manual quiz: every answer comes with an explanation and a link to the manual page.
Was this page helpful?