Heating, Ventilation, and Air Conditioning
Heater Repair Procedures
In this manual: Heating, Ventilation, and Air Conditioning
10steps
~60min
3/5difficulty
Done 0 of 10
Replacement
- Disconnect the negative (-) battery terminal.
- Recover the refrigerant using a recovery/recycling/charging station.
- When the engine has cooled, drain the engine coolant from the radiator. (Refer to Engine Mechanical System - "Engine Coolant")
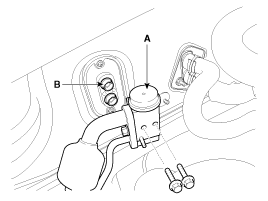
- Remove the expansion valve (A) from the evaporator core.
Tightening torque: 7.8 ~ 11.8 N·m
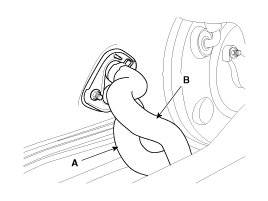
- Disconnect the heater inlet (A) and outlet (B) hoses from the heater unit.
- Remove the driver airbag module assembly. (Refer to Body - "Driver Airbag Module Assembly")
- Remove the hood crossmember assembly. (Refer to Body - "Hood Crossmember Assembly")
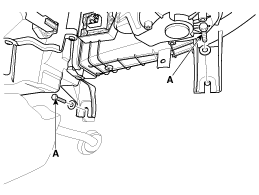
- Remove the heater and blower unit after loosening the mounting bolt (A).
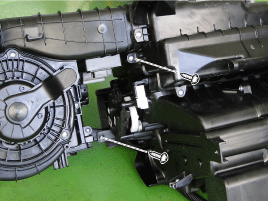
- Separate the blower unit from the heater unit by removing the 3 screws.
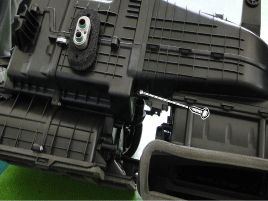
- Installation is the reverse of removal.
- If installing a new evaporator, add refrigerant oil (PAG oil).
- Replace the O-rings with new ones at each fitting and apply a thin coat of refrigerant oil before installation. Be sure to use the correct O-rings for R-134a or R-1234yf to prevent leaks.
- Close the oil container cap immediately after use and seal it to prevent moisture absorption.
- Do not spill refrigerant oil on the vehicle; it may damage the paint. If refrigerant oil gets on painted surfaces, wash it off immediately.
- Apply sealant to the bushings.
- Check that there is no air leakage.
- Charge the system and check that it operates properly.
- Do not interchange the heater inlet and outlet hoses, and make sure the hose is securely connected.
- Fill the cooling system with engine coolant.
Test yourself
A quick Kia Cee'd quiz: every answer comes with an explanation and a link to the manual page.
Was this page helpful?