Headlight Leveling Actuator Inspection
Headlight leveling actuator are integrated with the front combination light.
For the actuator inspection of the headlight auto leveling system, perform the headlight leveling actuator operation inspection..
1. Measure the voltage at each terminal is as indicated in the Terminal Voltage Lists.
If the voltage is not as specified in the Terminal Voltage Lists, inspect the parts under “Inspection item (s)”.
If the system does not work properly even though the parts or related wiring harnesses do not have any malfunction, replace the front combination light.
Terminal Voltage List (Reference)
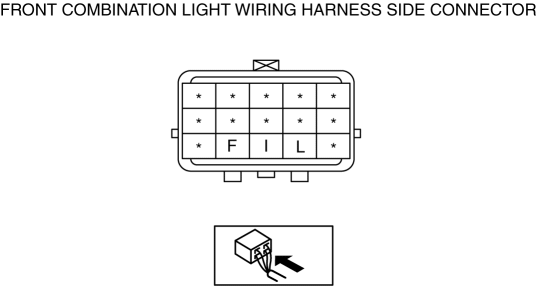
| Terminal | Signal | Connection | Test condition | Voltage (V)/Continuity | Action | |
F |
Headlight leveling actuator signal |
Headlight leveling switch |
Light switch at HEAD position |
Switch position 0 position |
approx. 10.5 |
|
Switch position 1 position |
approx. 9.2 |
|||||
Switch position 2 position |
approx. 6.2 |
|||||
Switch position 3 position |
approx. 4.9 |
|||||
I |
Headlight leveling actuator power supply |
Headlight relay (LO) |
Light switch at HEAD position |
B+ |
|
|
Light switch at OFF position |
1.0 or less |
|||||
L |
GND |
Headlight leveling switch Body ground |
Under any condition |
1.0 or less |
|
|
Test yourself
A quick Mazda 3 quiz: every answer comes with an explanation and a link to the manual page.