Steering Gear And Linkage Disassembly
To prevent damage to the steering gear, secure it to the vise using a copper plate or clean cloth.
1. Disassemble in the order indicated in the table.
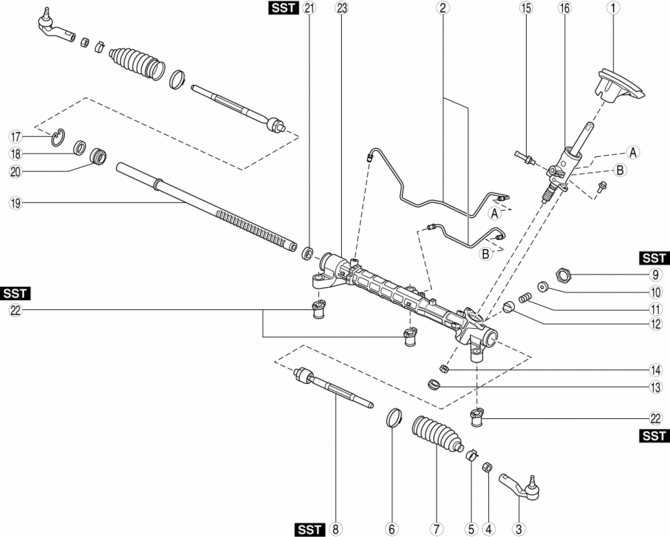
Floor seal
Oil pipe
Tie-rod end
(See Tie-rod End Disassembly Note.)
Locknut
Boot clamp
Boot band
(See Boot Band Disassembly Note.)
Boot
Tie rod
(See Tie Rod Disassembly Note.)
Locknut (on adjusting cover)
(See Locknut (on Adjusting Cover), Adjusting Cover Disassembly Note.)
Adjusting cover
(See Locknut (on Adjusting Cover), Adjusting Cover Disassembly Note.)
Yoke spring
Support yoke
Housing cover
Locknut (on pinion shaft)
Return pipe
Pinion shaft and valve housing component
Clip
Stopper
Steering rack
Rack bushing
Oil seal
(See Oil Seal Disassembly Note.)
Mounting rubber
(See Mounting Rubber Disassembly Note.)
Gear housing
Tie-rod End Disassembly Note
1. Place alignment marks as shown in the figure for proper installation.
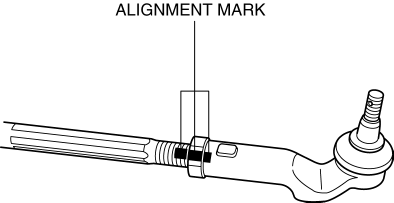
2. Remove the tie-rod end.
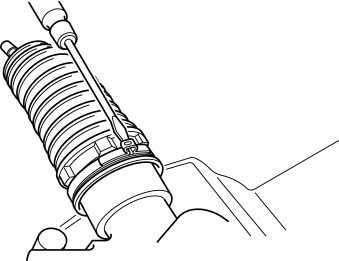
Boot Band Disassembly Note1. Insert a flathead screw driver into the boot band as shown in the figure, then press the caulked area outward to remove the boot band.
Tie Rod Disassembly Note CAUTION:
If the steering rack is secured to a vise without using a cloth, the sliding surface of the steering rack could be damaged. Always use a clean cloth when securing the steering rack to the vise.
If the steering rack is secured to a vise in the incorrect position, the steering gear could fall off the vise and be damaged during the operation. Always secure the steering rack to the vise in the proper position.
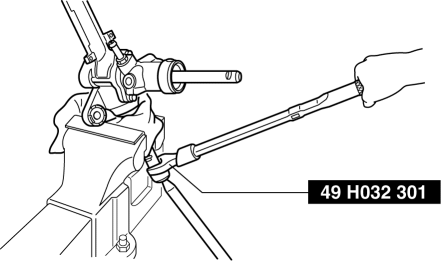
1. Protect the steering rack tooth surface using a clean cloth and secure it using a vise.
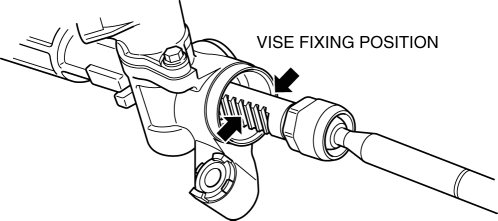
2. Remove the tie rod using the SST
.
Locknut (on Adjusting Cover), Adjusting Cover Disassembly Note 1. Remove the locknut using the SST
.
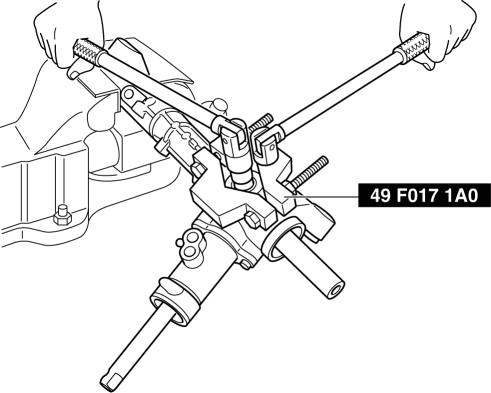
2. Remove the adjusting cover.
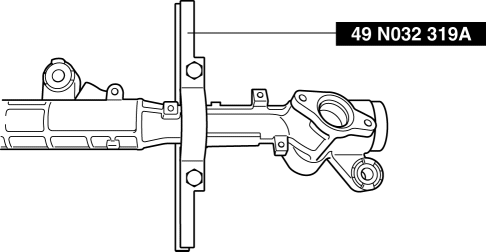
Oil Seal Disassembly Note 1. Install the SST(49 N032 319A) to the gear housing as shown in the figure.
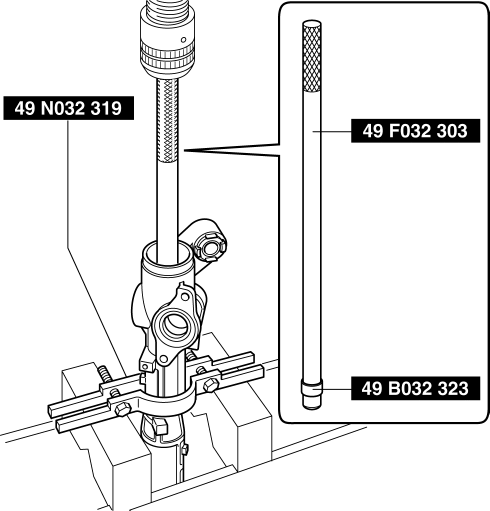
2. Insert the SSTs
(49 F032 303, 49 B032 323) into the valve housing side.
3. Remove the oil seal using the SSTsand a press.
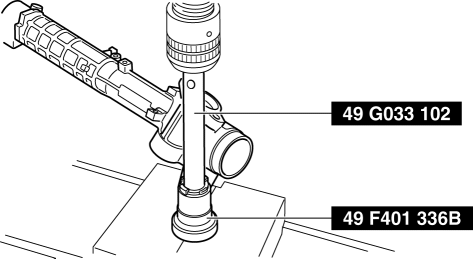
Mounting Rubber Disassembly Note 1. Remove the mounting rubber from the gear housing using the SSTs
and a press.
Test yourself
A quick Mazda 3 quiz: every answer comes with an explanation and a link to the manual page.