Steering Gear And Linkage Assembly
To prevent damage to the steering gear, secure it to the vise using a copper plate or clean cloth.
1. Assemble in the order indicated in the table.
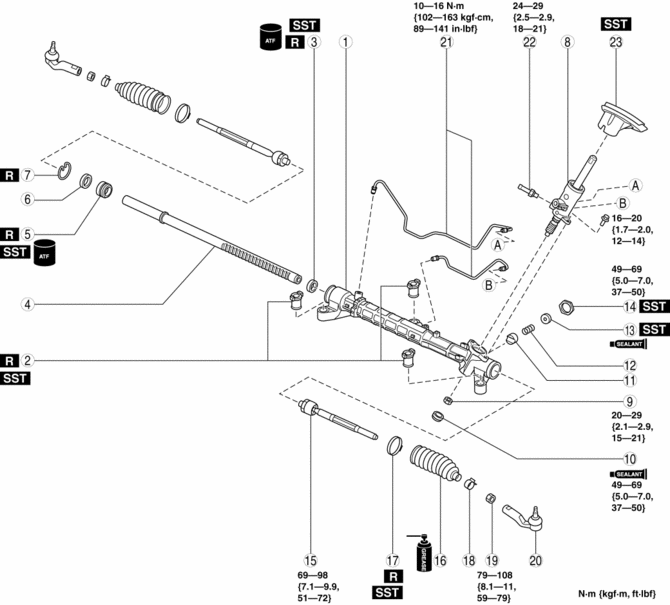
Gear housing
Mounting rubber
(See Mounting Rubber Assembly Note.)
Oil seal
(See Oil Seal Assembly Note.)
Steering rack
(See Steering Rack Assembly Note.)
Rack bushing
(See Rack Bushing, Stopper and Clip Assembly Note.)
Stopper
(See Rack Bushing, Stopper and Clip Assembly Note.)
Clip
(See Rack Bushing, Stopper and Clip Assembly Note.)
Pinion shaft and valve housing component
(See Pinion Shaft and Valve Housing Component Assembly Note.)
Locknut
Housing cover
(See Housing Cover Assembly Note.)
Support yoke
Yoke spring
Adjusting cover
(See Adjusting Cover, Locknut (on Adjusting Cover) Assembly Note.)
Locknut (on adjusting cover)
(See Adjusting Cover, Locknut (on Adjusting Cover) Assembly Note.)
Tie rod
Boot
(See Boot Assembly Note.)
Boot band
(See Boot Band Assembly Note.)
Boot clamp
Locknut
Tie-rod end
(See Tie-rod End Assembly Note.)
Oil pipe
Return pipe
Floor seal
(See Floor Seal Assembly Note.)
Mounting Rubber Assembly Note
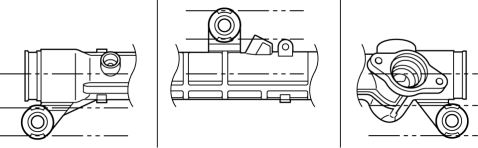
1. Apply soapy water to the rubber part of the mounting rubber.
2. Install the mounting rubber so that two projections of the mounting rubber are parallel to the steering rack as shown in the figure.
3. Press fit the ear portion of the mounting rubber (lower side) using the SSTs
until it projects from the gear housing as shown in the figure.
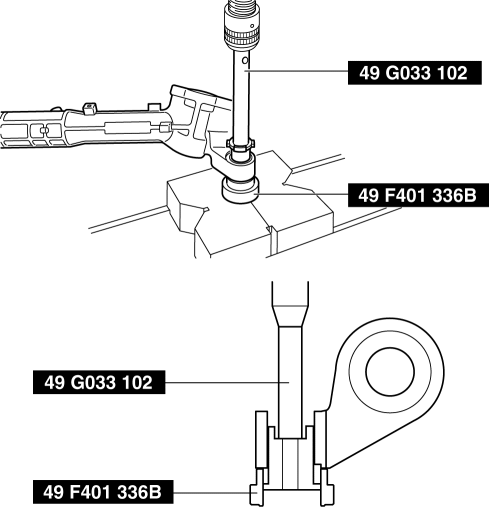
NOTE:
Press fit the ear portion of the mounting rubber (upper side) until it partially enters the gear housing.
and the press until the mounting rubber ear portion (upper side) contacts the gear housing.
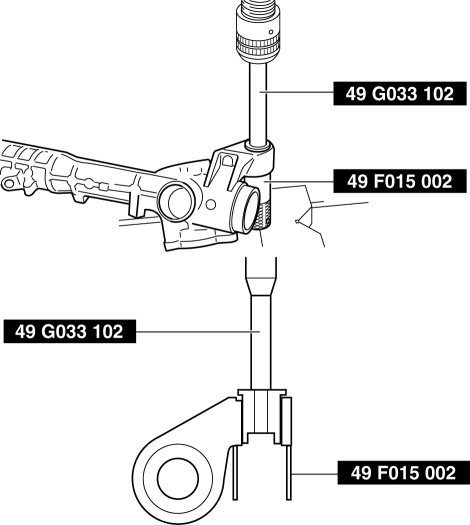
5. Verify that both mounting rubber ears are correctly assembled with no gaps between them and the gear housing as shown in the figure.
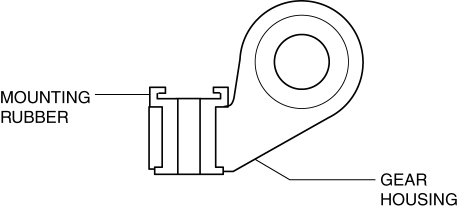
- If there are gaps, readjust their positions using the SSTs
and the press.
1. Apply ATF to the lip of a new oil seal.
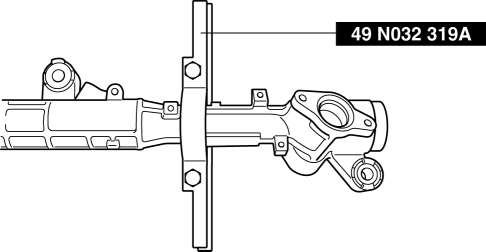
2. Install the SST(49 N032 319A) to the gear housing as shown in the figure.
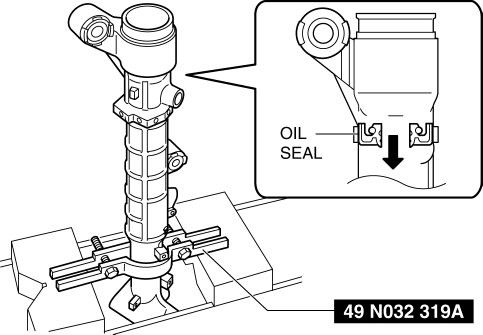
3. Set the gear housing into the press and insert the oil seal in the gear housing so that groove area is facing up as shown in the figure.
4. Set the stopper into the gear housing to hold the SSTs
as shown in the figure.
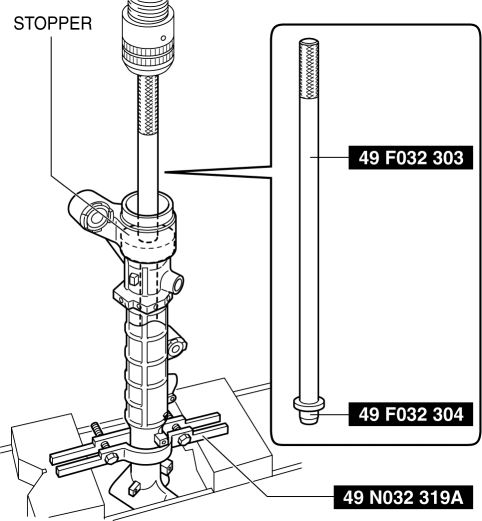
5. Install the oil seal using the SSTs
(49 F032 303, 49 F032 304) and a press.
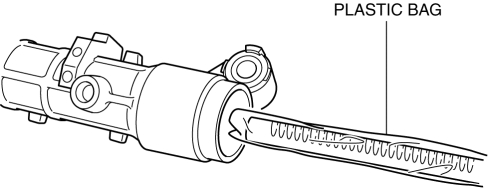
Steering Rack Assembly Note1. Apply multipurpose grease to the rack teeth.
2. Install a plastic bag to the rack teeth and insert the steering rack in the gear housing.
Rack Bushing, Stopper and Clip Assembly Note
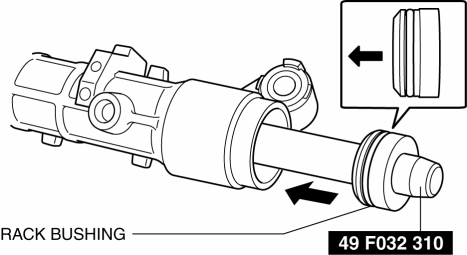
1. Apply ATF to the rack bushing.
2. After installing the SSTto the steering rack end, assemble the rack bushing to the rack housing.
NOTE:
Assemble the rack bushing so that the taper side faces the piston side of the steering rack.
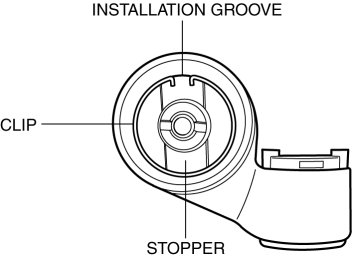
3. Insert the stopper together with the rack bushing to the rack housing so that the stopper extends past the installation groove on the rack housing.
NOTE:Assemble the stopper so that the side with the groove is facing outward.
4. Assemble the clip to the installation groove on the rack housing.
5. Perform the cylinder air tightness inspection using the following procedure.
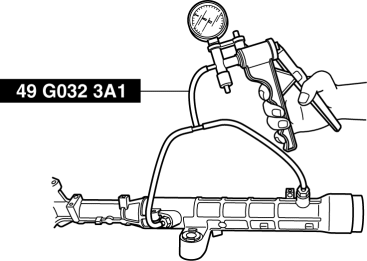
6. Install the SST
to the power cylinder section of the gear housing.
7. Apply 53.3 kPa {400 mmHg, 15.7 inHg} of vacuum with a vacuum pump and verify that it holds for 30 s.
If there is a malfunction, inspect the gear housing inner surface and the oil seal, and the rack bushing for damage, and repair or replace if necessary.
1. Set the rack in the center with the measurement between rack housing end and rack end as shown in the figure.
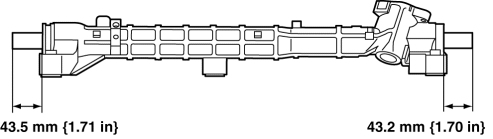
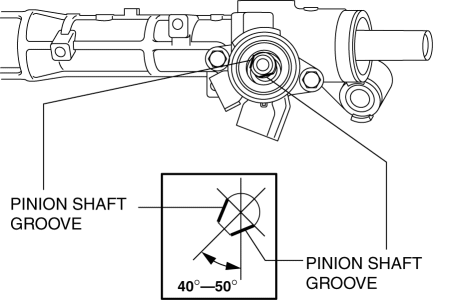
2. When the pinion shaft position is as shown in the figure with the rack in the center, insert the pinion shaft and valve housing component.
Housing Cover Assembly Note
1. Apply silicone sealant to the threads of the housing cover.
2. Assemble the housing cover.
Adjusting Cover, Locknut (on Adjusting Cover) Assembly Note1. Apply sealant to the threads of the adjusting cover.
2. Tighten the adjusting cover with a tightening torque of 20—29 N·m {2.1—2.9 kgf·m, 15—21 ft·lbf}.
3. Using the SST, loosen the adjusting cover to 25—35°.
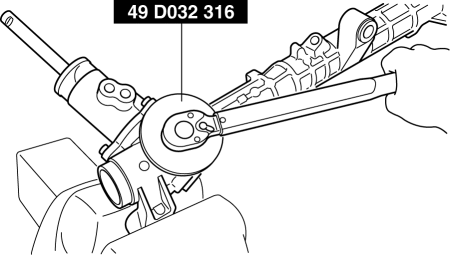
4. Fix the adjusting cover and tighten the locknut using the SST
.
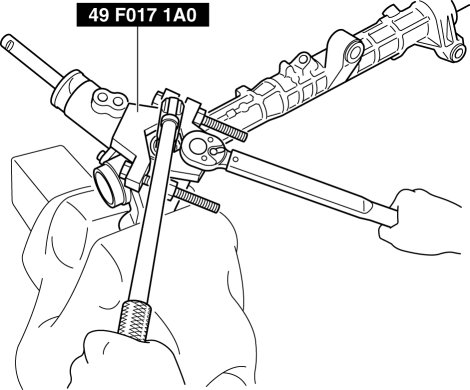
5. Measure the rotation torque of the pinion shaft using a crescent wrench and pull scale.
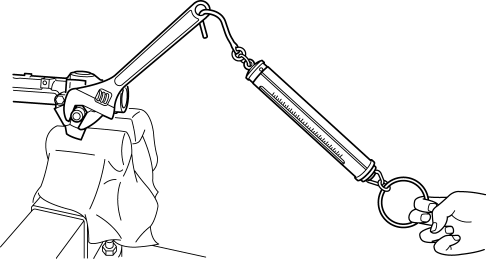
a. Install the crescent wrench to the steering gear.
b. Measure the length from the pinion shaft center to the crescent wrench end (application point of pull scale) as shown in the figure. This is dimension A.
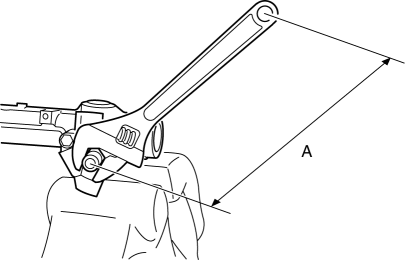
c. The rotation torque of the pinion shaft can be calculated using the following formula: Measured value using pull scale (N {kgf, lbf}) = rotation torque of the pinion shaft (N·m {kgf·cm, in·lbf})/length A (m {cm, in})
- Pinion shaft rotation torque (center of rack ± 90°)
MZR 2.0, SKYACTIV-G 2.0, MZR 2.5: 0.93—1,5 N·m {9.49—15.7 kgf·cm, 8.24—13.5 in·lbf}
[Pull scale reading: 0.93—1,5 N·m {9.49—15.7 kgf·cm, 8.24—13.5 in·lbf}/A (m {cm, in})]
MZR 2.3 DISI Turbo: 1.45—2 N·m {14.8—20.9 kgf·cm, 12.9—18.1 in·lbf}
[Pull scale reading: 1.45—2 N·m {14.8—20.9 kgf·cm, 12.9—18.1 in·lbf}/A (m {cm, in})]
6. If not as specified, remove the locknut and adjust the adjust cover.
Boot Assembly Note1. Apply silicone grease to the rubber lip groove.
2. Assemble the boot.
Boot Band Assembly Note1. Assemble the boot band to the boot.
2. Crimp the boot band using the SST.
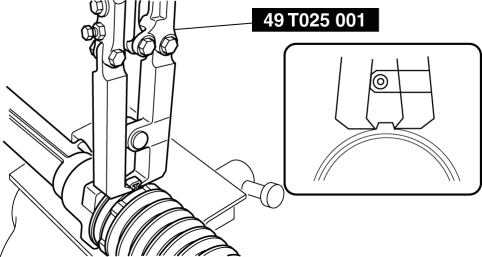
3. Rotate the boot by hand and verify that it is securely installed to the boot band.
Tie-rod End Assembly Note1. Align the alignment marks made before removing the tie-rod end, and then assemble it to the tie-rod.
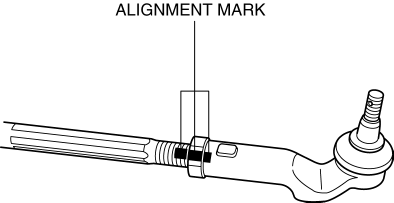
If there are no alignment marks, go to the following procedure.
2. Adjust dimension A shown in the figure to the standard, and assemble.
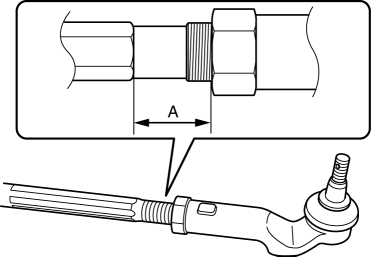
- Standard Dimension A
13—31 mm {0.6—1.2 in}
and a press, steel plate.
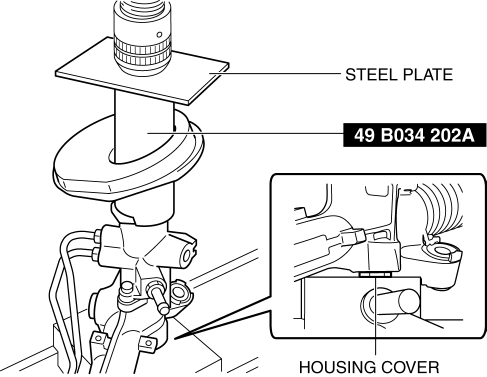
NOTE:
Set the steering gear and linkage to the press with the housing cover facing down as shown in the figure.
Test yourself
A quick Mazda 3 quiz: every answer comes with an explanation and a link to the manual page.