Timing chain
TIMING CHAIN REMOVAL/INSTALLATION
Warning- Fuel vapor is hazardous. It can very easily ignite, causing serious injury and damage. Always keep sparks and flames away from fuel.
- Fuel line spills and leakage are dangerous. Fuel can ignite and cause serious injures or death and damage. Fuel can also irritate skin and eyes. To prevent this, always complete the Fuel Line Safety Procedure. (See Fuel Line Safety Procedure.)
1. Disconnect the negative battery cable.
2. Remove the spark plugs. (See SPARK PLUG REMOVAL/INSTALLATION.)
3. Remove the tire (RH).
4. Remove the under cover.
5. Loosen the water pump pulley bolt and removal the drive belt. (See DRIVE BELT REPLACEMENT.)
6. Remove the CKP sensor. (See CRANKSHAFT POSITION (CKP) SENSOR REMOVAL/INSTALLATION.)
7. Drain the engine oil. (See ENGINE OIL REPLACEMENT.)
8. Remove the P/S oil pump with the oil hose still connected and position the P/S oil pump so that it is out of the way. (See POWER STEERING OIL PUMP REMOVAL/INSTALLATION.)
9. Remove the front drive shaft (RH) from the joint shaft. (See JOINT SHAFT REMOVAL/INSTALLATION.)
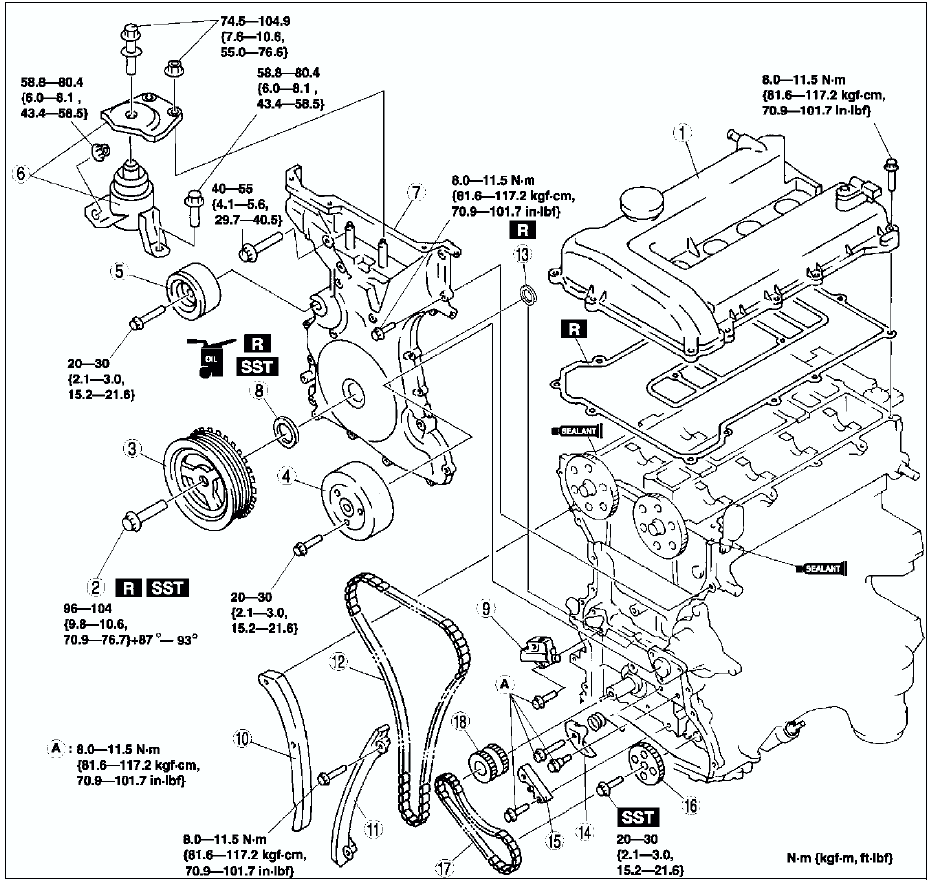
10. Remove in the order indicated in the table.
11. Install in the reverse order of removal.
12. Start the engine and:
- Inspect for the engine oil, engine coolant, transaxle oil and fuel leakage.
- Verify the ignition timing, idle speed and idle mixture. (See IGNITION TIMING INSPECTION.) (See IDLE MIXTURE INSPECTION.)
13. Perform a road test.
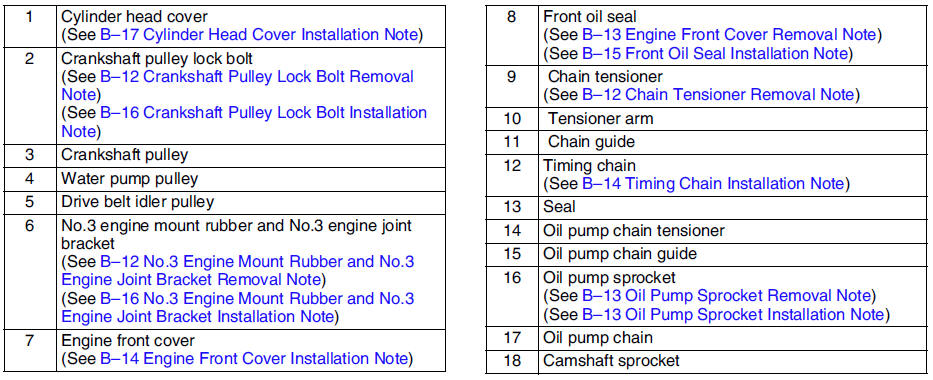
Crankshaft Pulley Lock Bolt Removal Note
1. Remove the cylinder block lower blind plug.
2. Install the SST.
3. Turn the crankshaft clockwise the crankshaft is in the No.1 cylinder TDC position.
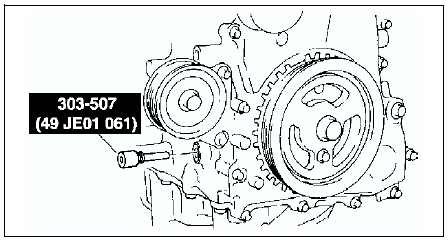
4. Hold the crankshaft pully by using the SSTs
.
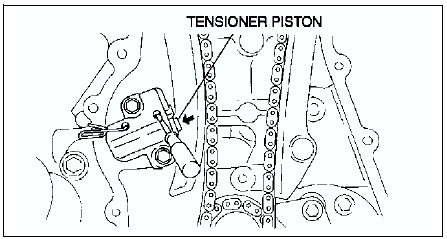
Chain Tensioner Removal Note
1. Using a thin screwdriver, hold the chain tensioner ratchet lock mechanism away from the ratchet stem.
2. Slowly compress the tensioner piston.
3. Hold the tensioner piston using a 1.5 mm {0.059 in}wire or paper clip.
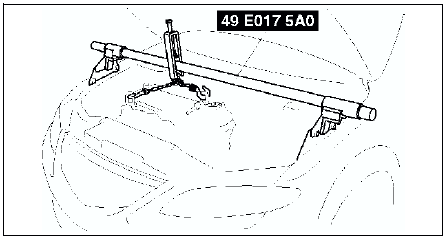
No.3 Engine Mount Rubber and No.3 Engine Joint Bracket Removal Note Suspend the engine using the SSTs
.
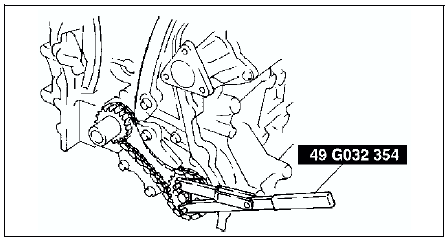
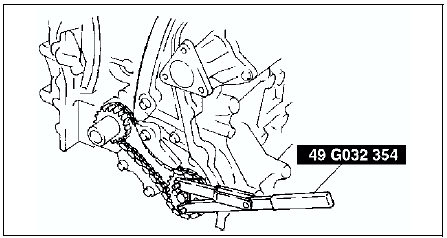
Oil Pump Sprocket Removal Note Hold the oil pump sprocket by using the SST
.
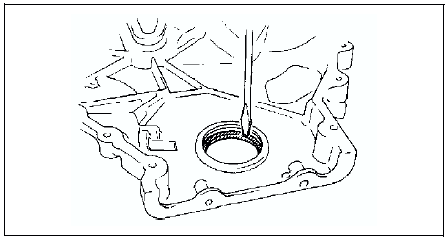
Engine Front Cover Removal Note
Remove the oil seal using a screwdriver as shown.
Oil Pump Sprocket Installation Note Hold the oil pump sprocket by using the SST
.
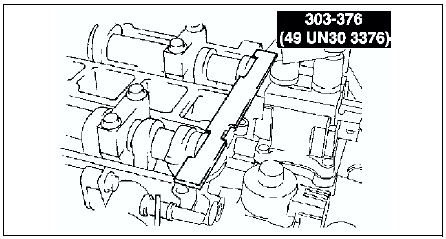
Timing Chain Installation Note Install the SST
to the camshaft as shown.
European countries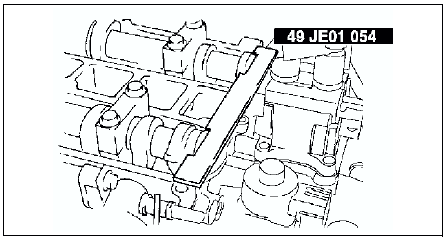
Except European countries
2. Install the timing chain.
3. Remove the retaining wire or paper clip from the auto tensioner to apply tension to the timing chain.
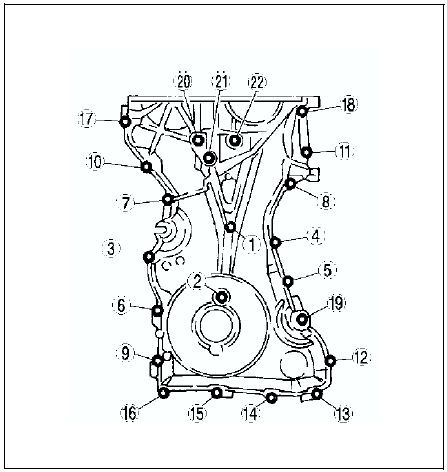
Engine Front Cover Installation Note1. Apply silicone sealant to the engine front cover as shown.
Caution- Install the cylinder head cover within 10 minutes of applying the silicone sealant.
- Silicone sealant is not need in area C as indicated below due to an existing. (L3)
Thickness
A: 2.0-3.0 mm {0.079-0.118 in} B: 1.5-2.5 mm {0.059-0.098 in}
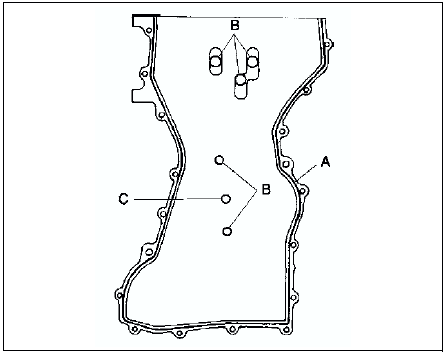
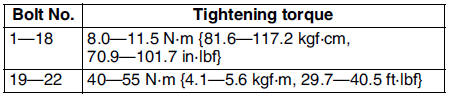
2. Install the cylinder head cover bolts in the order as shown.
Front Oil Seal Installation Note
1. Apply clean engine oil to the oil seal.
2. Push the oil seal slightly in by hand.
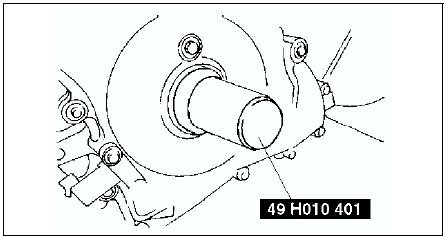
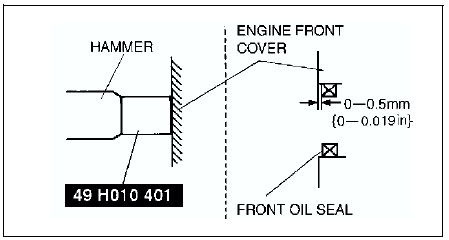
3. Compress the oil seal using the SSTand a hammer.
No.3 Engine Mount Rubber and No.3 Engine Joint Bracket Installation Note
1. Tighten the stud bolt of the No.3 engine mount bracket.
Tightening torque: 7.0-13 N·m {71.4-132.5 kgf·cm, 62.0-115.0 in·lbf}
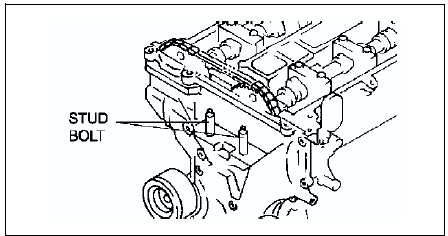
2. Install the No.3 engine mount rubber hand-tighten.
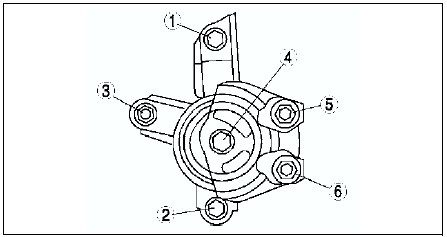
3. Tighten the No.3 engine joint bracket is attached and bolts, nuts in the order shown.
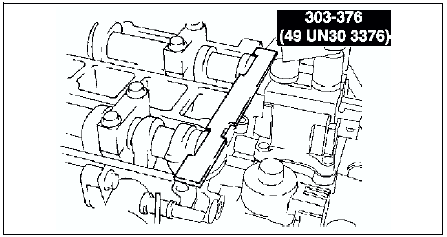
Crankshaft Pulley Lock Bolt Installation Note 1. Install the SST
to the camshaft as shown.
European countries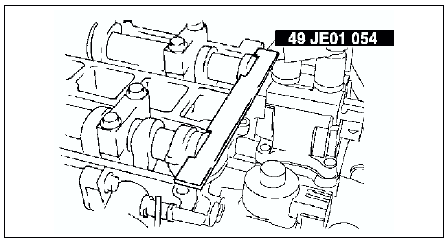
Except European countries
2. Install the M6 x 1.0 bolt
in by hand.
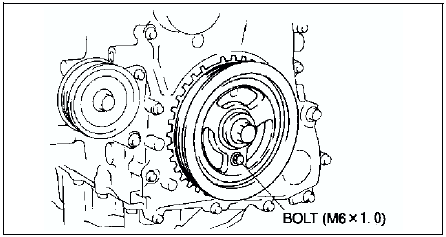
3. Turn the crankshaft clockwise the crankshaft is in the No.1 cylinder TDC position.
4. Hold the crankshaft pully by using the SST.
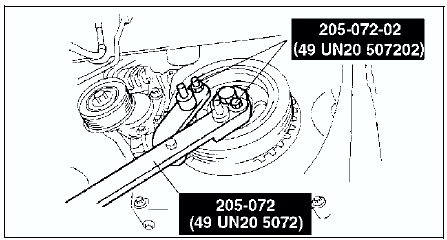
5. Tighten the crankshaft pulley lock bolt using the following two steps.
(1) Tighten to 96-104 N·m {9.8-10.6 kgf·m, 70.9-76.7 ft·lbf} (2) Tighten 87°-93°
6. Remove the M6 x 1.0 bolt.
7. Remove the SSTfrom the camshaft.
8. Remove the SSTfrom the cylinder block lower blind plug.
9. Rotate the crankshaft clockwise two turns until the TDC position.
- If not aligned, loosen the crankshaft pulley lock bolt and repeat from Step 1.
10. Install the cylinder block lower blind plug.
Tightening torque: 18-22 N·m {1.9-2.2 kgf·m, 13.3-16.2 ft·lbf}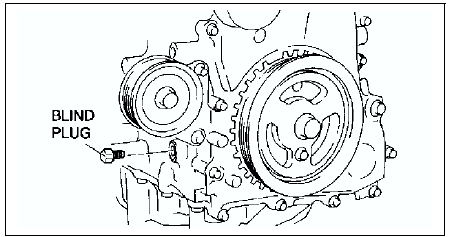
Cylinder Head Cover Installation Note
1. Apply silicone sealant to the mating faces as shown.
Caution- Install the cylinder head cover within 10 minutes of applying the silicone sealant.
Dot diameter:
4.0-6.0 mm {0.16-0.23 in}
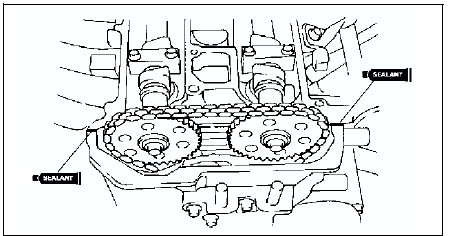
2. Install the cylinder head cover with a new gasket.
3. Tighten the bolts in the order shown.
Tightening torque: 8.0-11.5 N·m {81.6-122.3 kgf·cm, 70.9-106.2 in·lbf}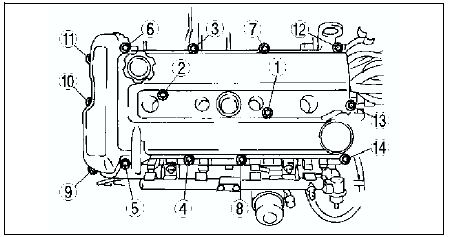
Test yourself
A quick Mazda 6 quiz: every answer comes with an explanation and a link to the manual page.