Battery
Exploded View
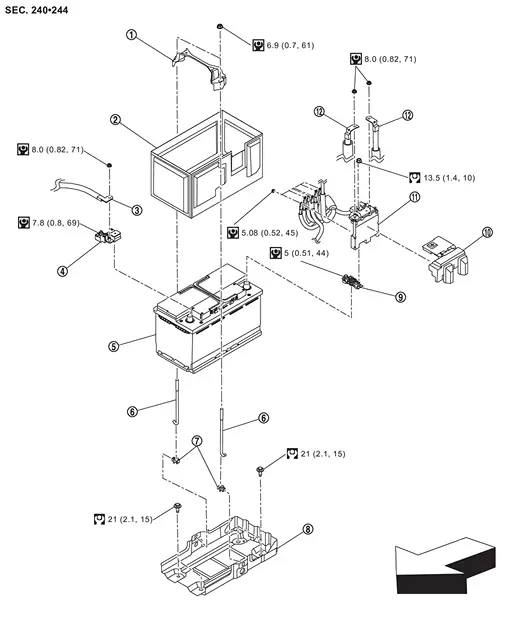
Without ProPILOT ASSIST 2.1
 |
Battery fix frame |  |
Battery cover |  |
Negative cable |
 |
Battery current sensor |  |
12V battery |  |
Battery fix rod |
 |
Battery fix rod clip |  |
Battery tray |  |
Battery positive terminal |
 |
Battery positive terminal cover |  |
Battery terminal with fusible link |  |
Positive cable |
 |
: N·m (kg-m, in-lb) | ||||
 |
: N·m (kg-m, ft-lb) | ||||
| : vehicle front |
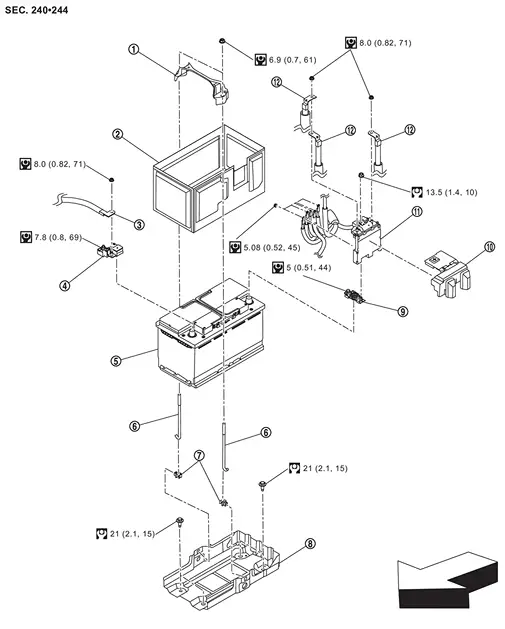
With ProPILOT ASSIST 2.1
|
Battery fix frame | |
Battery cover | |
Negative cable |
|
Battery current sensor | |
12V battery | |
Battery fix rod |
|
Battery fix rod clip | |
Battery tray | |
Battery positive terminal |
|
Battery positive terminal cover | |
Battery terminal with fusible link | |
Positive cable |
|
: N·m (kg-m, in-lb) | ||||
|
: N·m (kg-m, ft-lb) | ||||
| : vehicle front |
Removal and Installation
If the cumulative value is not erased when replacing the battery, the accurate diagnoses cannot be made because it was added to the cumulative value before the battery replacement.
REMOVAL
Remove reservoir tank support bracket. Refer to RADIATOR : Removal & Installation.
Disconnect the 12V battery cable from the negative terminal.
Disconnect the 12V battery cable from the positive terminal.
Remove battery fix frame mounting nuts  and battery fix frame .

Remove 12V battery.
Remove battery tray mounting bolts .
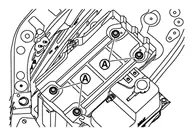
Remove battery tray.
INSTALLATION
Install in the reverse order of removal.
To prevent damage to the parts, connect the 12V battery cable to the positive terminal first.
After connecting 12V battery cables, to securely supply 12V battery voltage, ensure that they are tightly clamped to 12V battery terminals for good contact.
To securely supply 12V battery voltage, check 12V battery terminal for poor connection caused by corrosion.