Electrical & Power Control
Battery Terminal with Fusible Link
In this manual: Electrical & Power Control
~1min read
Exploded View
Without ProPILOT ASSIST 2.1
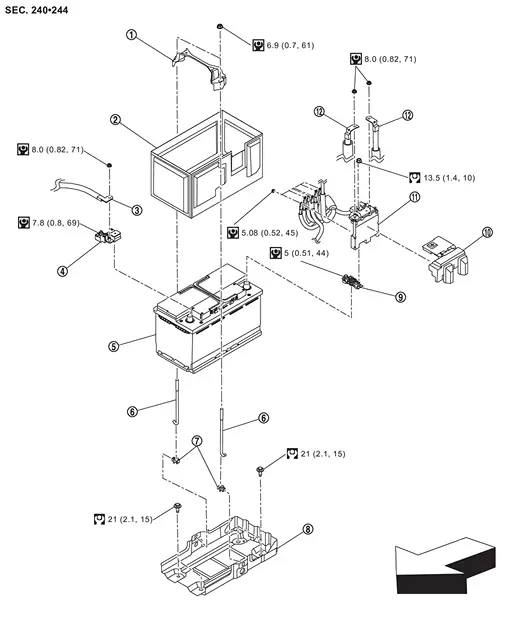
 |
Battery fix frame |  |
Battery cover |  |
Negative cable |
 |
Battery current sensor |  |
12V battery |  |
Battery fix rod |
 |
Battery fix rod clip |  |
Battery tray |  |
Battery positive terminal |
 |
Battery positive terminal cover |  |
Battery terminal with fusible link |  |
Positive cable |
 |
: N·m (kg-m, in-lb) | ||||
 |
: N·m (kg-m, ft-lb) | ||||
| : vehicle front |
With ProPILOT ASSIST 2.1
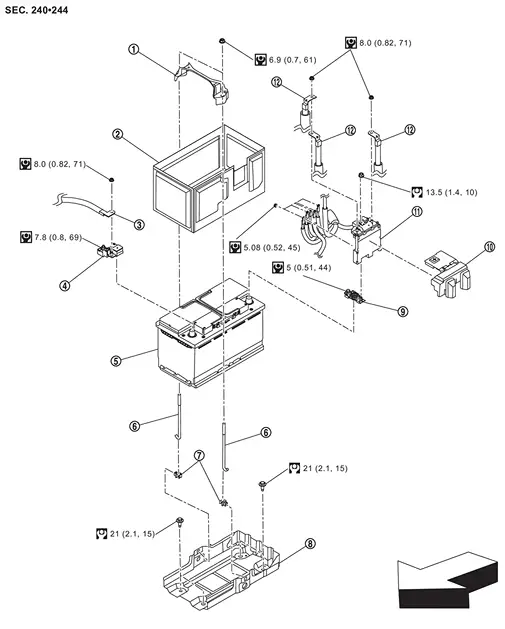
|
Battery fix frame | |
Battery cover | |
Negative cable |
|
Battery current sensor | |
12V battery | |
Battery fix rod |
|
Battery fix rod clip | |
Battery tray | |
Battery positive terminal |
|
Battery positive terminal cover | |
Battery terminal with fusible link | |
Positive cable |
|
: N·m (kg-m, in-lb) | ||||
|
: N·m (kg-m, ft-lb) | ||||
| : vehicle front |
Removal and Installation
REMOVAL
Disconnect the battery cable from the negative terminal. Refer to Exploded View.
Remove the battery positive terminal cover.
Remove positive cable mounting nuts  , and then disconnect the positive cables
 from the battery terminal with fusible link .
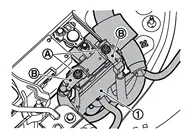
Remove battery terminal with fusible link mounting nut , and then remove the battery terminal with fusible link .

Remove cable mounting nuts , and then disconnect the cable ,  ,
 ,
 ,
 and
 from the battery terminal with fusible link .
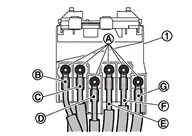
|
Red | |
Blue | |
Brown |
|
Green | |
White | |
Gray* |
| *: Without ProPILOT ASSIST 2.1 | |||||
INSTALLATION
Install in the reverse order of removal.
Was this page helpful?