Front
Exploded View
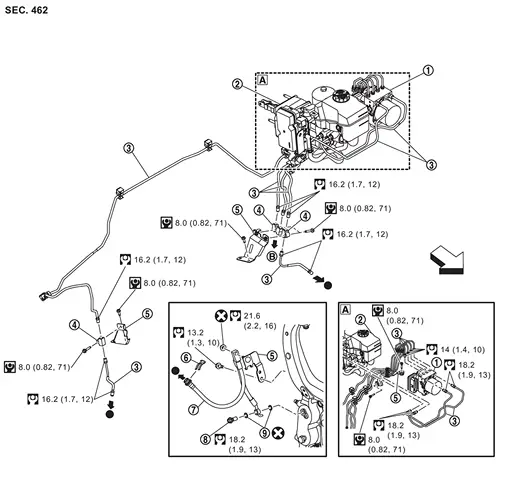
 |
ABS actuator and electric unit (control unit) |  |
Electrical brake control unit |  |
Brake tube |
 |
Connector |  |
Bracket |  |
Lock plate |
 |
Brake hose |  |
Union bolt |  |
Copper washer |
 |
To rear brake tube. Refer to Exploded View. | ||||
| : vehicle front | |||||
 |
: N·m (kg-m, ft-lb) | ||||
 |
: N·m (kg-m, in-lb) | ||||
 |
: Always replace after every disassembly. | ||||
 |
: Indicates that the part is connected at points with same symbol in actual vehicle. | ||||
Hydraulic Piping
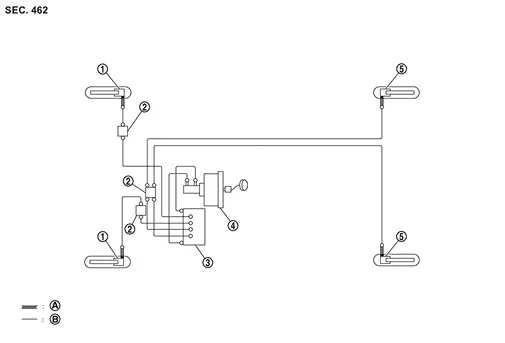
|
Front disc brake | |
Connector | |
ABS actuator and electric unit (control unit) |
|
Electrical brake control unit | |
Rear disc brake | ||
 |
Brake hose | |
Brake tube | ||
 |
: Flare nut | ||||
 |
: Union bolt | ||||
Removal and Installation
REMOVAL
Remove tires. Refer to ROAD WHEEL TIRE : Removal & Installation.
Perform the advance preparation "(Air release) Accumulator pressure release" using CONSULT. Refer to Work Procedure.
Drain brake fluid. Refer to Draining.
Loosen the flare nut with a flare nut wrench (A) and separate the brake tube from the brake hose .
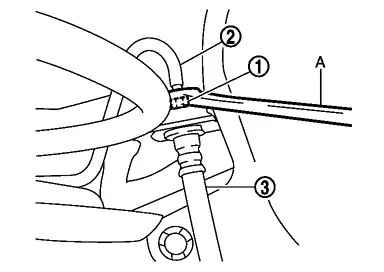
Remove the union bolt and copper washers .
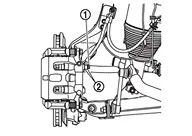
Remove the mounting nut , and remove brake hose from the brake caliper assembly .
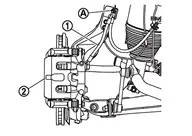
Remove the lock plate and remove the brake hose .
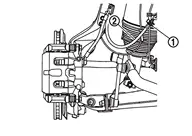
INSTALLATION
Assemble the union bolt and the copper washer to the brake hose .
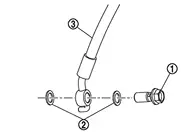
Install the brake hose L-pin by aligning it with the brake caliper assembly positioning hole , and tighten the union bolt to the specified torque. Refer to Exploded View.
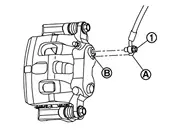
Install the brake hose to the bracket , and install the mounting nut .

Install the brake tube to the brake hose , temporarily tighten the flare nut by hand until it does not rotate further, and fix the brake hose to the bracket with the lock plate .
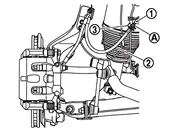
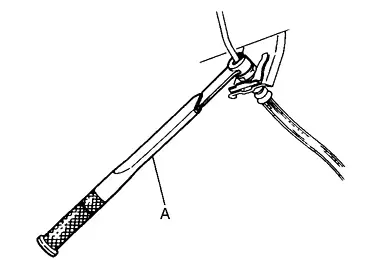
Tighten the flare nut to the specified torque with a flare nut torque wrench (A). Refer to Exploded View.
Refill with new brake fluid and perform the air bleeding. Refer to Work Procedure.
Install tires. Refer to ROAD WHEEL TIRE : Removal & Installation.
Perform inspection after installation. Refer to Inspection.
Inspection
INSPECTION AFTER INSTALLATION
Check the brake hoses and tubes for the following: no scratches; no twist and deformation; no interference with other components when steering the steering wheel; no looseness at connections.
*: Fuel, engine coolant and lubricant are quantity to specified. Spare tire, jack, hand tools and mats are brought out of vehicle.
Depress the brake pedal with a force of 785 N (80 kg, 176 lb) and hold down the pedal for approximately 5 seconds with the engine running. Check for any fluid leakage.