Front Oil Seal
Exploded View
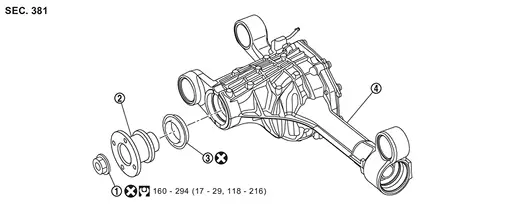
 |
Drive pinion lock nut |  |
Companion flange |  |
Front oil seal |
 |
Front final drive assembly | ||||
 : N·m (kg-m, ft-lb) |
|||||
 : Always replace after every disassembly. |
|||||
Removal and Installation
REMOVAL
Identification stamp of replacement frequency of front oil seal
The diagonally shaded area in the figure shows stamping point for replacement frequency of front oil seal.
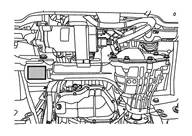
The following table shows if collapsible spacer replacement is needed before replacing front oil seal.
When collapsible spacer replacement is required, disassemble final drive assembly to replace collapsible spacer and front oil seal. Refer to Disassembly and Assembly.
Stamp Collapsible spacer replacement No stamp Not required “0” or “0” on the far right of stamp Required “01” or “1” on the far right of stamp Not required After replacing front oil seal, make a stamping on the stamping point in accordance with the table below in order to identify replacement frequency.
Stamp before stamping Stamping on the far right Stamping No stamp 0 0 “0”
(Front oil seal was replaced once.)1 01 “01”
(Collapsible spacer and front oil seal were replaced last time.)0 010 “0” is on the far right.
(Only front oil seal was replaced last time.)1 ...01 “1” is on the far right.
(Collapsible spacer and front oil seal were replaced last time.)0 ...010
Make a judgment if a collapsible spacer replacement is required.
Drain gear oil. Refer to Draining.
Remove both front drive shafts. Refer to Removal and Installation.
Remove stabilizer clamp. Refer to Removal and Installation.
Remove front propeller shaft.
Refer to Removal and Installation.
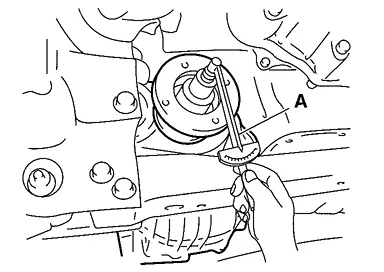
Measure the total preload with the preload gauge (A) [SST: ST3127S000 (NI-25765-A)].
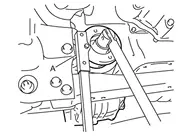
While holding companion flange with the wrench (A) (commercial service tool), remove drive pinion lock nut.
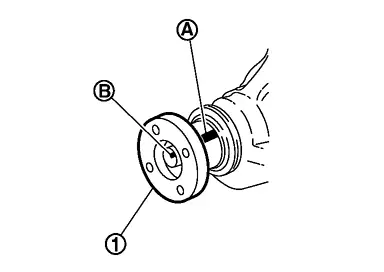
Put matching mark  on the end of the drive pinion. The matching mark should be in line with the matching mark
 on companion flange .
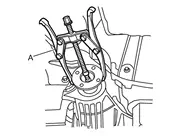
Remove companion flange using puller (A) (commercial service tool).
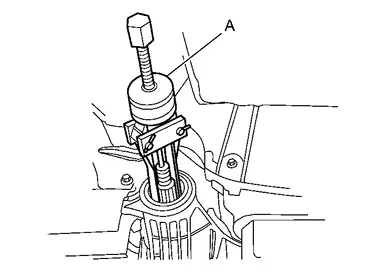
Remove front oil seal using puller (A) [SST: KV381054S0 (NI-34286)].
INSTALLATION
Drive the front oil seal in evenly using drifts (A and B).
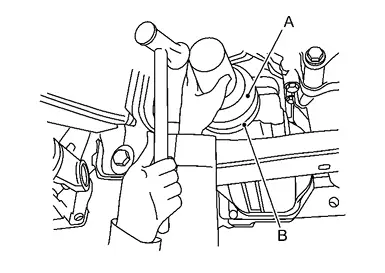
| A | : Drift [SST: ST30720000 (NI-25405)] |
| B | : Drift [SST: ST27863000 ( — )] |
Align the matching mark of drive pinion with the matching mark of companion flange , then install the companion flange.
Temporarily tighten drive pinion lock nut to drive pinion.
While holding companion flange with the flange wrench (A) (commercial service tool), tighten drive pinion lock nut within the limits of specified torque so as to keep the bearing preload within a standard values, using preload gauge (B) [SST: ST3127S000 (NI-25765-A)].
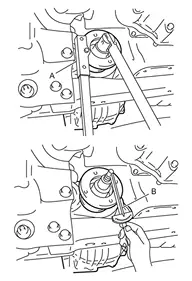
| Total preload torque | : A value that add 0.1 – 0,4 N·m to the measured value before removing. |
| Drive pinion lock nut tightening torque | : Refer to Exploded View. |
Make a stamping for identification of front oil seal replacement frequency. Refer to “Identification stamp of replacement frequency of front oil seal”.
Install front propeller shaft.
Refer to Removal and Installation.
Install both front drive shafts. Refer to Removal and Installation.
Refill gear oil to the final drive. Refer to Refilling.
Perform inspection after installation. Refer to Inspection.
Inspection
INSPECTION AFTER INSTALLATION
Check oil level and final drive for oil leakage. Refer to Inspection.