Radiator
Exploded View
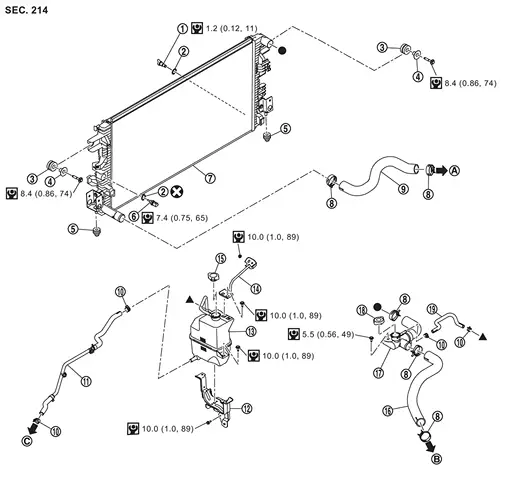
 |
Radiator drain cock |  |
O-ring |  |
Mounting rubber (upper) |
 |
Collar |  |
Mounting rubber (lower) |  |
Engine coolant temperature sensor 2 |
 |
Radiator |  |
Clamp |  |
Radiator hose (lower) |
 |
Clamp |  |
Reservoir tank tube |  |
Reservoir tank bracket |
 |
Reservoir tank |  |
Reservoir tank support bracket |  |
Reservoir tank cap |
 |
Radiator hose (upper) |  |
Radiator pipe assembly |  |
Radiator cap |
 |
Reservoir tank hose | ||||
 |
To water pipe 2. Refer to Exploded View. |  |
To multi-way control valve. Refer to MULTI-WAY CONTROL VALVE : Exploded View. |  |
To water pipe 2. Refer to Exploded View. |
 |
: N·m (kg-m, in-lb) | ||||
 |
: Always replace after every disassembly. | ||||
 , Indicates that the part is connected at points with same symbol in actual vehicle. |
|||||
Removal & Installation
REMOVAL
Remove front under cover using a power tool. Refer to Removal and Installation.
Drain engine coolant. Refer to ENGINE COOLANT : Draining.
Discharge refrigerant from A/C circuit. Refer to Recycle Refrigerant.
Remove front bumper fascia.
OFF ROAD MODELS: Refer to Removal and Installation.
CITY MODELS: Refer to Removal and Installation.
Remove cooling fan assembly. Refer to ENGINE COOLING FAN : Removal & Installation.
Remove mounting bolt of the radiator pipe assembly .
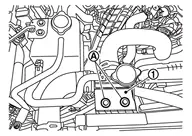
Remove radiator hose lower .

| : vehicle front |
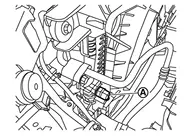
Disconnect engine coolant temperature sensor 2 harness connector .
Remove radiator air guide RH and radiator air guide LH  .
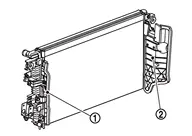
Disconnect refrigerant pressure sensor harness connector .
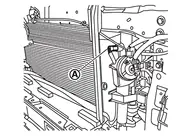
Remove condenser outlet pipe and condenser inlet pipe. Refer to Exploded View.
Remove radiator and condenser as a set.
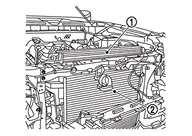
Remove condenser from the radiator.
INSTALLATION
Note the following, and install in the reverse order of removal.
RADIATOR : Inspection (Removal & Installation)
INSPECTION AFTER INSTALLATION
Check for leakage of engine coolant using the radiator cap tester adapter (commercial service tool) and the radiator cap tester (commercial service tool). Refer to ENGINE COOLANT : Inspection.
Start and warm up the engine. Visually check that there is no leakage of engine coolant.