Radiator
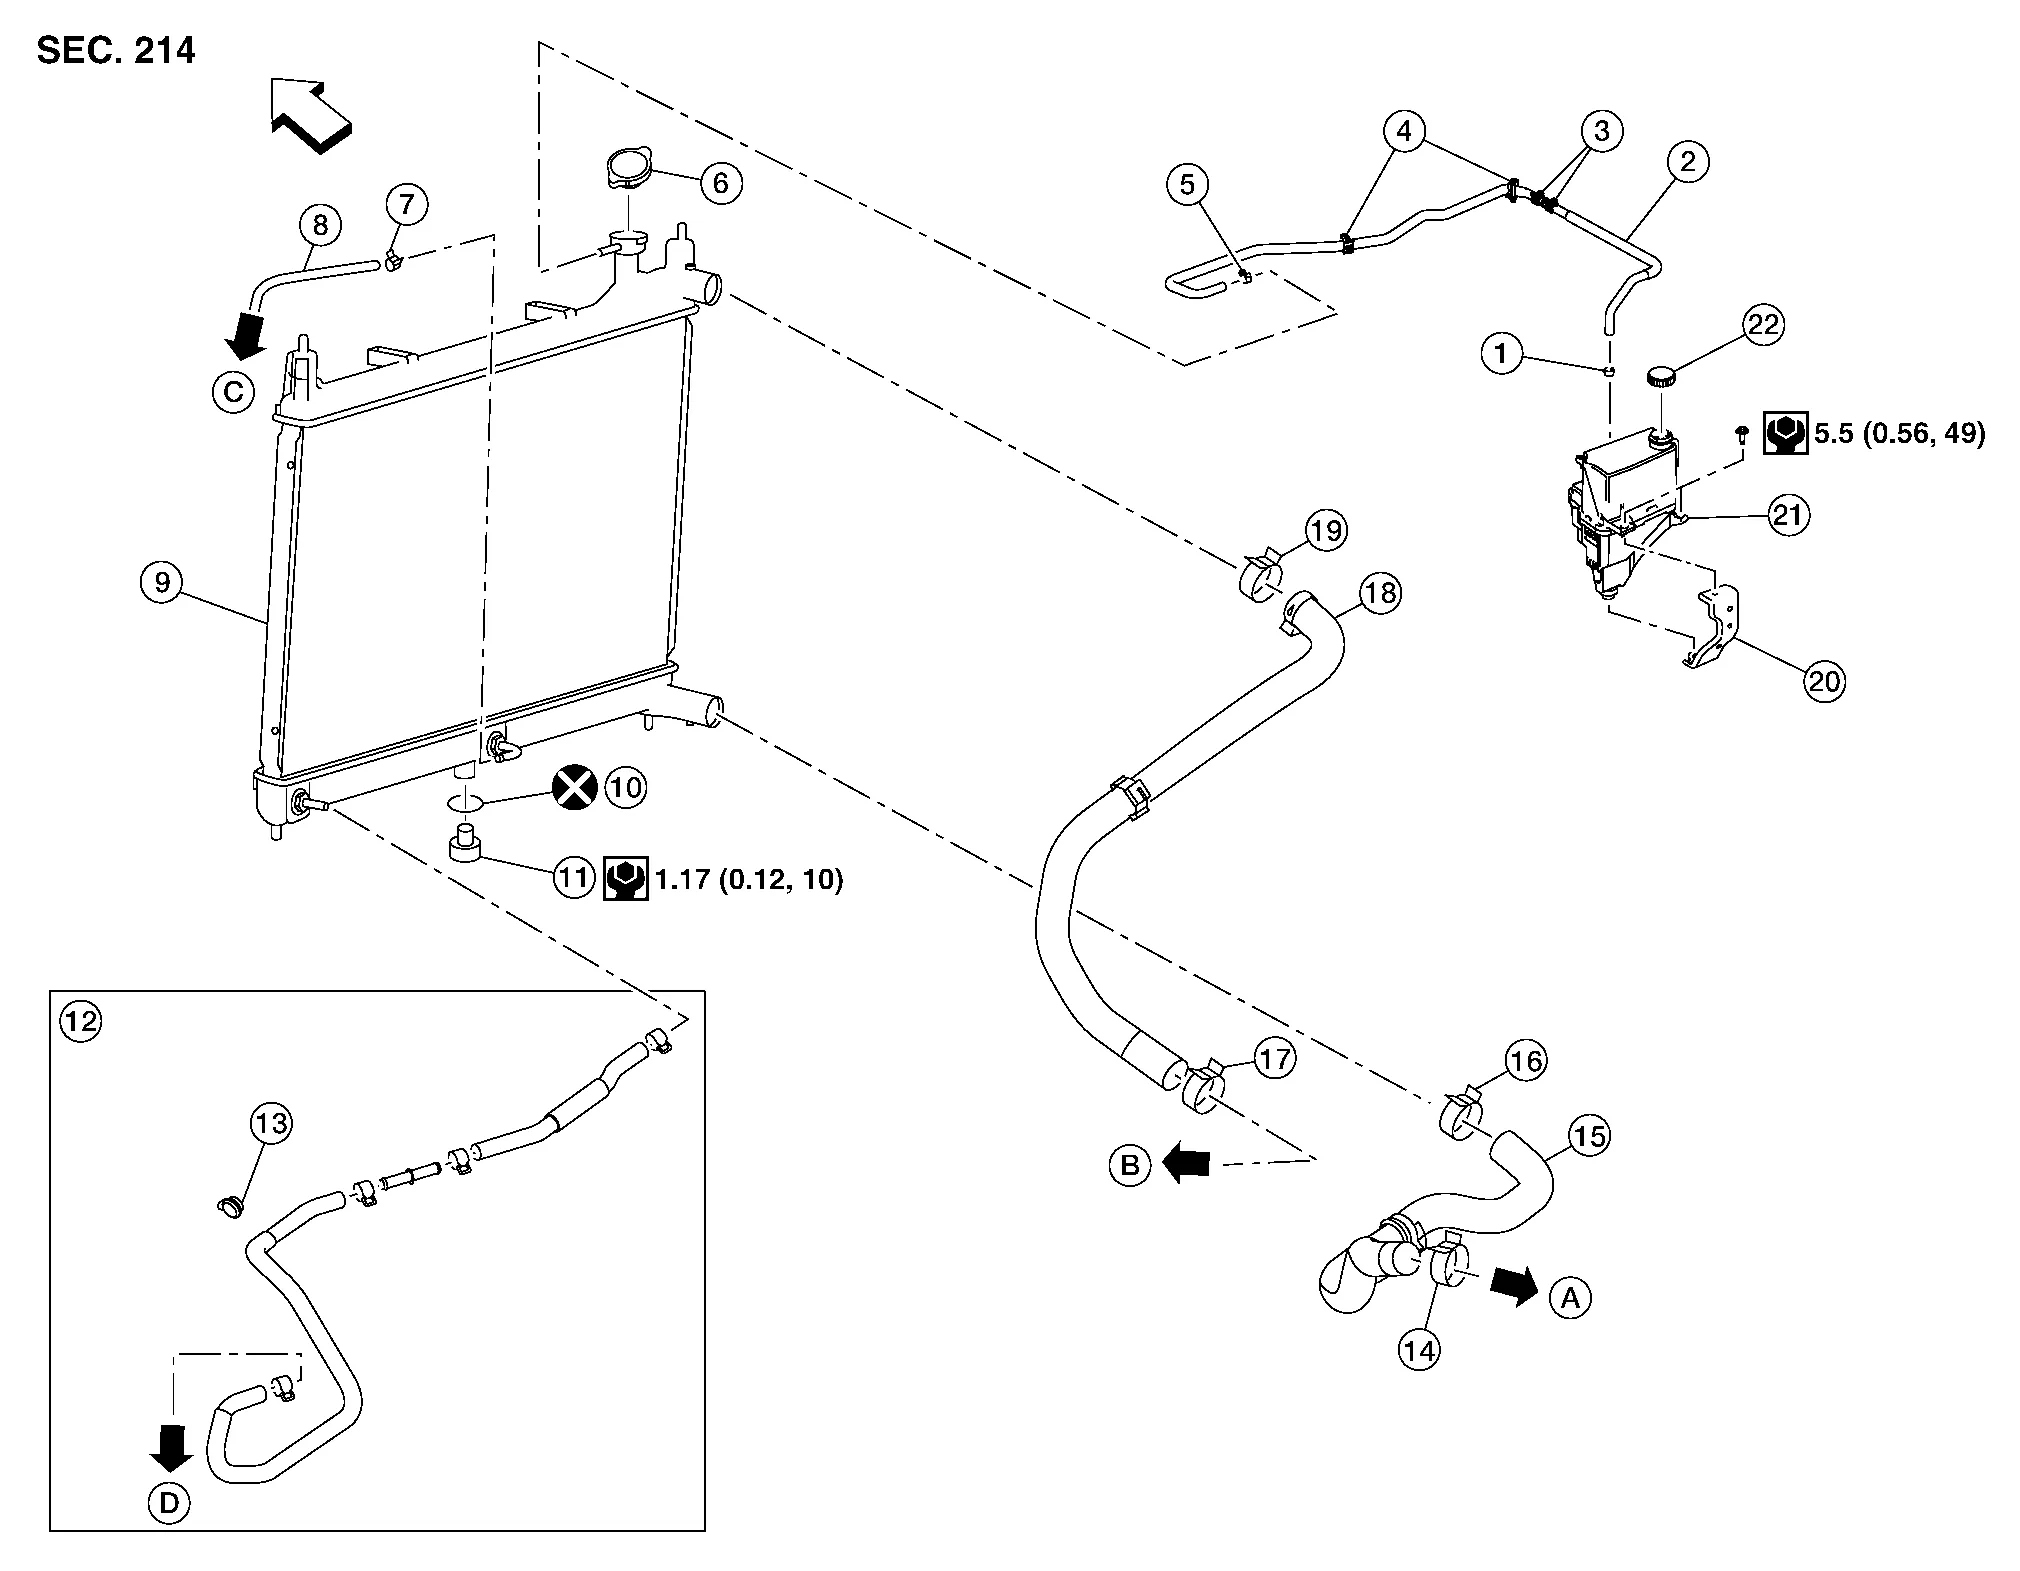
| 1. | Clamp | 2. | Reservoir tank hose | 3. | Clamp |
| 4. | Clip | 5. | Clamp | 6. | Radiator cap |
| 7. | Clamp | 8. | CVT fluid cooler hose A | 9. | Radiator |
| 10. | O-ring | 11. | Radiator drain plug | 12. | CVT fluid cooler hose B |
| 13. | Retainer | 14. | Clamp | 15. | Radiator hose (lower) |
| 16. | Clamp | 17. | Clamp | 18. | Radiator hose (upper) |
| 19. | Clamp | 20. | Reservoir tank bracket | 21. | Reservoir tank |
| 22. | Reservoir tank cap | A. | To water inlet. Refer to Exploded View. | B. | To water outlet. Refer to Exploded View. |
| C. | To CVT oil warmer. Refer to Exploded View. | D. | To CVT oil warmer. Refer to Exploded View. |  |
Front |
REMOVAL
Drain engine coolant from radiator. Refer to Changing Engine Coolant.
Remove front under cover. Refer to Removal and Installation.
Remove front air duct. Refer to Removal and Installation.
Disconnect coolant reservoir hose from the radiator.
Remove the front wheel and tire (RH) using power tool. Refer to Removal and Installation.
Remove the fender protector (LH/RH). Refer to Removal and Installation.
Disconnect radiator hose (upper) and radiator hose (lower) from the radiator.
Remove active grille shutter. Refer to Removal and Installation.
Remove harness connector from ICC sensor. Refer to Exploded View.
Disconnect CVT fluid cooler hose A from radiator.
Disconnect CVT fluid cooler hose B from radiator.
Disconnect hood lock switch and cable. Refer to Removal and Installation.
Remove harness connector from ambient temperature sensor.
Remove the hood lock assembly. Refer to Exploded View.
Remove the front bumper fascia. Refer to Exploded View.
Remove the core support center brace.
Remove A/C condenser. Refer to Removal and Installation.
Remove the radiator mounts (upper).
Remove radiator.
Replace radiator cap (if necessary).
INSTALLATION
Installation is in the reverse order of removal.
After installation, refill engine coolant and check for leaks. Refer to Changing Engine Coolant and System Inspection.
After installation, inspect CVT fluid level. Refer to Inspection.