Water Outlet and Water Piping
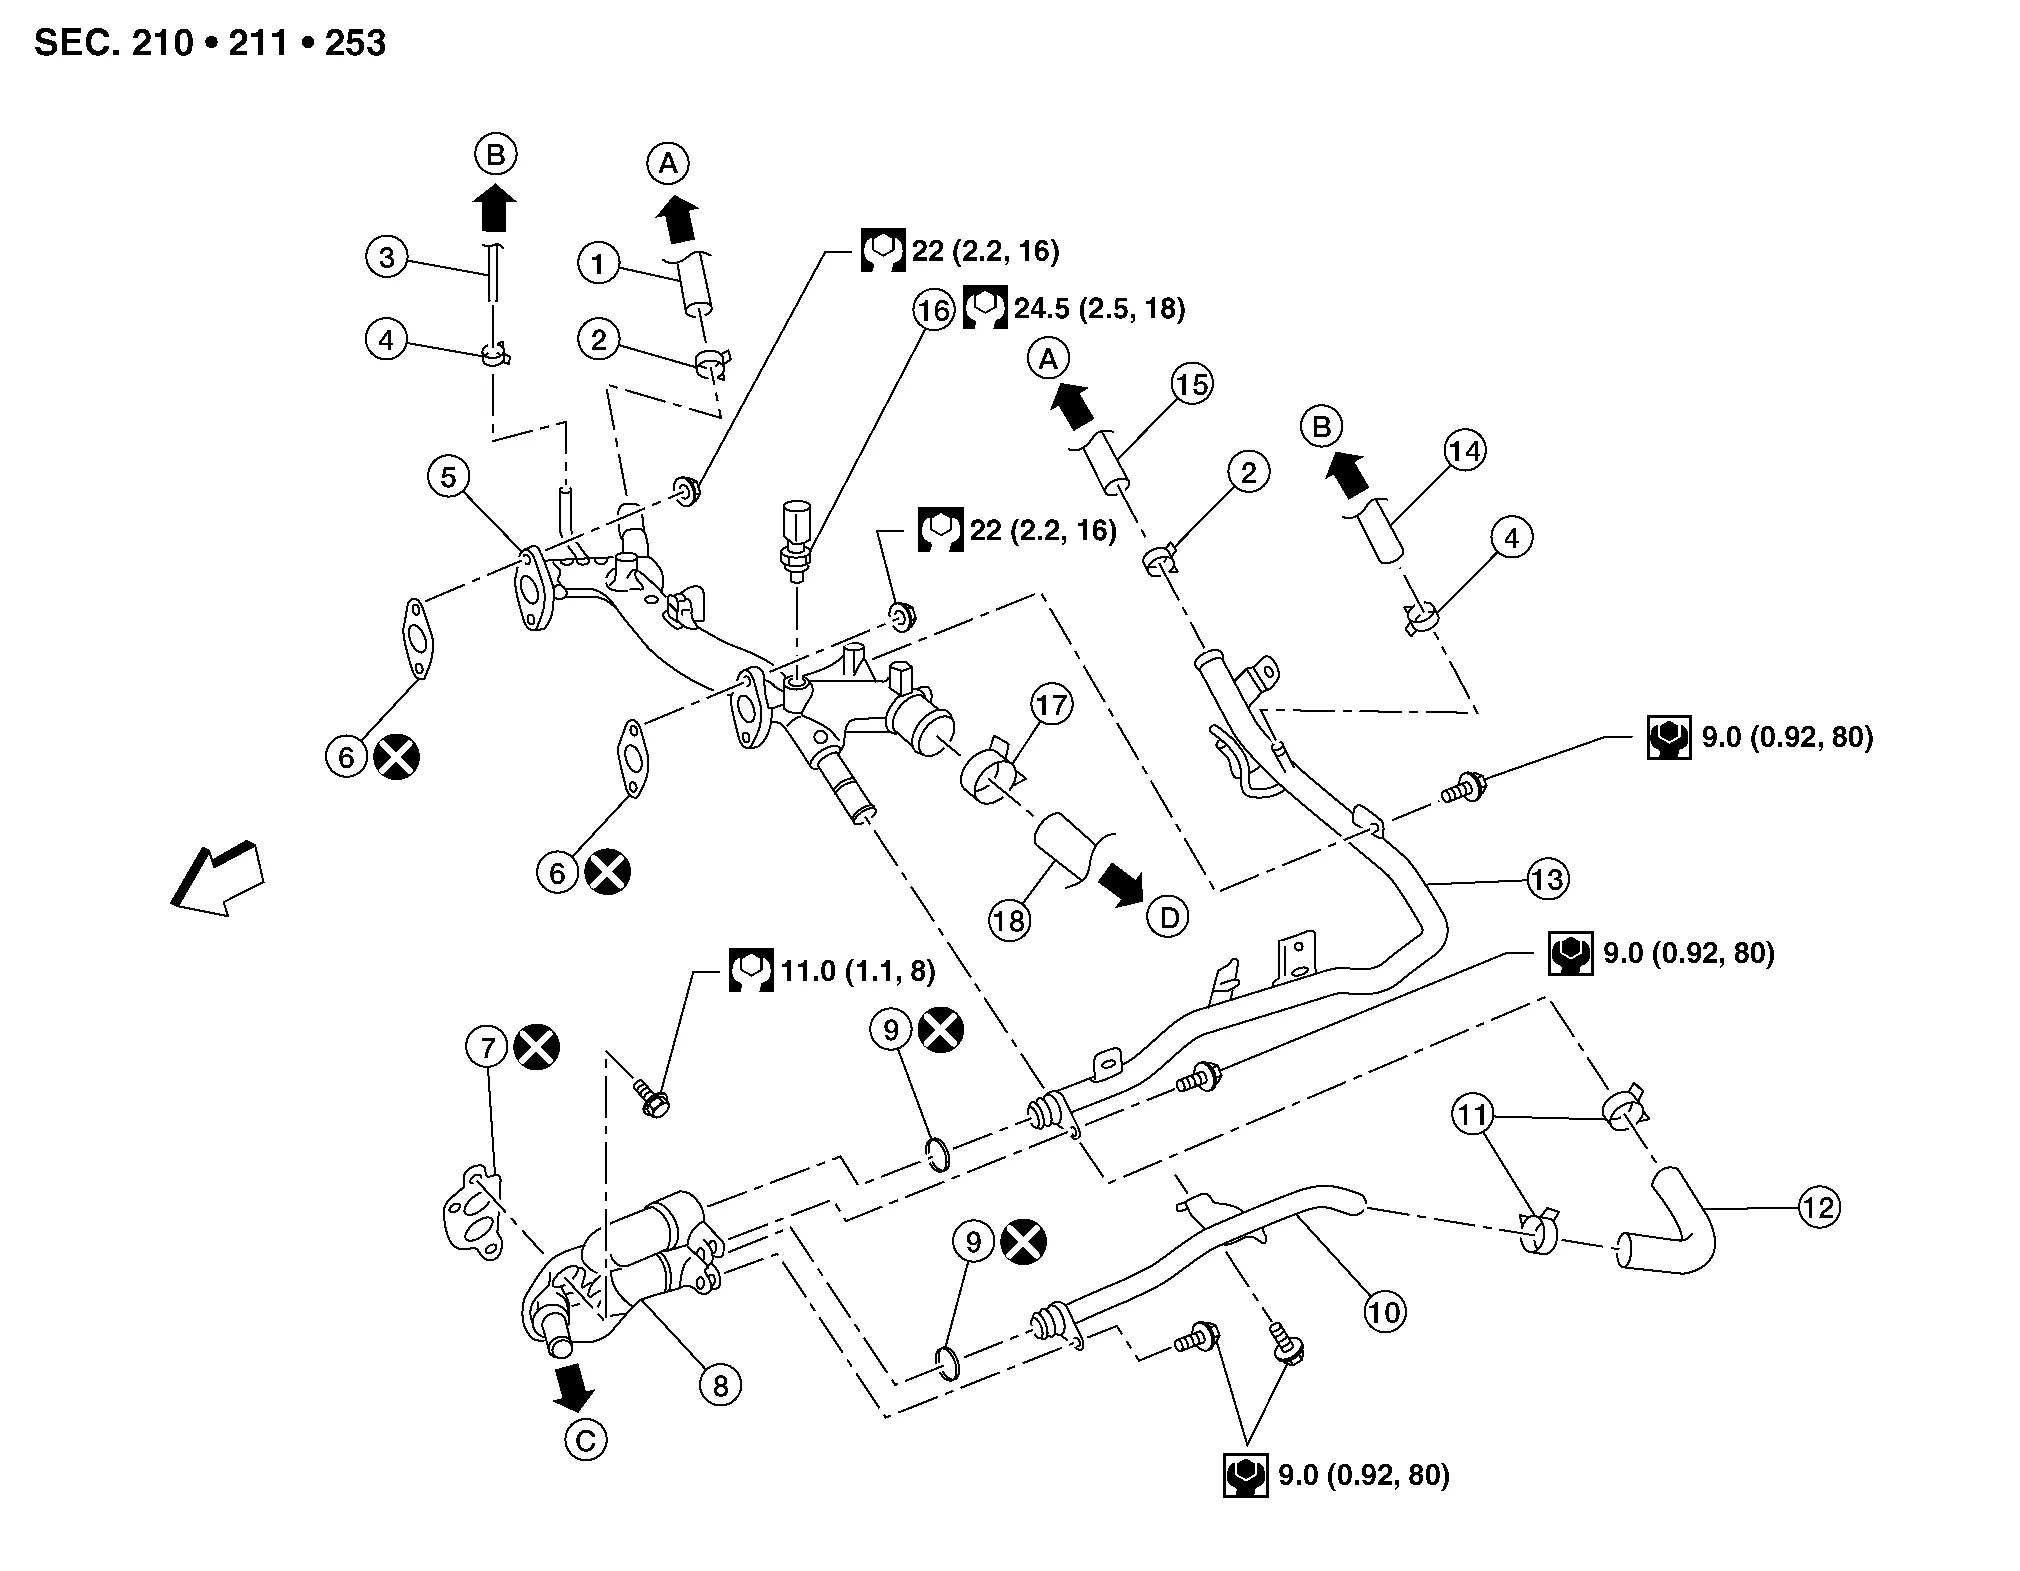
| 1. | Heater hose | 2. | Clamp | 3. | Water hose |
| 4. | Clamp | 5. | Water outlet | 6. | Gasket |
| 7. | Gasket | 8. | Water connector | 9. | O-ring |
| 10. | Water bypass pipe | 11. | Clamp | 12. | Water hose |
| 13. | Heater pipe | 14. | Water hose | 15. | Heater hose |
| 16. | Engine coolant temperature sensor | 17. | Clamp | 18. | Radiator hose (upper) |
| A. | To heater core. Refer to Exploded View. | B. | To electric throttle control actuator. Refer to Exploded View. | C. | To oil cooler. Refer to Exploded View. |
| D. | To radiator. Refer to Exploded View. |  |
Engine front |
REMOVAL
Remove engine room cover. Refer to Removal and Installation.
Remove battery tray. Refer to Removal and Installation.
Partially drain engine coolant from radiator. Refer to Changing Engine Coolant.
Remove sub tank bracket from cowl top extension.
Remove brake fluid level sensor harness connector from brake fluid level sensor.
Remove front air duct and air cleaner case assembly. Refer to Removal and Installation.
Remove the electric throttle control actuator engine coolant hoses.
Remove radiator hose (upper) and both heater hoses.
Remove connector(s) from heater pipe.
Remove engine coolant temperature sensor on water outlet.
Remove water outlet, heater pipe, water connector, and water bypass pipe nuts and bolts.
INSTALLATION
Installation is in the reverse order of removal.
Securely insert each hose, and install a clamp at a position where it does not interfere with the pipe bulge.
When inserting heater pipe and water bypass pipe into water connector, apply mild soap to new O-rings.
After installation, refill engine coolant and check for leaks. Refer to Changing Engine Coolant and System Inspection.