Repair methods
DASHBOARD CROSSMEMBER
This part has a special feature at its side mountings: it is fitted with a nut system with reverse thread that eliminates play between the side member and the front body pillars.
During chain assembly, the side fixing screw is coated with thread locker, which drives the play take-up nut (reverse thread) by friction.
To remove and refit the dashboard cross member during repair, a specific tool Car. 1673 must be used to ensure the system operates correctly (see detailed explanations in the method).
Tool description
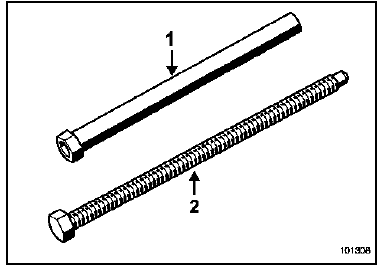
- Tool body
- Rod
Removal:
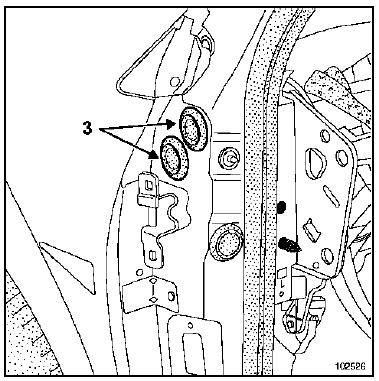
Remove the blanking plugs (3).
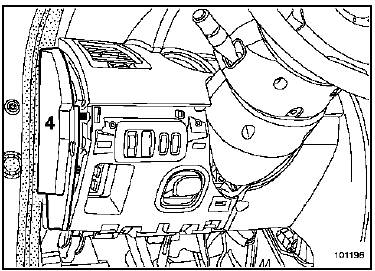
Remove the dashboard side panel (4).
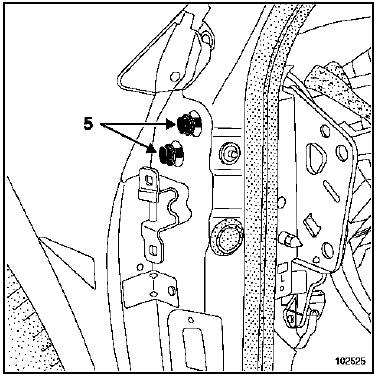
Remove the side mounting screws (5).
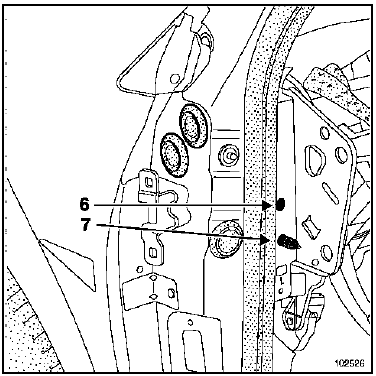
Remove the fixing screw (6).
Loosen the centring device (7), so that the holes in the front footwell lining can be aligned with the counter-nuts on the dashboard cross member.
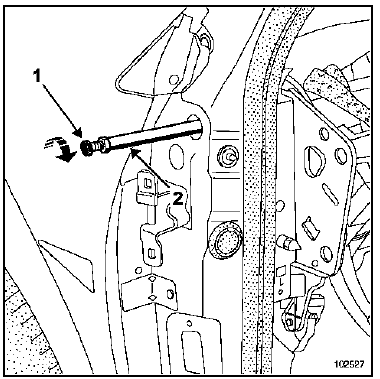
Screw the rod (1) onto the body (2) until it bottoms out, then tighten lightly.
Insert the assembly into the front pillar, then screw it into the side member until it bottoms out.
Firmly hold the tool body (2) against the dashboard crossmember nut as a locknut, while holding the hexagonal socket of the rod (1).
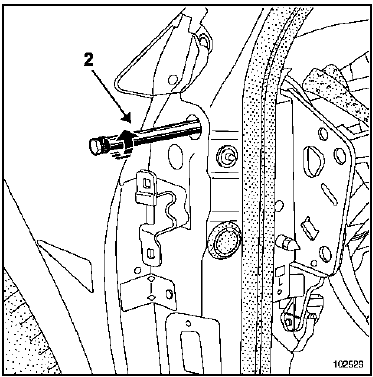
Unscrew the tool by the hexagonal socket of the body (2) until it stops, then tighten lightly.
(During this operation, the side member nut, which has a reverse thread, screws into the side member and releases it from the front pillar).
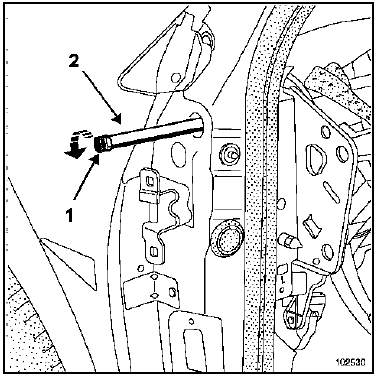
Hold the tool body (2) and release the rod (1) like a counter-nut.
Unscrew the rod (1) from the dashboard crossmember to remove the tool.
Repeat the operation for the second screw.
The dashboard crossmember is now released from the front pillar.
CAUTION: To keep the dashboard cross member adjustment and thus make refitting easier, adjust the counter-nuts on one side only.
INSTALLATION
Screw the locknut (left-hand thread) fully onto the beam.
Position the side member on the vehicle, aligning the side member nut with the hole in the front pillar.
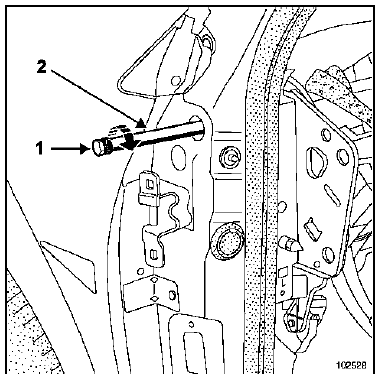
As for removal, prepare the tool, screw it fully into the beam nut, then lock the tool body (2) against the beam nut (nut and lock nut).
Screw the tool rod (1) and body (2) together until they stop, tightening lightly.
Hold the tool body (2) and loosen the rod (1) like a counter-nut, then remove the tool.
CAUTION: When removing the dashboard cross member, the counter-nuts may become misadjusted on both sides. In this case, refit the dashboard and adjust its gaps with the pillar trim and door trim.
REMINDERS
- Vehicles have an electric steering column lock. To be able to move the vehicle when the battery is disconnected, the airbag control unit must be locked using the diagnostic tool before disconnecting the battery.
- When the pyrotechnic elements have been triggered following an impact, the airbag control unit is locked and the electric steering column lock is unlocked.
- When carrying out welding on the vehicle body, both battery terminals must be disconnected and the electronic control units located near the replaced structural parts must be removed. These may be damaged by the current flowing from resistance spot welding or arc welding.
LOCATION OF CONTROL UNITS IN THE VEHICLE
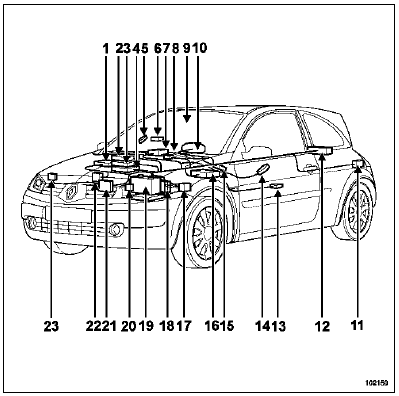
- Central communication unit
- Radio
- Air conditioning
- Badge refitting
- Right electric window switch
- Right side impact sensor
- Airbag electronic control unit
- Electric steering column lock
- Rain-light sensor
- Instrument panel
- Right-hand side CD changer
- "Hands-free" opening aerial
- Left-hand side impact sensor
- Left electric window switch
- Electric power steering ECU
- Body control unit
- Protection and switching unit
- Engine management injection
- Battery
- Left-hand xenon lamp control unit
- Automatic transmission
- Wheel anti-lock - dynamic driving control
- Right-hand xenon lamp control unit
Test yourself
A quick Renault Megane quiz: every answer comes with an explanation and a link to the manual page.