In this manual: Heating, Ventilation, and Air Conditioning
14steps
~84min
3/5difficulty
Done 0 of 14
Inspection
Turn the ignition on.
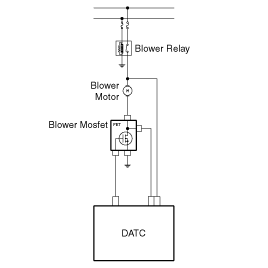
Manually operate the control switch and measure the blower motor voltage.
Select the control switch to raise the voltage to high speed. Specification
Blower Speed (Manual)
Motor Voltage (V)
1
4.05
2
5.24
3
6,44
4
7,63
5
8,82
6
10.02
7
11.21
8
13.60
Diagnosis Using GDS
The heating, ventilation and air conditioning system can quickly diagnose faulty components using the Generic Diagnostic System (GDS). The diagnostic system (GDS) provides the following information: (1) Self-diagnosis: Diagnostic Trouble Code (DTC) check and display. (2) Current data: Checking the input/output status of the system. (3) Actuation test: Checking the operating status of the system. (4) Additional functions: Other controls such as system option and zero point adjustment.
Select "Vehicle Model" and the system to be checked to inspect the vehicle with the tester.
Select the "Current Data" menu to check the current status of the input/output data. The input/output data for the sensors related to the Power MOSFET can be checked.
To perform a forced operation based on the input factors of the Power MOSFET, select "ACTUATION TEST".
Replacement
Disconnect the negative (-) battery terminal.
Remove the hood side trim. (Refer to Body - "Hood Side Trim")
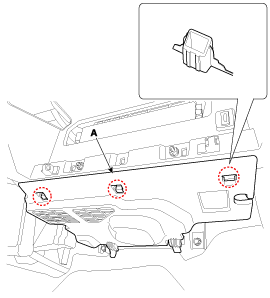
To remove the protective cover under the [RH] cover (A), press both sides of the stopper pin, then pull it downward.
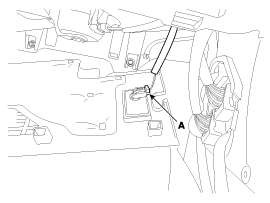
Disconnect the under lamp connector (A).
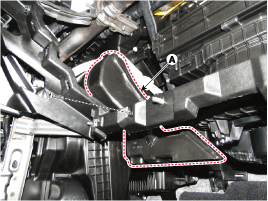
Remove the passenger side air vent duct (A) after loosening the screw.
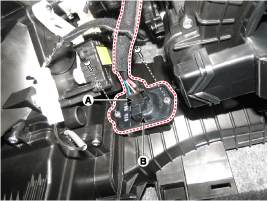
Disconnect the power MOSFET connector (A), then remove the power MOSFET (B) after loosening the mounting screws.
Install in the reverse order of removal.
?
Test yourself
A quick Hyundai Sonata LF quiz: every answer comes with an explanation and a link to the manual page.