Driveline / axle
Engine sprocket removal and installation
In this manual: Driveline / axle
7steps
~42min
2/5difficulty
Done 0 of 7
Removal
Installation : Thread lock cement
99000–32110 (thread lock cement super “1322” or equivalent)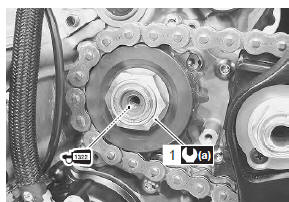
 : Grease 99000–25010 (suzuki
super grease “a” or equivalent)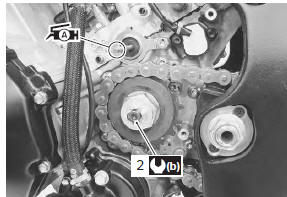

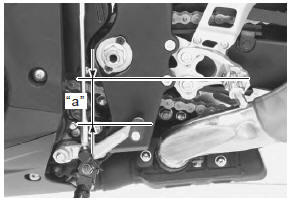
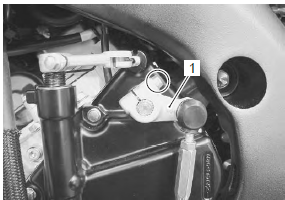
- Remove the gearshift link arm (1) from the gearshift shaft.
mark the gearshift shaft head at which the gearshift link arm slit set for correct reinstallation.
- Remove the speed sensor (2).
- Remove the engine sprocket cover (3).
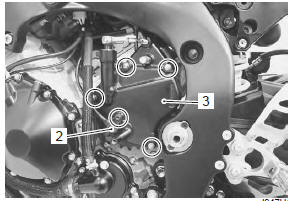
- Support the motorcycle with a jack or wooden block.
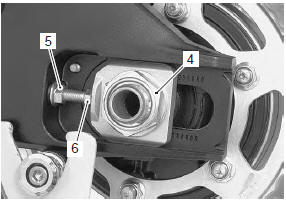
- Loosen the rear axle nut (4) and left and right chain adjuster lock-nuts (5).
- Loosen the chain adjusters (6) to provide additional chain slack.
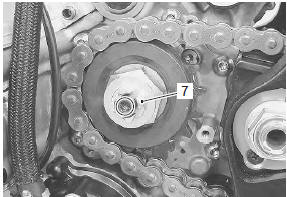
- Remove the speed sensor rotor (7) by removing its bolt while depressing the rear brake pedal.
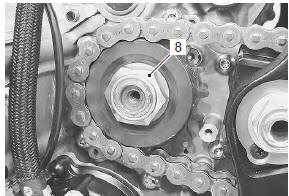
- Remove the engine sprocket nut (8) while depressing the rear brake pedal.
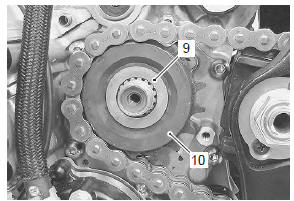
- Remove the washer (9).
- Remove the engine sprocket (10).
Installation
Install the engine sprocket in the reverse order of removal. Pay attention to the following points:
- apply thread lock to the driveshaft.
: Thread lock cement 99000–32110 (thread lock cement super “1322” or equivalent)
- Tighten the engine sprocket nut (1) to the specified torque.
- Tighten the speed sensor rotor bolt (2) to the specified torque.
- Before installing the engine sprocket cover, apply a small quantity of grease to the clutch push rod.
: Grease 99000–25010 (suzuki super grease “a” or equivalent)
- Install the engine sprocket cover (3).
- Tighten the speed sensor mounting bolt (4) to the specified torque.
- Fit the gearshift link arm to the gearshift shaft so that the gearshift lever is located at height “a” below the footrest.
- Adjust the drive chain slack. Refer to “drive chain inspection and adjustment” in section 0b (page 0b- 14).
Test yourself
A quick Suzuki GSX-R 1000 quiz: every answer comes with an explanation and a link to the manual page.
Was this page helpful?