Suspension
Front fork disassembly and assembly
In this manual: Suspension
19steps
~114min
4/5difficulty
Done 0 of 19
Refer to “front fork removal and installation” (page 2b- 2).
Notethe right and left front forks are installed symmetrically and therefore the disassembly procedure for one side is the same as that for the other side.
Disassembly- Turn the spring pre-load adjuster (1) to the softest position.
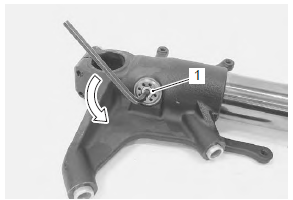
- Loosen the front fork cap using the special tool and vise.
Caution do not clamp the outer tube too tight.
Special tool (a): 09941–53670 (front fork cap socket wrench (45 mm))
- Loosen the rod guide case installed in the inner tube using the special tool.
 (b): 09940–84710 (rod guide case
wrench)
 Hold the
front fork cap when removing the rod guide case, or it will jump out due to the spring pressure.
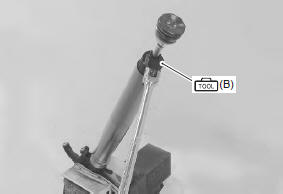
- Remove the piston rod assembly (2).

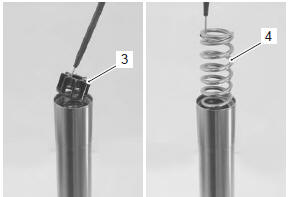
- Remove the spring collar b (3) and spring (4).
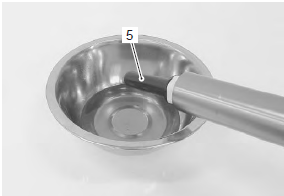
- Drain fork oil and remove the spring collar a (5).
- Remove the dust seal (6).
- Remove the oil seal stopper ring (7).
- scratches on the inner tube could cause oil leaks.
- Avoid scratching when removing.
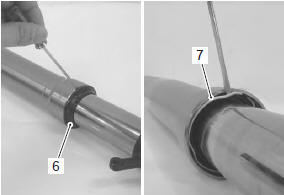
- Pull out the inner tube from the outer tube.

- Remove the slide bushing (8) from the inner tube.
- Remove the following parts from the inner tube.
- guide bushing (9)
- oil seal spacer (10)
- oil seal (11)
- oil seal stopper ring (7)
- dust seal (6)

- Hold the piston rod assembly with the special tool and vise.
 (a): 09941–53670 (front fork cap
socket wrench (45 mm))
- Loosen the piston rod nut (12) and disassemble the piston rod as shown.
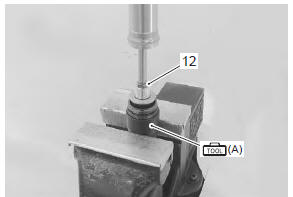

Assembly Caution
- clean all fork parts before reassembling.
- Replace the o-rings, seals and bushings with new ones.
- Apply specified front fork oil when installing the o-rings, slide bushing and guide bushing.
- Cover the inner tube with a plastic film.
- Install the following parts to the inner tube.
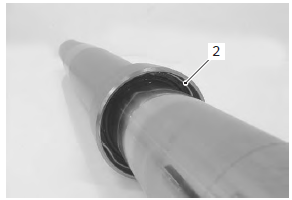
- new dust seal (1)
- stopper ring (2)
- new oil seal (3)
- scratches on the oil seal lip may cause oil leakage. When installing the seals, place a plastic film over the slide bushing groove and edges of the inner tube to avoid damaging the seals’ lip.
- Misdirecting of the parts may cause inferior operation and oil leakage.
- Face the stamp mark side “a” of the oil seal to the dust seal side.
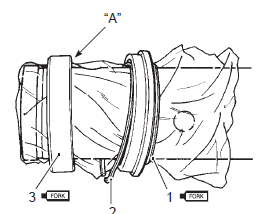
Stamp mark
- Remove the plastic film and install the oil seal spacer (4), guide bushing (5) and slide bushing (6) keep them free from dust.
- face the grooved side “b” of the oil seal spacer to the outer tube side.
- Position the slit “c” of slide bushing 90° against the traveling direction.
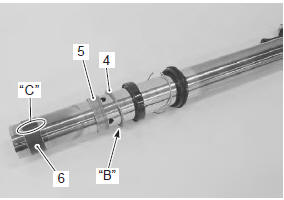
Groove Slit
- Insert the inner tube into the outer tube.
- Press fit the guide bushing (5) using the special tools.
- Press fit the new oil seal (3) using the special tools until the stopper ring groove on the outer tube can be seen.
 (a): 09940–52861 (front fork oil
seal installer set)
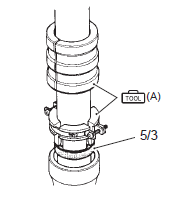
- Install the stopper ring (2).
Caution make sure that the stopper ring is fitted securely into the groove.
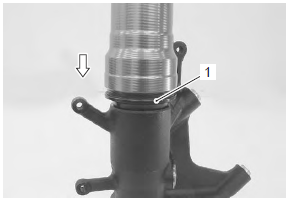
- Press fit the dust seal (1).
- Insert the spring collar a (7) and spring (8) into the inner tube.
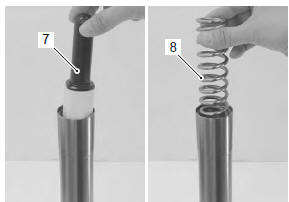
- Insert the spring collar b (9) into the inner tube.
Caution face the flange “d” of the collar to the spring side.
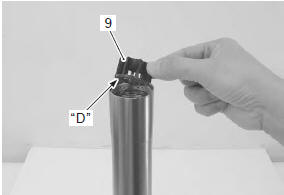
Flange
- Pour specified fork oil until its surface passes the side holes of inner tube.
 : Fork oil 99000–99001–ss5
(suzuki fork oil ss-05 or equivalent)
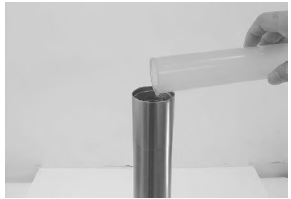
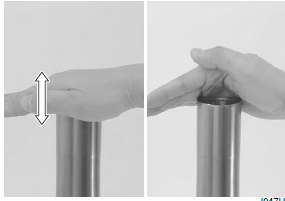
- Slowly stroke the outer tube more than ten times to pump out air.
Note take extreme attention to pump out air completely.
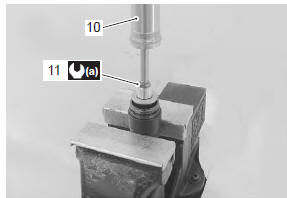
- Assemble the piston rod and rod guide case (10).
- Tighten the piston rod nut (11) with the special tool and vise.
- Insert the piston rod assembly into the inner tube and temporarily tighten the rod guide case by hand.
insert the piston rod assembly into the inner tube with the outer tube lifted up. Be sure not to damage the piston ring (12) of the rod guide case.
Special tool (b): 09940–84710 (rod guide case
wrench)

- Tighten the rod guide case to the specified torque.
Refer to “rod guide case tightening torque” .
 (b): 09940–84710 (rod guide case
wrench) Tightening torque rod guide case: 90 N·m
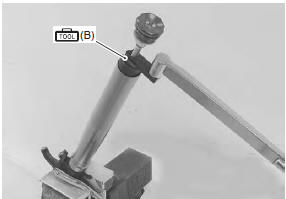
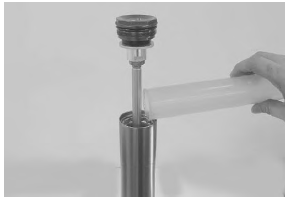
- Pour specified fork oil up to the top of the rod guide case.
 : Fork oil
99000–99001–ss5 (suzuki fork oil ss-05 or equivalent)
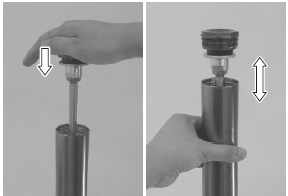
- Push the front fork cap, then stroke the outer tube several times to pump out air.
Note take extreme attention to pump out the air completely.
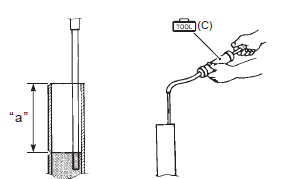
- Hold the front fork vertically and adjust the oil level using the special tool.
 (c): 09943–74111 (front fork oil
level gauge) Fork oil level “a” 75.0 Mm (2.95 In)
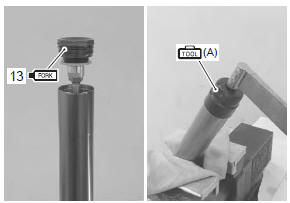
- Apply fork oil to the o-ring (13).
Caution use new o-ring to prevent oil leakage.
- Tighten the front fork cap to the specified torque.
Caution do not clamp the outer tube too tight.
Tightening torque front fork cap: 35 N·m Special tool (a): 09941–53670 (front fork cap
socket wrench (45 mm))
Test yourself
A quick Suzuki GSX-R 1000 quiz: every answer comes with an explanation and a link to the manual page.
Was this page helpful?