Engine
Muffler / muffler chamber / exhaust pipe removal and installation
In this manual: Engine
9steps
~54min
2/5difficulty
Done 0 of 9
Removal
Installation
 : Muffler seal (muffler
seal loctite 5920 (commercially available) or equivalent)
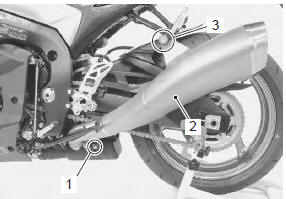
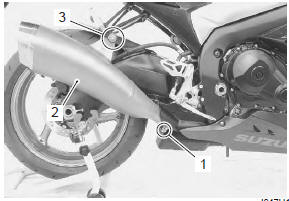
- Loosen the muffler connecting bolts (1).
- Remove the mufflers (2) by removing the mounting bolt and nut (3).
Note support the muffler to prevent it from falling.
- Remove the side cowlings. Refer to “exterior parts removal and installation” in section 9d (page 9d- 6).
- Lift and support the fuel tank with the prop stay.
Refer to “fuel tank removal and installation” in section 1g .
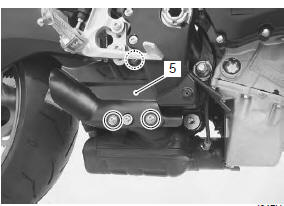
- Disconnect the ho2 sensor coupler (4).
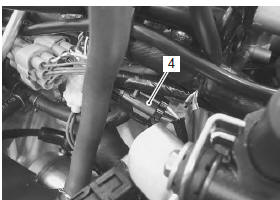
- Remove the muffler chamber heat guard no. 2 (5).
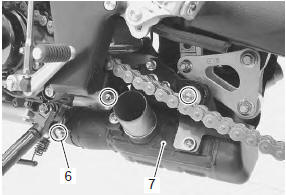
- Loosen the muffler chamber connecting bolt (6).
- Remove the muffler chamber (7).
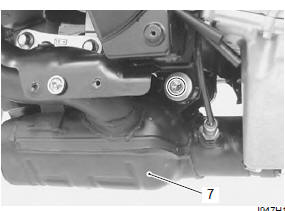
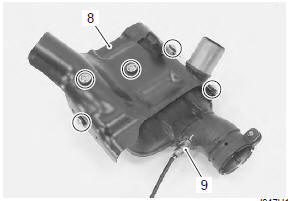
- Remove the muffler chamber heat guard no. 1 (8) And ho2 sensor (9) from the muffler chamber.
- be careful not to expose the ho2 sensor to an excessive shock.
- Be careful not to twist or damage the ho2 sensor lead wires.
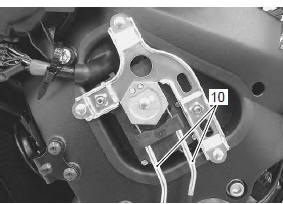
- Remove the excv cables (10). Refer to “excv cable removal and installation” .
- Move the radiator and oil cooler forward. Refer to “radiator inspection and cleaning” in section 1f .
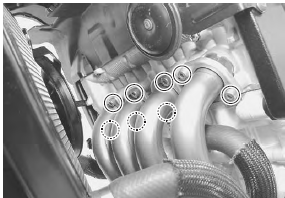
- Remove the exhaust pipe assembly by removing the exhaust pipe bolts.
Caution take care not to bend the radiator/oil cooler fins.
Note support the exhaust pipe assembly to prevent it from falling.
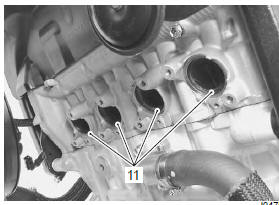
- Remove the exhaust pipe gaskets (11).
Installation
Installation is in the reverse order of removal. Pay attention to the following points:
- tighten the ho2 sensor to the specified torque.
- be careful not to expose the ho2 sensor to an excessive shock.
- Do not use an impact wrench when installing the ho2 sensor.
- Be careful not to twist or damage the ho2 sensor lead wires.
- Do not apply oil or other materials to the sensor air holes.
- Install new gaskets and connectors and tighten each bolt to the specified torque. Refer to “exhaust system components” .
Caution replace the gaskets and connectors with new ones.
Notewhen installing a new connector, remove all of the old sealer. Apply the exhaust gas sealer to both the inside and outside of the new connector.
: Muffler seal (muffler seal loctite 5920 (commercially available) or equivalent)
- Install the excva cables. Refer to “excv cable removal and installation” .
Test yourself
A quick Suzuki GSX-R 1000 quiz: every answer comes with an explanation and a link to the manual page.
Was this page helpful?