Ambient Temperature Sensor
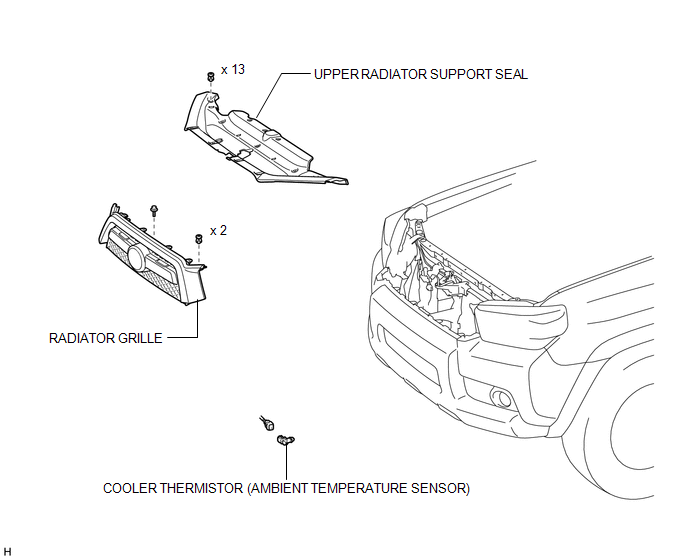
Inspection INSPECTION PROCEDURE
1. INSPECT COOLER THERMISTOR (AMBIENT TEMPERATURE SENSOR)
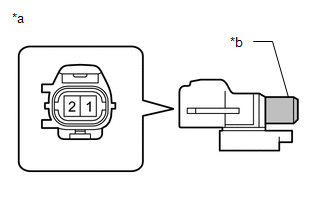
(a) Measure the resistance according to the value(s) in the table below.
Standard Resistance:
Tester Connection | Condition | Specified Condition |
|---|---|---|
1 - 2 |
10 °C |
3.00 to 3.73 kΩ |
15 °C |
2.45 to 2.88 kΩ |
|
20 °C |
1.95 to 2.30 kΩ |
|
25 °C |
1.60 to 1.80 kΩ |
|
30 °C |
1.28 to 1.47 kΩ |
|
35 °C |
1.00 to 1.22 kΩ |
|
40 °C |
0.80 to 1.00 kΩ |
|
45 °C |
0.65 to 0.85 kΩ |
|
50 °C |
0.50 to 0.70 kΩ |
|
55 °C |
0.44 to 0.60 kΩ |
|
60 °C |
0.36 to 0.50 kΩ |
HINT:
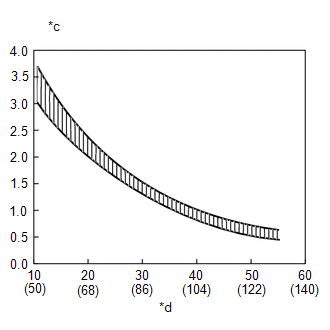
As the temperature increases, the resistance decreases (refer to the graph).
NOTICE:
- Touching the sensor even slightly may change the resistance value. Hold the connector of the sensor.
- When measuring the resistance, make sure the sensor temperature is the same as the ambient temperature.
If the result is not as specified, replace the cooler thermistor (ambient temperature sensor).
Text in Illustration*a |
Component without harness connected (Ambient Temperature Sensor) |
*b |
Sensor Area |
*c |
Resistance (kΩ) |
*d |
Temperature (°C(°F)) |
1. INSTALL COOLER THERMISTOR (AMBIENT TEMPERATURE SENSOR)
(a) Attach the clamp to install the sensor.
(b) Connect the connector.
2. INSTALL RADIATOR GRILLE
(a) Install the radiator grille (See page  ).
3. INSTALL UPPER RADIATOR SUPPORT SEAL
Removal REMOVAL PROCEDURE
1. REMOVE UPPER RADIATOR SUPPORT SEAL

2. REMOVE RADIATOR GRILLE
(a) Remove the radiator grille (See page ).
3. REMOVE COOLER THERMISTOR (AMBIENT TEMPERATURE SENSOR)
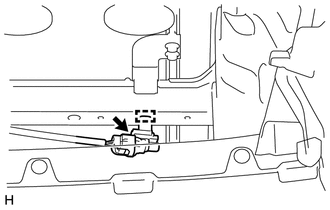
(a) Disconnect the connector.
(b) Using a screwdriver, detach the clamp and remove the sensor.
HINT:
Tape the screwdriver tip before use.
Test yourself
A quick Toyota 4Runner quiz: every answer comes with an explanation and a link to the manual page.