Solar Sensor
Inspection INSPECTION PROCEDURE
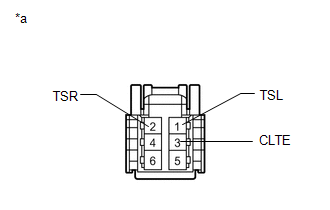
1. INSPECT AUTOMATIC LIGHT CONTROL SENSOR (SOLAR SENSOR)
(a) Connect the positive (+) lead of the battery to terminal 6 and the negative (-) lead to terminal 3, and then measure the voltage according to the value(s) in the table below. Standard Voltage:
HINT:
NOTICE: The connection procedure for using a digital tester, such as a TOYOTA electrical tester, is shown above. If the result is not as specified, replace the automatic light control sensor. Text in Illustration
|
 |
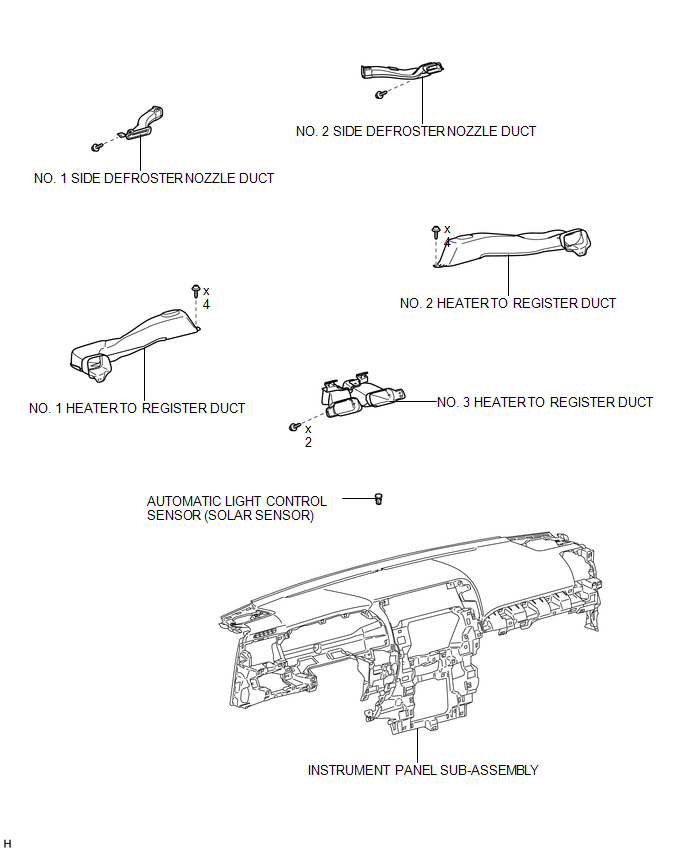
1. REMOVE INSTRUMENT PANEL SUB-ASSEMBLY
(a) Remove the instrument panel sub-assembly (See page  ).
2. REMOVE NO. 1 HEATER TO REGISTER DUCT
3. REMOVE NO. 2 HEATER TO REGISTER DUCT
4. REMOVE NO. 1 SIDE DEFROSTER NOZZLE DUCT
5. REMOVE NO. 2 SIDE DEFROSTER NOZZLE DUCT
6. REMOVE NO. 3 HEATER TO REGISTER DUCT
7. REMOVE AUTOMATIC LIGHT CONTROL SENSOR (SOLAR SENSOR)
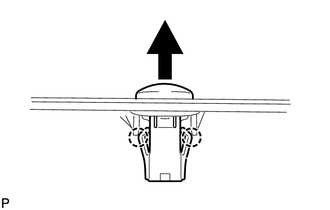
(a) Disconnect the connector.
(b) Detach the 2 claws and remove the sensor.
Installation INSTALLATION PROCEDURE1. INSTALL AUTOMATIC LIGHT CONTROL SENSOR (SOLAR SENSOR)
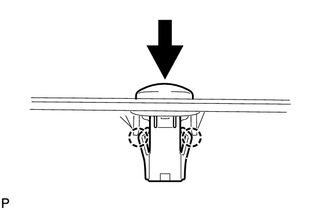
(a) Attach the 2 claws to install the sensor.
(b) Connect the connector.
2. INSTALL NO. 3 HEATER TO REGISTER DUCT

3. INSTALL NO. 2 SIDE DEFROSTER NOZZLE DUCT
4. INSTALL NO. 1 SIDE DEFROSTER NOZZLE DUCT
5. INSTALL NO. 2 HEATER TO REGISTER DUCT
6. INSTALL NO. 1 HEATER TO REGISTER DUCT
7. INSTALL INSTRUMENT PANEL SUB-ASSEMBLY
(a) Install the instrument panel sub-assembly (See page ).
Test yourself
A quick Toyota 4Runner quiz: every answer comes with an explanation and a link to the manual page.