Blower Unit
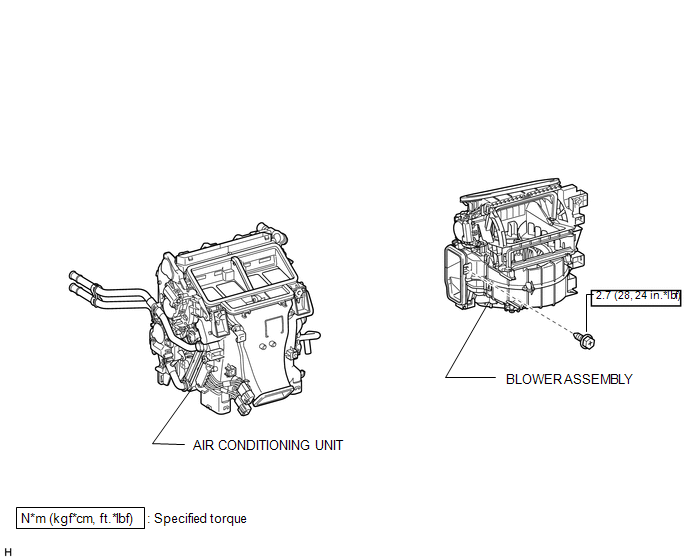
ILLUSTRATION
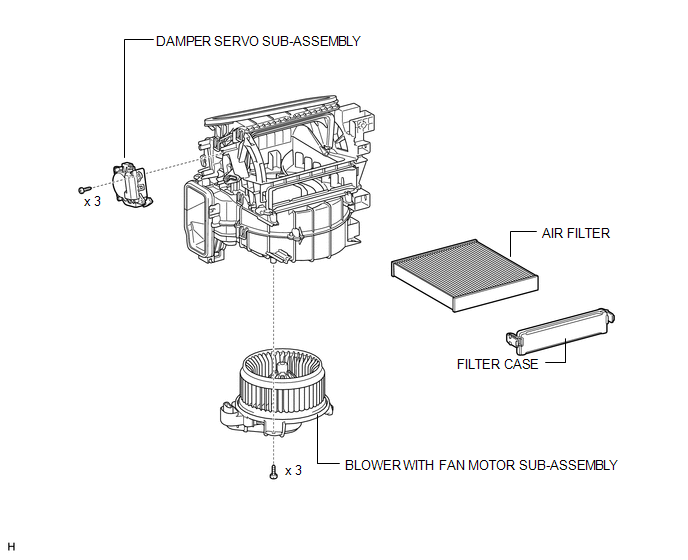
Removal REMOVAL PROCEDURE
1. REMOVE AIR CONDITIONING UNIT
(a) Remove the air conditioning unit (See page  ).
2. REMOVE BLOWER ASSEMBLY
(a) Remove the screw. |
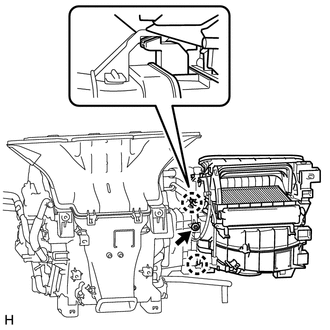 |
(b) Disconnect the connector and detach the clamp.
(c) Detach the 2 claws and remove the blower unit.
Disassembly DISASSEMBLY PROCEDURE1. REMOVE DAMPER SERVO SUB-ASSEMBLY
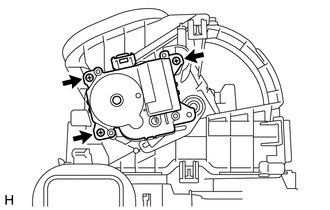
(a) Remove the 3 screws and damper servo sub-assembly.
2. REMOVE BLOWER WITH FAN MOTOR SUB-ASSEMBLY
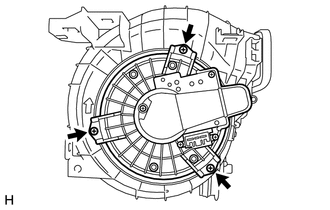
(a) Remove the 3 screws and motor.
3. REMOVE AIR FILTER
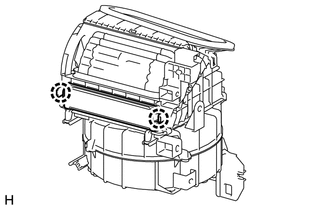
(a) Detach the 2 claws and remove the filter.
(b) Remove the filter case.
Reassembly REASSEMBLY PROCEDURE1. INSTALL AIR FILTER
(a) Install the filter.
(b) Attach the 2 claws to install the filter case.
2. INSTALL BLOWER WITH FAN MOTOR SUB-ASSEMBLY
(a) Install the motor with the 3 screws.
3. INSTALL DAMPER SERVO SUB-ASSEMBLY
(a) Install the damper servo with the 3 screws.
Installation INSTALLATION PROCEDURE1. INSTALL BLOWER ASSEMBLY
(a) Attach the 2 claws to install the blower unit.
(b) Connect the connector and attach the clamp.
(c) Install the screw.
Torque:
2,7 N·m {28 kgf·cm, 24 in·lbf}
2. INSTALL AIR CONDITIONING UNIT
(a) Install the air conditioning unit (See page  ).
Test yourself
A quick Toyota 4Runner quiz: every answer comes with an explanation and a link to the manual page.