Installation
1. INSTALL NO. 1 ULTRASONIC SENSOR RETAINER
(a) Align the keyhole and protrusion as shown in the illustration. Text in Illustration
|
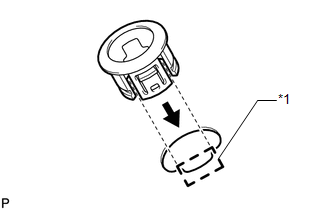 |
(b) Attach the 4 claws to install the No. 1 ultrasonic sensor retainer to the rear bumper cover.
NOTICE:
Do not damage the bumper cover with the protrusion when installing the No. 1 ultrasonic sensor retainer.
HINT:
Use the same procedure as for the other side.
2. INSTALL NO. 2 ULTRASONIC SENSOR RETAINER
(a) Align the keyhole and protrusion as shown in the illustration. Text in Illustration
|
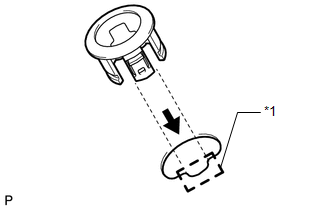 |
(b) Attach the 3 claws to install the No. 2 ultrasonic sensor retainer to the rear bumper cover.
NOTICE:
Do not damage the bumper cover with the protrusion when installing the No. 2 ultrasonic sensor retainer.
HINT:
Use the same procedure as for the other side.
3. INSTALL ULTRASONIC SENSOR CLIP
(a) Attach the claw to install the ultrasonic sensor clip to the No. 1 ultrasonic sensor.
HINT:
Use the same procedure as for the other side.
4. INSTALL NO. 1 ULTRASONIC SENSOR
(a) Attach the 2 claws to install the No. 1 ultrasonic sensor to the ultrasonic sensor retainer.
HINT:
Use the same procedure as for the other side.
5. INSTALL NO. 3 FLOOR WIRE

6. INSTALL REAR BUMPER COVER
7. INSTALL REAR QUARTER PANEL MUDGUARD LH
8. INSTALL REAR QUARTER PANEL MUDGUARD RH
HINT:
Use the same procedure as for the LH side.
9. INSTALL JACK BOX HOLE COVER
Test yourself
A quick Toyota 4Runner quiz: every answer comes with an explanation and a link to the manual page.