Microphone Amplifier
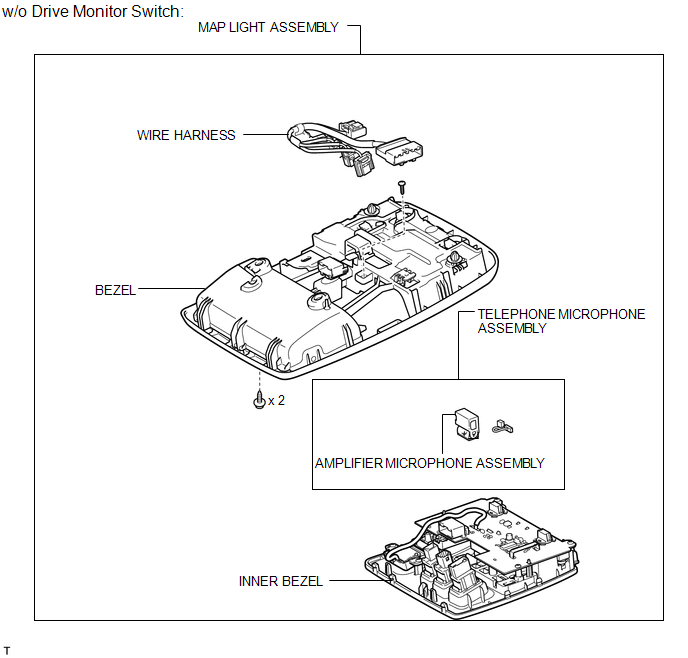
ILLUSTRATION
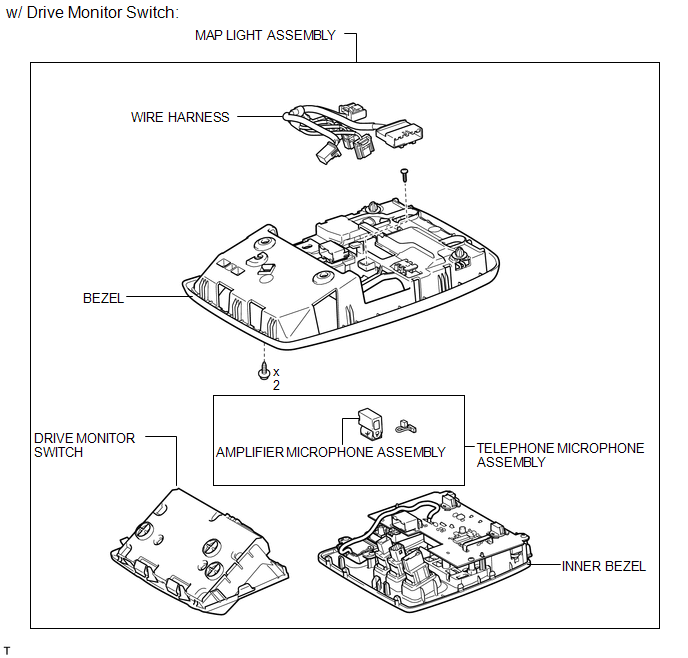
Removal REMOVAL PROCEDURE
1. REMOVE DRIVE MONITOR SWITCH

2. REMOVE MAP LIGHT ASSEMBLY
3. REMOVE TELEPHONE MICROPHONE ASSEMBLY
(a) Disconnect the 6 connectors. |
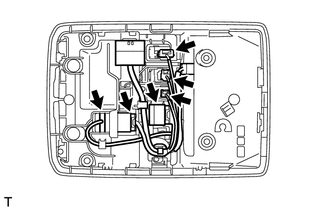 |
(b) Remove the screw. |
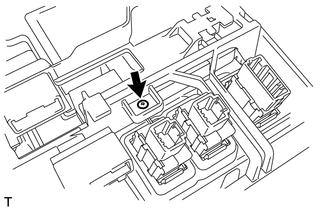 |
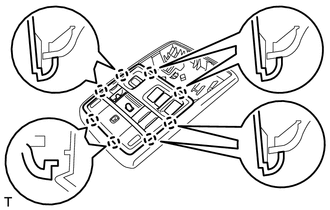
(c) Detach the 8 claws and remove the inner bezel. |
 |
(d) Disconnect the connector. |
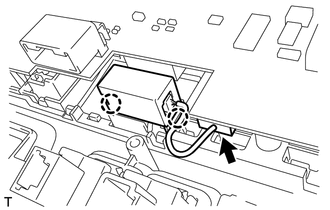 |
(e) Detach the 2 claws and remove the telephone microphone.
4. REMOVE AMPLIFIER MICROPHONE ASSEMBLY
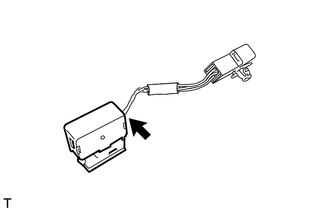
(a) Disconnect the connector and remove the amplifier microphone. |
 |
1. INSTALL AMPLIFIER MICROPHONE ASSEMBLY
(a) Connect the connector and install the amplifier microphone.
2. INSTALL TELEPHONE MICROPHONE ASSEMBLY
(a) Attach the 2 claws to install the telephone microphone.
(b) Connect the connector.
(c) Attach the 8 claws to install the inner bezel.
(d) Install the screw.
(e) Connect the 6 connectors.
3. INSTALL MAP LIGHT ASSEMBLY

4. INSTALL DRIVE MONITOR SWITCH
Test yourself
A quick Toyota 4Runner quiz: every answer comes with an explanation and a link to the manual page.