Back Door Speaker
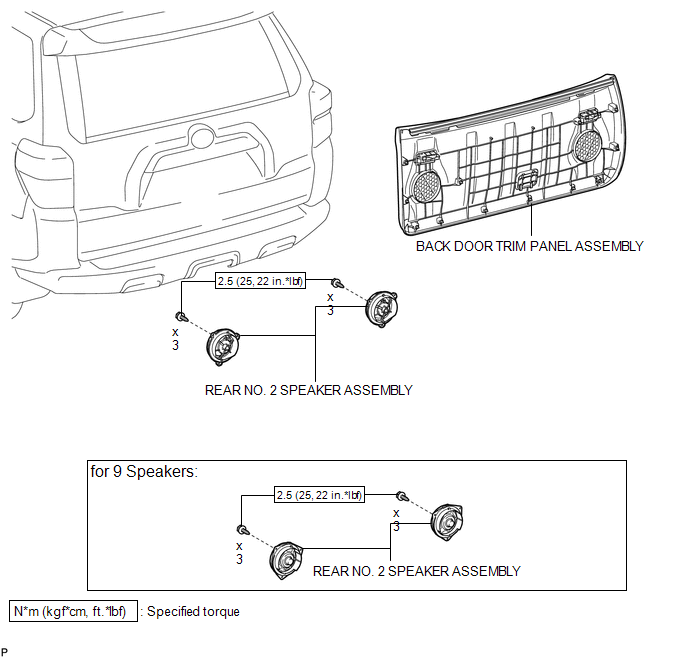
Removal REMOVAL CAUTION / NOTICE / HINT
HINT:
- Use the same procedure for the RH and LH sides.
- The procedure listed below is for the LH side.
1. DISCONNECT CABLE FROM NEGATIVE BATTERY TERMINAL
NOTICE:
When disconnecting the cable, some systems need to be initialized after the cable is reconnected (See page  ).
2. REMOVE BACK DOOR TRIM PANEL ASSEMBLY
3. REMOVE REAR NO. 2 SPEAKER ASSEMBLY
(a) Disconnect the connector.
(b) Remove the 3 screws. |
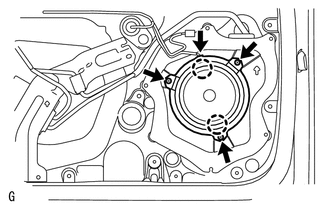 |
(c) Detach the 2 claws and remove the speaker.
NOTICE:
Do not touch the cone of the speaker.
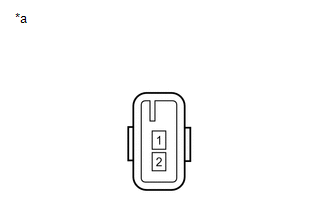
Inspection INSPECTION PROCEDURE1. INSPECT REAR NO. 2 SPEAKER ASSEMBLY (for 8 Speakers)
(a) Measure the resistance according to the value(s) in the table below. Standard Resistance:
|
 |
2. INSPECT REAR NO. 2 SPEAKER ASSEMBLY (for 9 Speakers)
(a) Temporarily replace the front No. 2 speaker assembly with a new or normally functioning one.
OK:
Malfunction disappears.
Installation INSTALLATION CAUTION / NOTICE / HINTHINT:
- Use the same procedure for the RH and LH sides.
- The procedure listed below is for the LH side.
1. INSTALL REAR NO. 2 SPEAKER ASSEMBLY
(a) Temporarily install the speaker by attaching the 2 claws of the speaker to the door panel.
(b) Install the speaker with the 3 screws.
Torque:
2,5 N·m {25 kgf·cm, 22 in·lbf}
(c) Connect the connector.
NOTICE:
Do not touch the cone of the speaker.
2. INSTALL BACK DOOR TRIM PANEL ASSEMBLY

3. CONNECT CABLE TO NEGATIVE BATTERY TERMINAL
NOTICE:
When disconnecting the cable, some systems need to be initialized after the cable is reconnected (See page ).
Test yourself
A quick Toyota 4Runner quiz: every answer comes with an explanation and a link to the manual page.