DCM (Telematics Transceiver)
Components
COMPONENTS
ILLUSTRATION
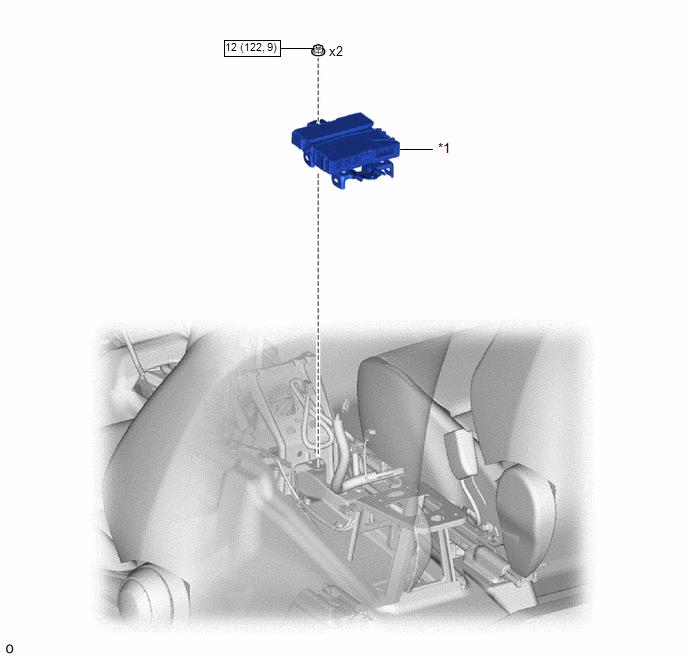
*1 |
DCM (TELEMATICS TRANSCEIVER) |
- |
- |
 |
N*m (kgf*cm, lbf*in): Specified torque |
- |
- |
Installation
INSTALLATION
PROCEDURE
1. REINSTALL DCM (TELEMATICS TRANSCEIVER)
(a) Reinstall the DCM (telematics transceiver) with the 2 bolts. Torque: 12 N·m {122 kgf·cm, 9 ft·lbf} |
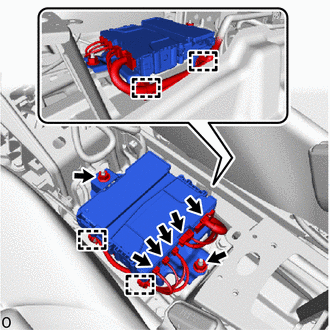 |
(b) Engage the clips.
(c) Connect the 5 connectors.
2. REINSTALL REAR CONSOLE BOX ASSEMBLY
Click here
3. PERFORM REGISTRATION
HINT:
When replacing the entire DCM (telematics transceiver) when the DCM is triggered.
Click here
Removal
REMOVAL
PRECAUTION / NOTICE / HINT
The necessary procedures (adjustment, calibration, initialization or registration) that must be performed after parts are removed and installed or replaced during DCM (telematics transceiver) removal/installation are shown below.
Procedures Required After Replacement / Removal / Installation of PartsReplacement part or procedure | Required Procedure | Effect/Inoperative function when procedure not performed | Link |
|---|---|---|---|
DCM replacement (Telematics Transceiver) |
DCM Activation |
Secure connection system |
 |
PROCEDURE
1. REMOVE REAR CONSOLE BOX ASSEMBLY
Click here
2. REMOVE DCM (TELEMATICS TRANSCEIVER)
(a) Disconnect the 5 connectors. |
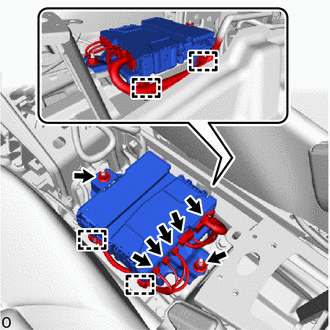 |
(b) Release the clips.
(c) Remove the 2 nuts and the DCM (Telematics Transceiver).