Disassembly
DISASSEMBLY
PRECAUTION / NOTICE / HINT
CAUTION:
Wear protective gloves. Sharp edges on parts may cause injury to your hands.
PROCEDURE
1. REMOVE SEAT BELT ANCHOR COVER CAP (for RH side)
(a) Using a moulding remover tool A, release the claws and guides to detach the belt cover on the rear seat back side along with the seat belt anchor cover cap, as shown in the illustration.
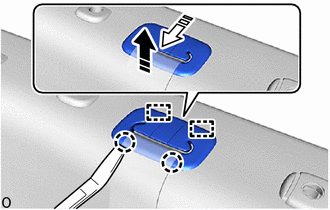
 |
Remove in this direction (1) |
 |
Remove in this direction (2) |
(b) Release the guides to remove the seat belt anchor cover cap, as shown in the illustration.
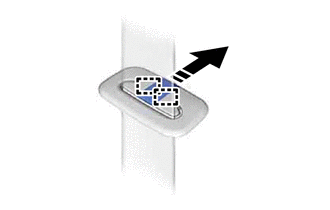
|
Remove in this direction |
2. REMOVE REAR SEAT BACK SIDE BELT HOLE COVER (for RH side)
(a) Remove the rear seat belt upper strap cover. |
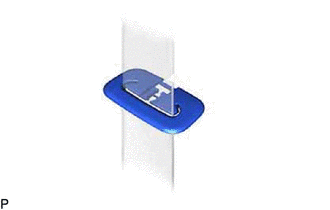 |
3. REMOVE REAR SEAT BACK LOCK DEVICE GARNISH (for RH side)
(a) Release the claws to remove the rear seat back lock control garnish. |
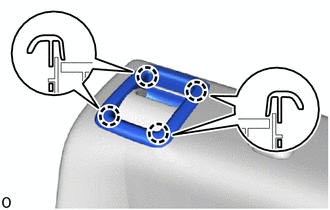 |
(b) Release the hooks of the separate type rear seat back cover. |
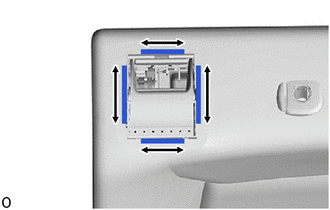 |
4. REMOVE RH REAR SEAT BACK PANEL SUB-ASSEMBLY (for RH side)
(a) Release the hook. |
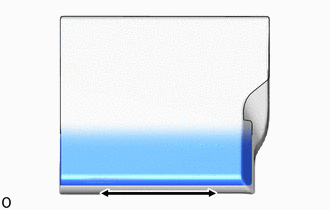 |
(b) Open the 2 fasteners as shown in the illustration. |
|
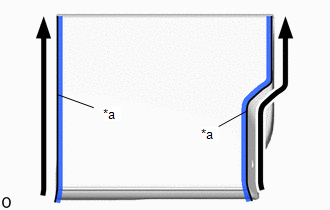
(c) Release the claws and guides to remove the RH rear seat back panel sub-assembly. |
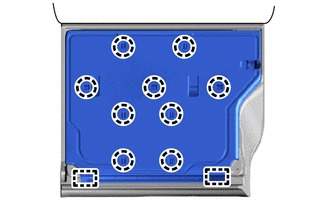 |
5. REMOVE REAR SEAT HEADREST SUPPORT (for RH side)
(a) without Occupant Classification System:
(1) Release the claws to remove the 2 rear seat headrest supports, as shown in the illustration.
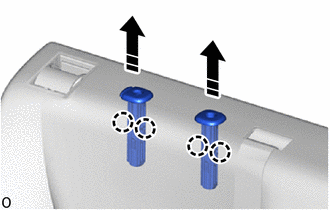
|
Remove in this direction |
(b) with Occupant Classification System:
(1) Release the claws to remove the 2 rear seat headrest supports, as shown in the illustration.
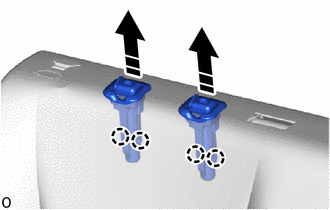
|
Remove in this direction |
6. REMOVE CENTER REAR SEAT HEADREST SUPPORT (for RH side)
(a) Release the claws to remove the 2 center rear seat headrest supports, as shown in the illustration.
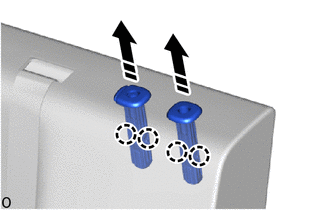
|
Remove in this direction |
7. REMOVE SEPARATE TYPE REAR SEAT BACK COVER WITH PAD (for RH side)
(a) Pass the center rear seat belt outer belt assembly through the separate type rear seat back cover, then remove the separate type rear seat back cover with pad from the RH rear seat back frame sub-assembly. |
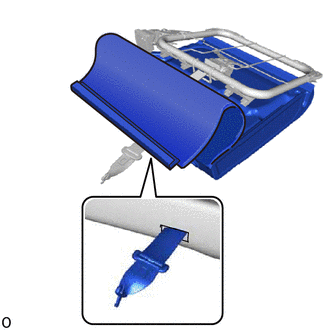 |
8. REMOVE SEPARATE TYPE REAR SEAT BACK COVER (for RH side)
(a) Using a screwdriver, release the claws to remove the separate type rear seat back cover from the RH separate type rear seat back pad, as shown in the illustration.
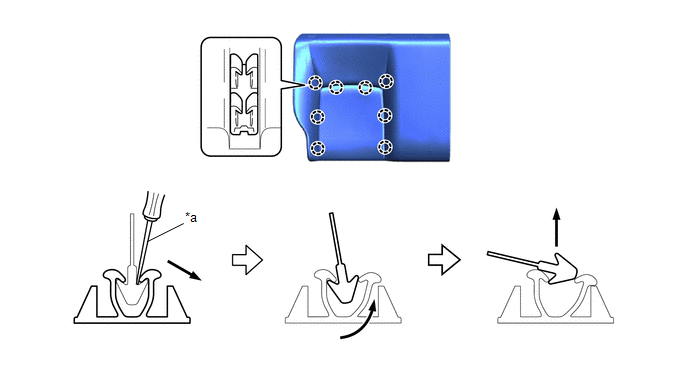
*a |
Screwdriver |
- |
- |
9. REMOVE CENTER REAR SEAT BELT OUTER BELT ASSEMBLY (for RH side)
Click here
10. REMOVE RH REAR SEAT BACK LOCK ASSEMBLY (for RH side)
(a) Remove the 2 bolts. |
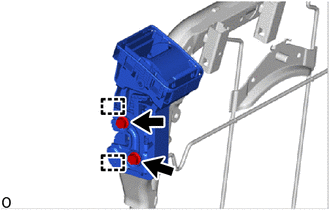 |
(b) Release the guides of the RH rear seat back lock assembly.
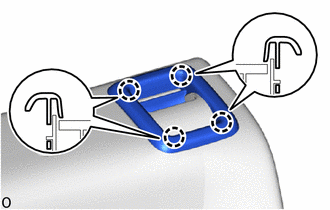
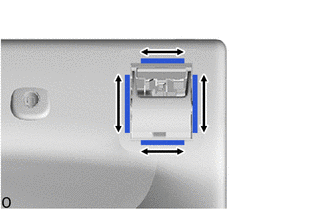
11. REMOVE REAR SEAT BACK LOCK DEVICE GARNISH (for LH side)
(a) Release the claws to remove the rear seat back lock control garnish. |
 |
(b) Release the hooks of the separate type rear seat back cover. |
 |
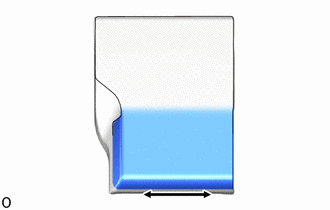
12. REMOVE LH REAR SEAT BACK PANEL SUB-ASSEMBLY (for LH side)
(a) Release the hook. |
 |
(b) Open the 2 fasteners as shown in the illustration. |
|
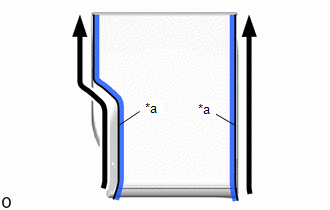
(c) Release the claws and guides to remove the LH rear seat back panel sub-assembly. |
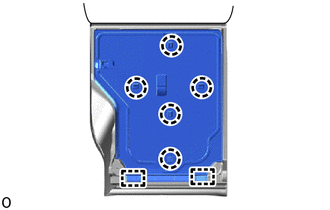 |
13. REMOVE REAR SEAT HEADREST SUPPORT (for LH side)
(a) without Occupant Classification System:
(1) Release the claws to remove the 2 rear seat headrest supports, as shown in the illustration.
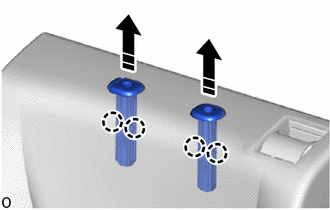
|
Remove in this direction |
(b) with Occupant Classification System:
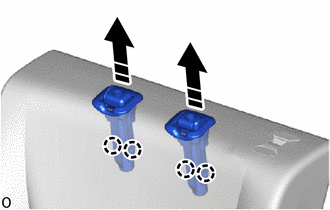
|
Remove in this direction |
(1) Release the claws to remove the 2 rear seat headrest supports, as shown in the illustration.
14. REMOVE SEPARATE TYPE REAR SEAT BACK COVER WITH PAD (for LH side)
(a) Remove the separate type rear seat back cover with pad from the LH rear seat back frame sub-assembly. |
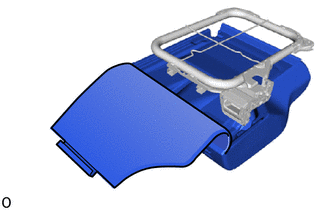 |
15. REMOVE SEPARATE TYPE REAR SEAT BACK COVER (for LH side)
(a) Using a screwdriver, release the claws to remove the separate type rear seat back cover from the LH separate type rear seat back pad, as shown in the illustration.
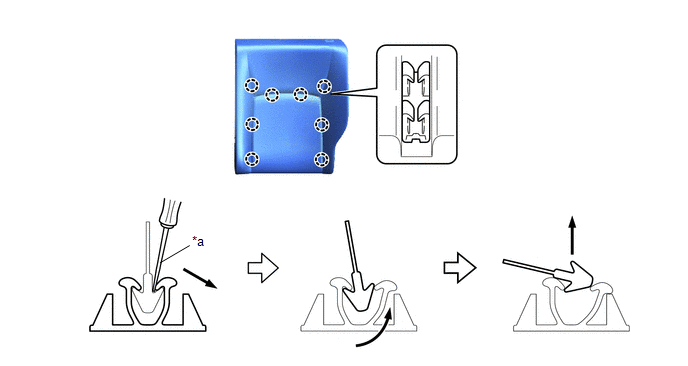
*a |
Screwdriver |
- |
- |
16. REMOVE LH REAR SEAT BACK LOCK ASSEMBLY (for LH side)
(a) Remove the 2 bolts. |
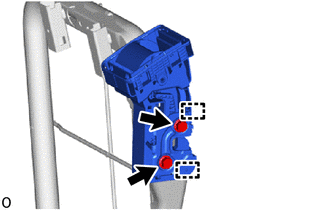 |
(b) Release the guides of the LH rear seat back lock assembly.
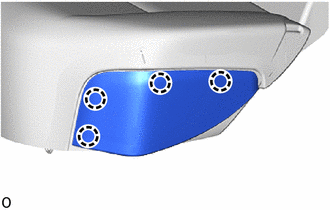
17. REMOVE LH REAR DOOR SILL PLATE (with occupant classification system)
(a) Release the claws to remove the LH rear door sill plate. |
 |
18. REMOVE RH REAR DOOR SILL PLATE (with occupant classification system)
HINT:
Repeat the same procedure for the right side and the left side.
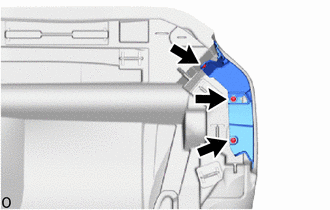
19. REMOVE REAR SEAT COVER GARNISH NO. 2 (with occupant classification system)
(a) Remove the 3 screws and the rear seat cover garnish No. 2. |
 |
20. REMOVE REAR SEAT COVER GARNISH NO. 1 (with occupant classification system)
HINT:
Perform the same procedure for the No. 1 seat cushion cover garnish and the No. 2 seat cushion cover garnish.
21. REMOVE REAR SEAT CUSHION COVER (BENCH TYPE)
(a) without Occupant Classification System:
(1) Release the hooks and the buckle fixing device.
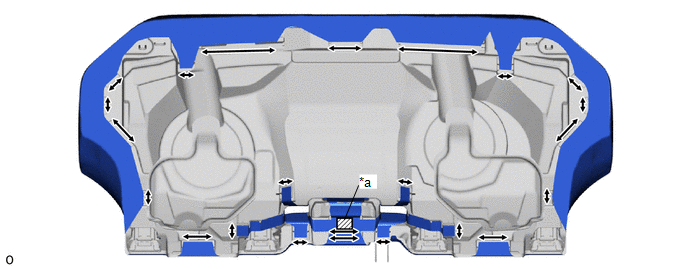
*a |
Buckle Fixing Device |
- |
- |
(b) with Occupant Classification System:
(1) Release the hooks and the buckle fixing device.
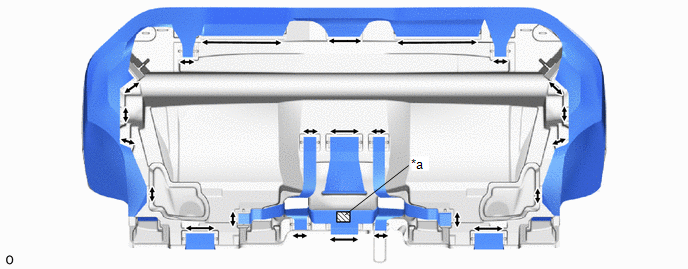
*a |
Buckle Fixing Device |
- |
- |
(c) Remove the rear seat cushion pad from the No. 1 rear seat cushion pad sub-assembly.
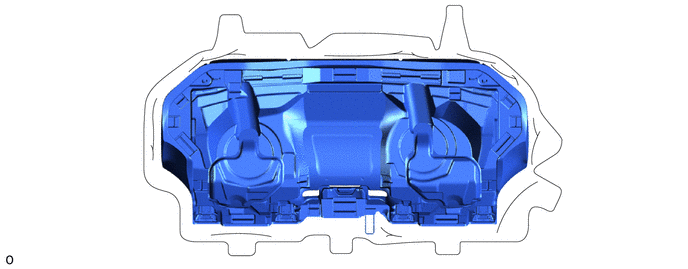
(d) Using a screwdriver, release the claws to remove the bench type rear seat cushion cover from the No. 1 rear seat cushion pad sub-assembly, as shown in the illustration.
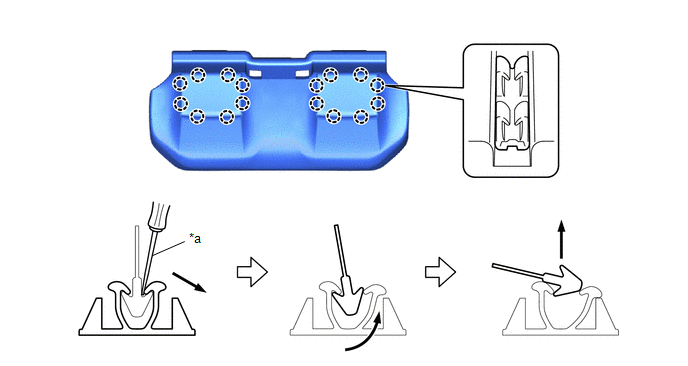
*a |
Screwdriver |
- |
- |