Removal
REMOVAL
PRECAUTION / NOTICE / HINT
The procedures required (adjustment, calibration, initialization or registration) that must be performed after the parts have been removed, installed or replaced during removal/installation of the rear door sill light switch are shown below.
Procedures Required After Replacement / Removal / Installation of PartsReplacement part or procedure | Required Procedure | Effect/Inoperative function when procedure not performed | Link |
|---|---|---|---|
Disconnect the cable from the negative (-) battery terminal. |
Initialize Back Door Lock |
Door Lock Control System |
 |
Memorize Steering Angle Neutral Point |
Lane Departure Alert System (with Steering Control) |
|
|
Pre-Collision System |
HINT:
- Use the same procedure for the right and left sides.
- The procedure described below applies to the left side.
PROCEDURE
1. REMOVE REAR SEAT ASSEMBLY
Click here
2. REMOVE REAR DOOR SCUFF PLATE (with rear seat side airbag)
Click here
3. REMOVE REAR DOOR SCUFF PLATE (without rear seat side airbag)
Click here
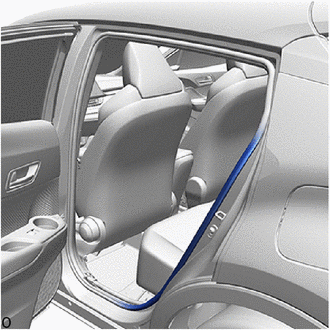
4. DISCONNECT REAR DOOR OPENING TRIM WEATHERSTRIP
(a) Disconnect the rear door opening trim weatherstrip from the area shown in the illustration. |
 |
5. REMOVE REAR SEAT BACK HINGE SUB-ASSEMBLY
Click here
6. REMOVE REAR PILLAR GARNISH (with rear seat side airbag)
Click here
7. REMOVE REAR SEAT SIDE GARNISH (with rear seat side airbag)
Click here
8. REMOVE REAR SEAT SIDE GARNISH (without rear seat side airbag)
Click here
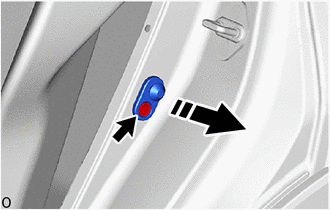
9. REMOVE REAR DOOR SILL LIGHT SWITCH ASSEMBLY
(a) Disconnect the connector.
(b) Using a TORX socket wrench T30, remove the bolt and the rear door sill light switch assembly.
 |
Remove in this direction |