Fuel Lid Opener Motor Assembly
Components
COMPONENTS
ILLUSTRATION
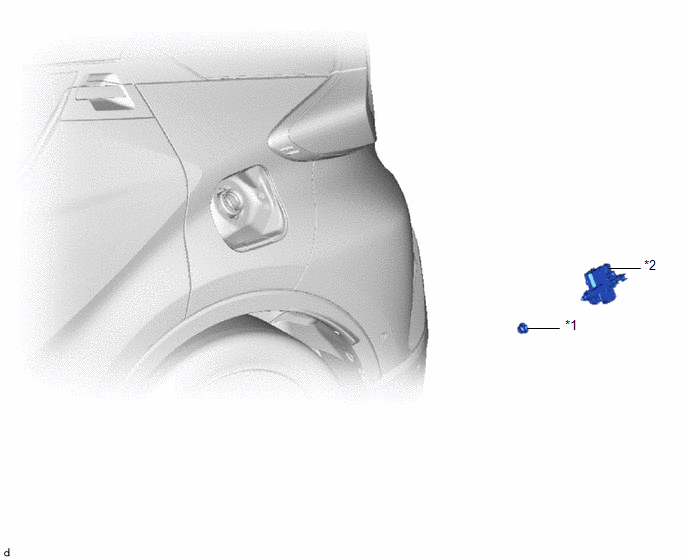
*1 |
FUEL LID LOCK RETAINER |
*2 |
FUEL LID LOCK ASSEMBLY WITH MOTOR |
Removal
REMOVAL
PROCEDURE
1. REMOVE LH LUGGAGE COMPARTMENT SIDE TRIM BOARD ASSEMBLY
Click here
2. REMOVE FUEL LID LOCK RETAINER
(a) Remove the fuel lid lock retainer as shown in the illustration.
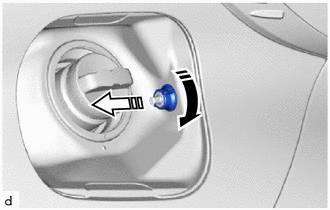
 |
Remove in this direction (1) |
 |
Remove in this direction (2) |
3. REMOVE FUEL LID LOCK ASSEMBLY WITH MOTOR
(a) Release the claws. |
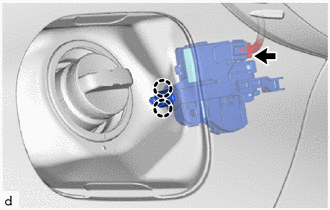 |
(b) Disconnect the connector to remove the fuel lid lock assembly with motor.
Inspection
INSPECTION
PROCEDURE
1. INSPECT FUEL LID LOCK ASSEMBLY WITH MOTOR
(a) Check the operation of the fuel lid lock assembly with motor (motor operation).
(1) Apply battery voltage to the fuel lid lock assembly with motor connector and measure the shaft stroke. OK:
If the result is not as specified, replace the fuel lid lock assembly with motor. |
|
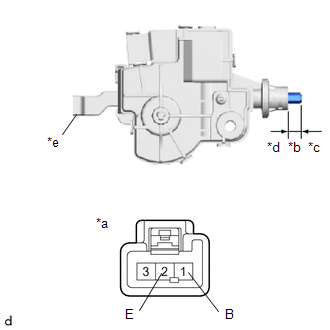
(b) Measure the shaft stroke.
OK:
Area | Condition | Specified Condition |
|---|---|---|
Shaft Stroke |
Lever Pulled |
16.05 mm (0.632 in.) |
If the result is not as specified, replace the fuel lid lock assembly with motor.
Installation
INSTALLATION
PROCEDURE
1. INSTALL FUEL LID LOCK ASSEMBLY WITH MOTOR
(a) Connect the connector. |
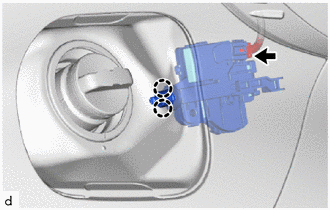 |
(b) Engage the claws to install the fuel lid lock assembly with motor.
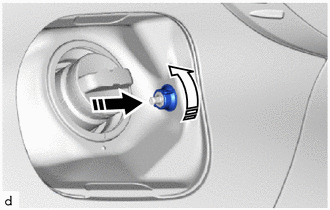
2. INSTALL FUEL LID LOCK RETAINER
(a) Install the fuel lid lock retainer as shown in the illustration.
 |
Install in this direction (1) |
 |
Install in this direction (2) |
3. INSTALL LEFT LUGGAGE COMPARTMENT SIDE GARNISH PANEL ASSEMBLY
Click here