Installation
INSTALLATION
PROCEDURE
1. INSTALL HOOD LOCK CONTROL CABLE ASSEMBLY
(a) Route the hood lock control cable assembly into the engine compartment.
(b) Engage the grommet.
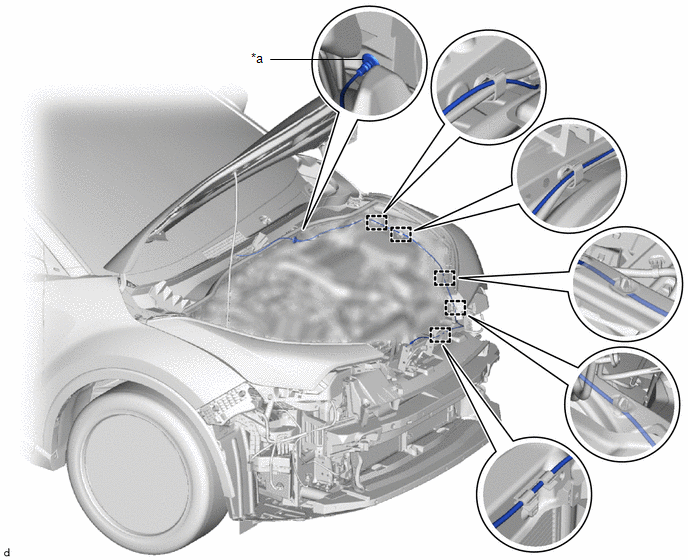
*a |
Grommet |
- |
- |
(c) Connect the hood lock control cable assembly to the clips.
2. INSTALL HOOD LOCK CONTROL LEVER SUB-ASSEMBLY
(a) Install the hood lock control lever sub-assembly to the hood lock control cable assembly.
3. INSTALL HOOD LOCK CONTROL CABLE BRACKET
(a) Engage the claw to install the hood lock control cable bracket as shown in the illustration.
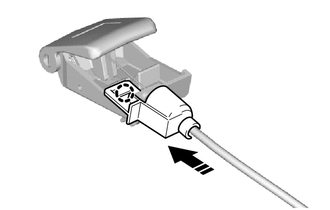
 |
Install in this direction |
4. RECONNECT HOOD LOCK CONTROL LEVER SUB-ASSEMBLY
Click here
5. INSTALL HOOD LOCK ASSEMBLY (without engine room courtesy light switch)
(a) Apply MP grease to the sliding parts of the hood lock assembly.
(b) Connect the hood lock control cable assembly to the hood lock assembly.
(c) Install the hood lock assembly with the 2 bolts and hood lock bolt.
Torque:
7.5 N·m {76 kgf·cm, 66 in·lbf}
6. INSTALL HOOD LOCK ASSEMBLY (with engine room courtesy light switch)
Click here
7. INSTALL HOOD LOCK NUT CAP
Click here
8. INSTALL RADIATOR SUPPORT SEAL NO. 1
Click here
9. INSTALL RADIATOR GRILLE RETAINER NO. 1
Click here
10. INSTALL FRONT FENDER LINER LH
(a) Install the front fender liner LH using the 7 clips and 2 screws.
11. INSTALL ROCKER PANEL MOULDING LH
Click here
12. INSTALL FRONT FENDER GARNISH SUB-ASSEMBLY
Click here
13. INSTALL FRONT BUMPER ASSEMBLY
Click here
14. INSTALL FRONT WHEEL
Click here
15. ADJUST HOOD SUB-ASSEMBLY
Click here