Installation
INSTALLATION
PROCEDURE
1. INSTALL NO. 2 BACK DOOR GARNISH RETAINER
(a) Engage the claws to install the No. 2 back door garnish retainer as shown in the illustration.
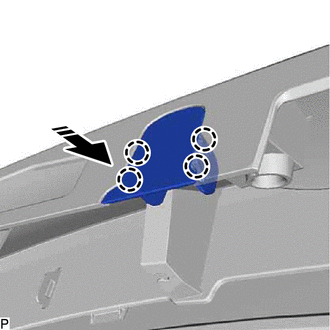
 |
Install in this direction |
2. INSTALL BACK DOOR OUTSIDE GARNISH SUB-ASSEMBLY
(a) Remove the protective sheet from the back door outside garnish seal.
(b) Engage the clips to install the back door outside garnish as shown in the illustration.
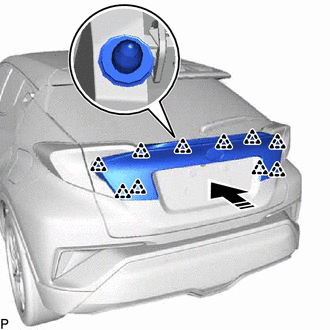
|
Install in this direction |
(c) Install the 4 bolts.
Torque:
4.9 N·m {50 kgf·cm, 43 in·lbf}
3. INSTALL BACK DOOR GARNISH PANEL ASSEMBLY
Click here
4. INSTALL LEFT BACK DOOR GARNISH SIDE
Click here
5. INSTALL RIGHT BACK DOOR GARNISH SIDE
HINT:
Perform the same procedure as for the left side.
6. INSTALL UPPER BACK DOOR GARNISH PANEL ASSEMBLY
Click here
7. INSTALL SILL GARNISH ASSEMBLY (with sill garnish)
Click here
8. INSTALL BACK PANEL GARNISH ASSEMBLY (with back panel garnish)
Click here