Precautions
PRECAUTION
HINT:
- The following procedures are used to prevent wrinkles from forming when installing the seat cover. Be sure to follow the procedures correctly.
- The shape of the seat shown in the illustration may differ from the actual seat.
SEAT COVER ASSEMBLY
(a) Align the center cutout of the pad with the V-point of the cover.
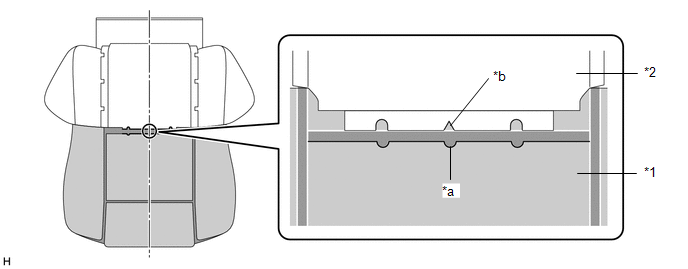
*1 |
Pad |
*2 |
Trim cover |
*a |
Pad center cutout |
*b |
Cover V-point |
CHECK COVER POSITION
(a) Fold back the cover as shown in the illustration, and make sure the cover V-points and the pad reference lines are almost aligned.
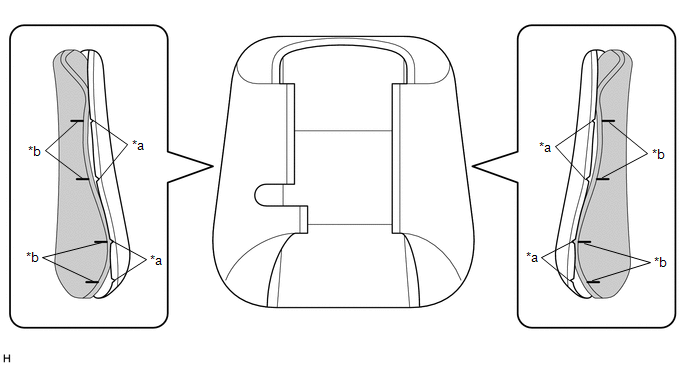
*a |
Cover V-point |
*b |
Pad reference line |
INSTALL TRIM COVER
(a) Align the seat back cover with the center of the seat back pad, and the seat cushion cover with the center of the seat cushion pad. Then, install the covers starting from the outside of the vehicle and working toward the inside.
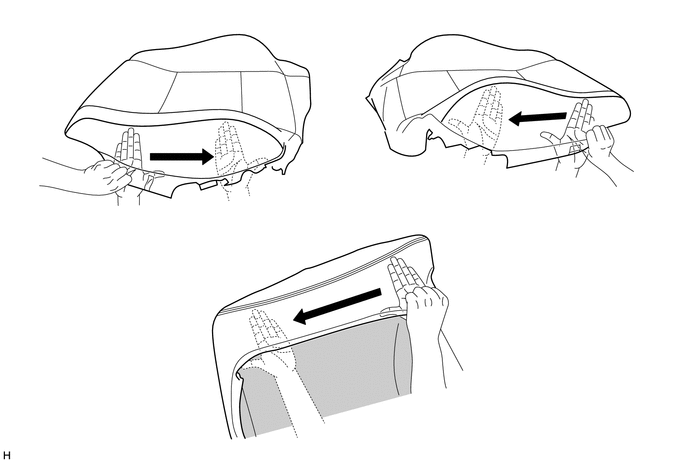
(b) While removing wrinkles by hand as shown in the illustration, install the seat back cover starting from the bottom and working up to shoulder level, then install the seat cushion cover starting from the front and working toward the rear.
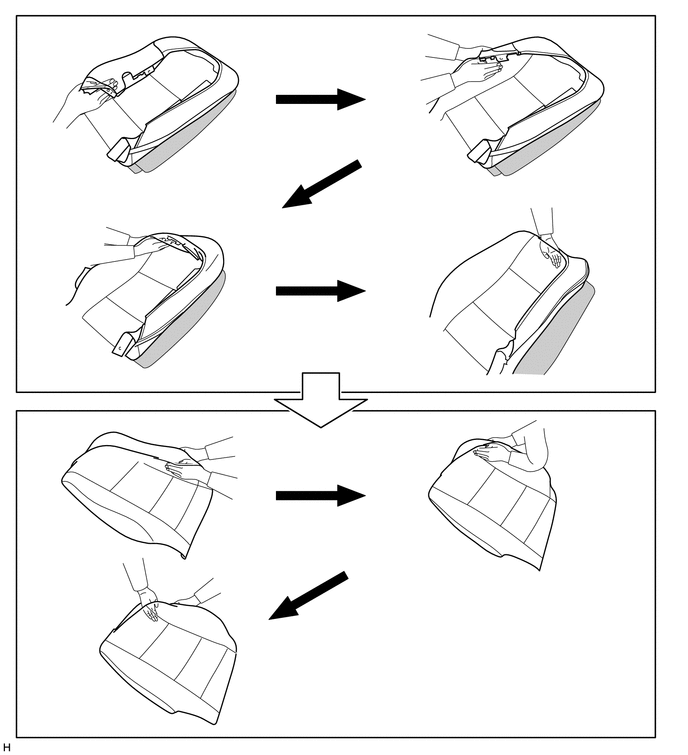
HINT:
- Be careful not to push the pad into the cover. Instead, secure the pad and install the cover over the pad.
- For the seat back side:
When installing the cover on the outer side, install the cover up to the outer headrest support installation area.
- Do not apply excessive force when covering the corners, as this may tear or fray the cover.
(c) Align the cover seam line with the edges of the pad.
HINT:
- Double-knit type:
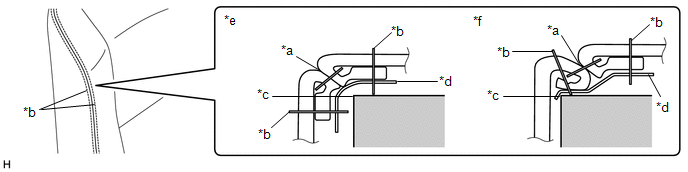
*a
Cover seam line
*b
Cover seam (stitching point)
*c
Pad edge
*d
Felt
*e
Correct
*f
Incorrect
- Single-knit type:
Align the excess seam in one direction.
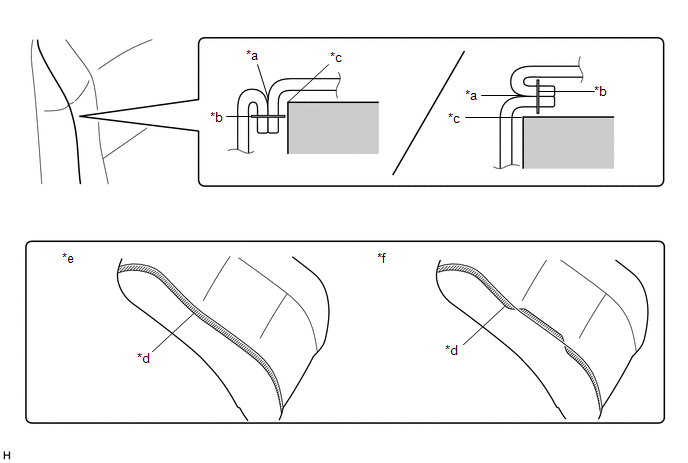
*a
Cover seam line
*b
Cover seam (stitching point)
*c
Pad edge
*d
Excess cover seam
*e
Correct
*f
Incorrect
(d) Push the excess cover seam properly into the groove of the pad.
HINT:
Be sure to push the excess seam fully into the groove. If any excess seam is outside the groove, wrinkles will form.
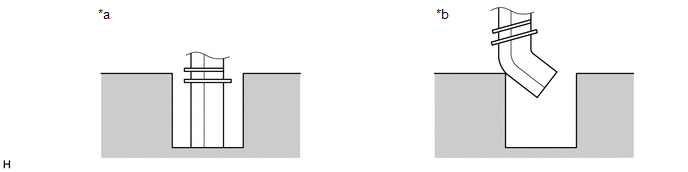
*a |
Correct |
*b |
Incorrect |
REMOVE WRINKLES
(a) After installing the cover with pad onto the seat frame, use your fingers to trace the seam line of each part and remove wrinkles.
NOTICE:
If there are wrinkles in the strap, they will appear on the surface of the cover.
*A |
with airbag |
- |
- |
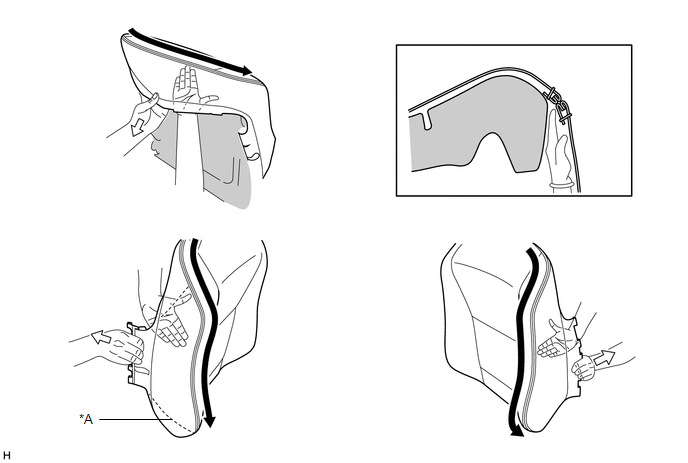
CHECKS TO PERFORM AFTER WORK IS COMPLETED
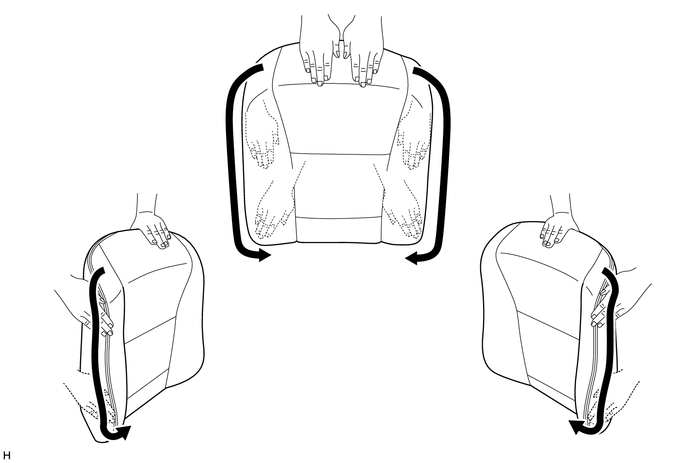
(a) Smooth out the cover as shown in the illustration, and make sure there are no wrinkles.
HINT:
- If wrinkles remain, the cover has most likely not been installed correctly.
- If wavy shapes appear on the seam line, the excess seam is most likely not in the groove or the felt is positioned incorrectly.