Adjustment
ADJUSTMENT
PRECAUTION / NOTICE / HINT
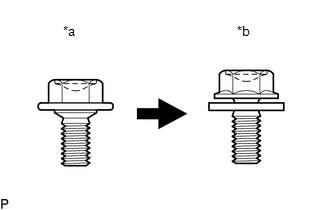
*a |
Centering Bolt |
*b |
Standard Bolt |
HINT:
- Centering bolts are used to install the hood hinges and the hood lock. The hood and its lock cannot be adjusted while the centering bolts are installed. Replace the centering bolts with standard bolts with washers when making adjustments.
- The specified torque for standard bolts is shown in the standard bolt table.
Click here

PROCEDURE
1. INSPECT HOOD SUB-ASSEMBLY
Click here
2. REMOVE FRONT BUMPER ASSEMBLY
Click here
3. ADJUST HOOD SUB-ASSEMBLY
(a) Adjust the hood horizontally and vertically.
(1) Loosen the 4 hood hinge bolts. |
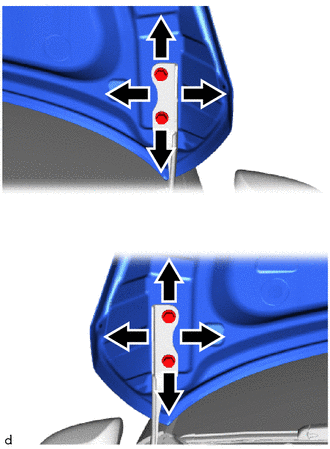 |
(2) Adjust the clearance between the hood and the front fenders by moving the hood.
(3) After adjustment, tighten the 4 hood hinge bolts.
Torque:
13 N·m {133 kgf·cm, 10 ft·lbf}
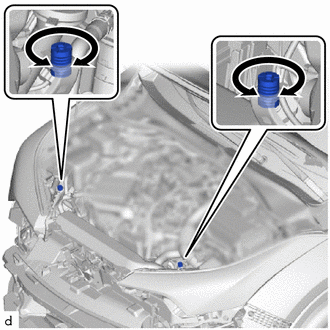
(b) Adjust the height of the front end of the hood using the hood stopper bushings. (1) Adjust the 2 hood stopper bushings so that the hood and fenders are aligned in height. HINT: Raise or lower the front end of the hood by turning the 2 hood stopper bushings. |
 |
(c) Adjust the hood lock.
(1) Using a screwdriver with its tip wrapped in protective tape, remove the hood lock nut cap. |
|
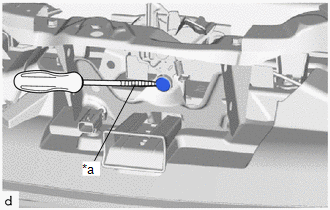
(2) Loosen the 2 hood lock bolts and the hood lock bolt. |
|
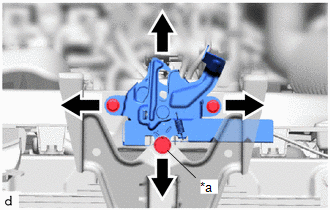
(3) Adjust the hood lock assembly, then tighten the 2 hood lock bolts and the hood lock bolt.
Torque:
7.5 N·m {76 kgf·cm, 66 in·lbf}
(4) Check that the striker engages freely in the hood lock assembly.
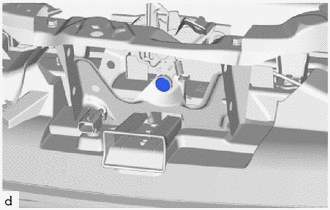
(5) Install a new hood lock nut cap. |
 |
4. INSTALL FRONT BUMPER ASSEMBLY
Click here